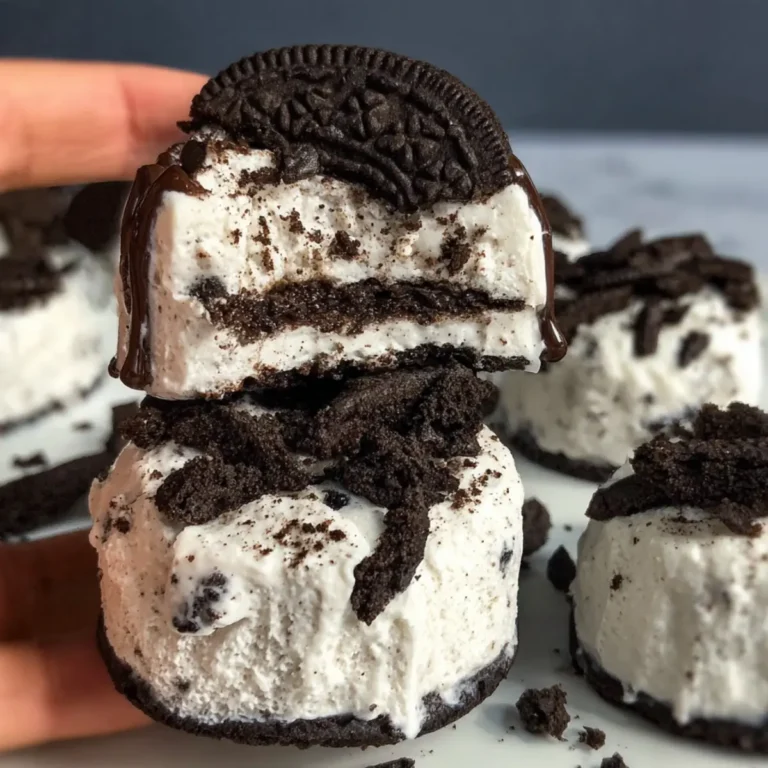
Every spring, when the days start stretching longer and the light glances across the kitchen just so, I find myself reaching for the mini cupcake pan, craving something bright and playful. These Easter No-Bake Mini Cheesecakes capture that whole fresh-season energy in one festive, creamy bite. There’s a kind of magic in desserts that require no oven at all—your kitchen stays cool, your hands stay busy, and the sweet reward arrives sooner than you’d think.
Kids swarm around, sticky-fingered and giggling, ready to scatter pastel sprinkles and nestle mini candies on the pillowy tops. Even adults—who really ought to know better—fight over who gets the one crowned with the biggest chocolate egg. The first bite is always a surprise: that buttery, sandy base underneath a cloud-light, tangy filling, topped with a bit of crunch and color. These little cheesecakes taste like a celebration, equal parts nostalgia and now.
Bring On the Easter Glow with Mini Cheesecakes
You know that unmistakable feeling when Easter sneaks up and the house is suddenly humming with family, treats, and bright little bursts of color? That’s exactly where these mini cheesecakes fit in—right alongside painted eggs and chocolate bunnies, as the edible centerpiece everyone gravitates toward. Every time I make a batch, they seem to vanish the moment I turn my back, each one a tiny, sweet excuse to stop and savor just a moment of spring.
There’s something about the ritual too: pressing the crust into tiny cups, whipping the cream until it stands tall, swirling the filling smooth. Kids can go wild with the toppings, and grownups marvel at how satisfying a single bite can be. Whether they show up after a holiday meal or as a spontaneous afternoon treat, these cheesecakes never fail to bring a fresh, playful glow to the table.
The Ingredients That Set These Cheesecakes Apart
- graham cracker crumbs – The sandy, honeyed base that’s earthy and sweet, forming the crisp backbone beneath all that luscious filling.
- Granulated sugar – Brings an extra edge of sweetness and sparkle to the crust.
- Unsalted butter (melted) – Binds the crumb base together, adding rich body and that signature golden taste.
- Cream cheese (softened) – The true star here—smooth, tangy, and creamy; let it come to room temp for the dreamiest texture.
- Powdered sugar – Blends right in for a silky, almost cloud-like filling, with no hint of graininess.
- Vanilla extract – Lifts the whole dessert, giving those subtle floral and caramel notes you notice with every forkful.
- Heavy whipping cream – Whipped to peaks, it turns the cheesecake base airy and light, breaking up the cream cheese’s heft.
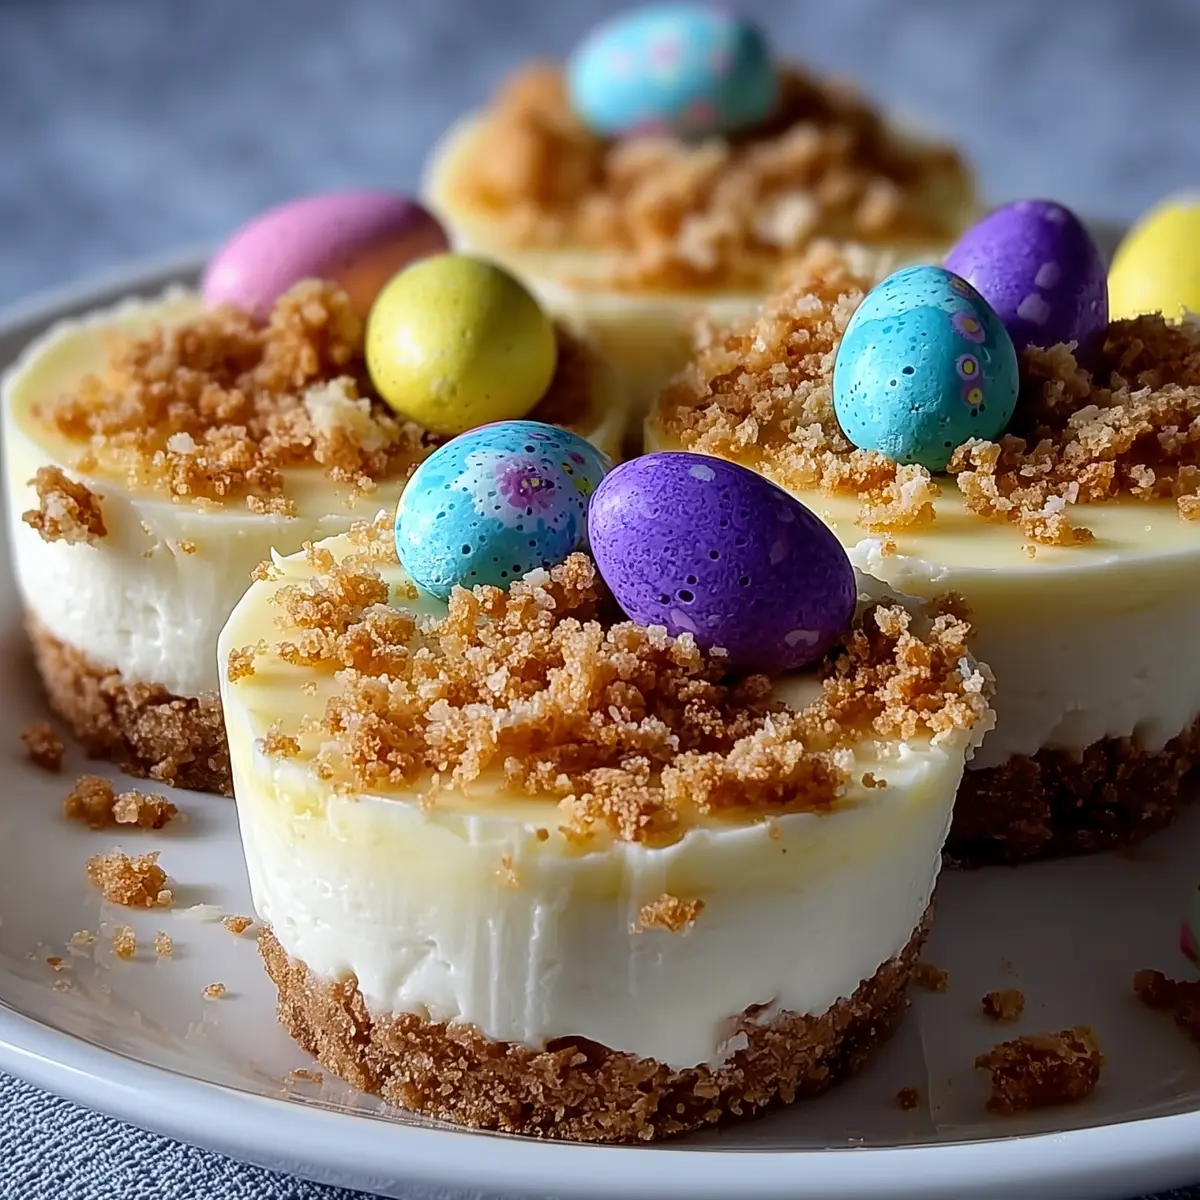
- Assorted Easter-themed sprinkles or mini candies – Pure fun; they add crunch, color, and a little whimsy—mini chocolate eggs, pastel jimmies, sugar pearls, or anything you love.
See the recipe card below for the full list of ingredients and measurements.
The Simple Steps to Cheesecake Bliss
- First comes the crust. Toss those graham cracker crumbs, granulated sugar, and melted butter together in a bowl until the mix feels like damp sand beneath your fingers. There’s a satisfying moment when it all just comes together—and if you sneak a taste, I won’t judge.
- Press that crumb blend firmly into mini cupcake liners (or silicone molds, if you want extra-easy unmolding). You want a sturdy base—don’t be shy about packing it down.
- It’s time for the filling. Beat softened cream cheese until it’s completely smooth, with no stubborn lumps. Then swirl in the powdered sugar and vanilla extract, letting everything become creamy and fragrant.
- In a separate bowl, whip the cold heavy cream until it stands up in glossy, firm peaks. The secret is to stop as soon as it holds shape—you’re aiming for lift, not butter.
- Gently fold the whipped cream into the cream cheese mixture. It’ll look a little marbled and airy at first, but keep going gently until you’ve got a single, pillowy blend. This is when the magic happens—suddenly, it’s cheesecake but lighter than you thought possible.
- Either spoon or pipe the filling onto the prepared crusts. Smooth the tops with the back of a spoon if you care about perfection—or leave them rustic if that’s more your style.
- Let them chill. Four hours tucked in the fridge transforms everything, turning loose mousse into sliceable, ready-to-eat cakes. They’ll feel firm but soft to the touch, a sign they’re ready for one last flourish.
- Finish strong with a cascade of Easter sprinkles, candies, or whatever your festive heart desires. Set them out and watch the colors pop back at you.
Texture, Flavor, and That First Festive Bite
It’s always the very first forkful that gets people: the way the crumb base yields with a gentle crunch, giving way to an impossibly light, almost mousse-like cheesecake layer. That cream cheese brings a tanginess that balances all the sugar, while whipped cream adds a gentle, airy bounce—nothing dense or chalky, just pure silk. The buttered crust brings a toastiness and warmth you notice even through the filling.
Then come the toppings: a little crackle from sugar pearls, the playful pop of a mini egg, a rainbow of color swirling together in every mouthful. These bite-sized gems feel nostalgic but marvelously fresh—tiny portions you can savor or inhale in a blink, depending on your mood.
Small Tweaks for Perfect No-Bake Cheesecakes
There’s a kind of low-stress joy in a dessert that’s this forgiving, but a few tricks make all the difference. Always use full-fat cream cheese—reduced-fat varieties can turn runny and just won’t hold up after chilling. Let your cream cheese soften fully at room temperature for the smoothest, lump-free filling. When whipping cream, keep your bowl and beaters cold for the loftiest peaks. Fold the whipped cream in gently, or you’ll lose that precious airiness.
If you’re out of graham crackers, digestive biscuits or even Biscoff cookies can stand in, each bringing their own twist. No mini cupcake pan? Standard muffin tins work too, though the portions will be a bit bolder. For egg-free fun, jelly beans or dried fruit make great topping swaps.
And about time—don’t skimp on the chill. The full set transforms these from dreamy mousse to sliceable cheesecake. If you must rush, pop them in the freezer for half an hour after their fridge stint for a slightly firmer texture (though it’ll be colder and a touch denser).
Leftovers—if any survive—keep beautifully in a covered container in the fridge for a couple of days, though the toppings may soften a bit. I’ve never managed to freeze a batch before they disappear, but they do hold up for a few weeks tightly wrapped.
Serving Them Up for Spring Celebrations
Picture these Easter No-Bake Mini Cheesecakes as the stars of your spring table—bold, pastel-topped, and perfectly portioned. Serve them piled high on a cake stand with extra candies on the side, or wrap them up in pretty boxes as edible gifts for friends and neighbors. They fit right in as the light finale after brunch or as sweet finger food for a breezy garden party.
Pair with fresh strawberries or a spoonful of tangy berry compote for an extra punch of spring flavor. They also work as a quick grab-and-go pick-me-up in the afternoon, or a midnight treat stolen straight from the fridge when quiet settles over the house. However you serve them, they tell a story of color, celebration, and just the right bit of indulgence.
FAQs about Easter No-Bake Mini Cheesecakes
Can I make Easter No-Bake Mini Cheesecakes ahead of time?
Absolutely—you can prepare these cheesecakes a day or two ahead and keep them chilled in the fridge until you’re ready to serve. Just wait to add the decorative toppings until right before serving for the freshest look and crunch.
What substitutions work well for the graham cracker crust?
If you’re out of graham crackers, digestive biscuits, vanilla wafers, or even crushed Biscoff cookies make excellent alternatives for the crust. Just pulse them up the same way and mix with sugar and melted butter for a tasty spin.
Will Easter No-Bake Mini Cheesecakes freeze well?
They’ll hold up in the freezer if you need to store them longer—wrap each un-topped cheesecake tightly or store in an airtight container, and freeze for up to a month. Defrost overnight in the fridge before serving, and add fresh decorations just before eating.
How long will these mini cheesecakes stay fresh in the fridge?
Stored in a covered container, your mini cheesecakes should stay creamy and delicious for up to three days in the refrigerator. Sprinkles or candy toppings may start to lose their crunch after a while, so garnish right before serving when possible.
There’s a comfort in knowing a batch of Easter No-Bake Mini Cheesecakes can bring out the sparkle in even the ordinary spring days. Every bite brings a little sunshine—a creamy tang, a hint of buttery crunch, and the surprise of whatever colorful topping you choose. Whether they’re dressed up for a holiday or ready for an afternoon snack attack, there’s always something joyful about them. When you make these, just know you’re handing out fragments of celebration, one cheerful, creamy, bite-sized cake at a time.
More Delicious Recipes
- Easter Egg Fruit Pizza: This vibrant dessert is perfect for spring celebrations, featuring colorful fruits that echo the festive theme of your mini cheesecakes.
- Strawberry Cheesecake Ice Cream: A creamy, no-churn frozen treat that combines the flavors of cheesecake with fresh strawberries, ideal for a warm day.
- Loaded Leprechaun Popcorn: This fun, colorful snack features festive elements similar to the toppings on your mini cheesecakes, perfect for entertaining during celebrations.
Easter No-Bake Mini Cheesecakes
Ingredients
Equipment
Method
- In a medium bowl, combine graham cracker crumbs, sugar, and melted butter. Mix until well combined.
- Press the crumb mixture firmly into the bottom of mini cupcake liners or silicone molds to form the crust.
- In a large bowl, beat the softened cream cheese until smooth.
- Add powdered sugar and vanilla extract to the cream cheese and continue beating until creamy.
- In a separate bowl, whip the heavy cream until stiff peaks form.
- Gently fold the whipped cream into the cream cheese mixture until fully incorporated.
- Pipe or spoon the cheesecake filling over the crust in each mini liner, smoothing the tops.
- Refrigerate the mini cheesecakes for at least 4 hours or until set.
- Before serving, decorate the cheesecakes with Easter sprinkles or mini candies.