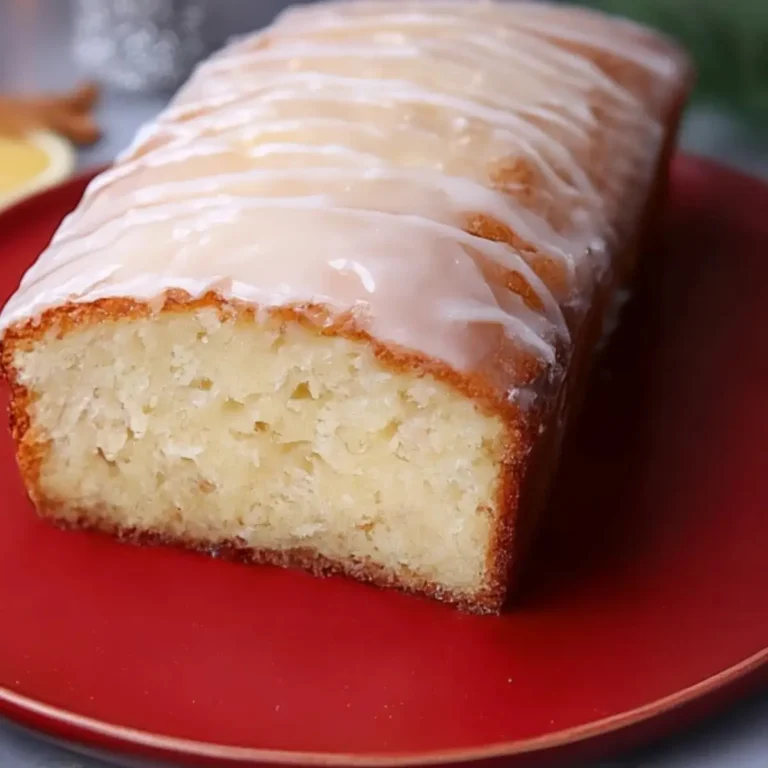
I still remember the first time I tried to make cheesy garlic bread without an oven. It was a rainy evening, power was out, and the craving hit hard. We had leftover flour, some shredded cheese, and a dusty old pressure cooker I’d barely used. What came out of that little experiment was unexpectedly golden, garlicky, and perfectly indulgent. That quick improvisation turned into one of my most repeated comfort recipes — and I’m sharing it with you today.
This recipe brings you that classic Dominos-style flavor — buttery garlic, soft and stretchy cheese, herbed crust — with one big twist: no oven needed. Whether you’re short on equipment or just want something cozy and fast, this cheesy garlic bread will become a staple in your kitchen.
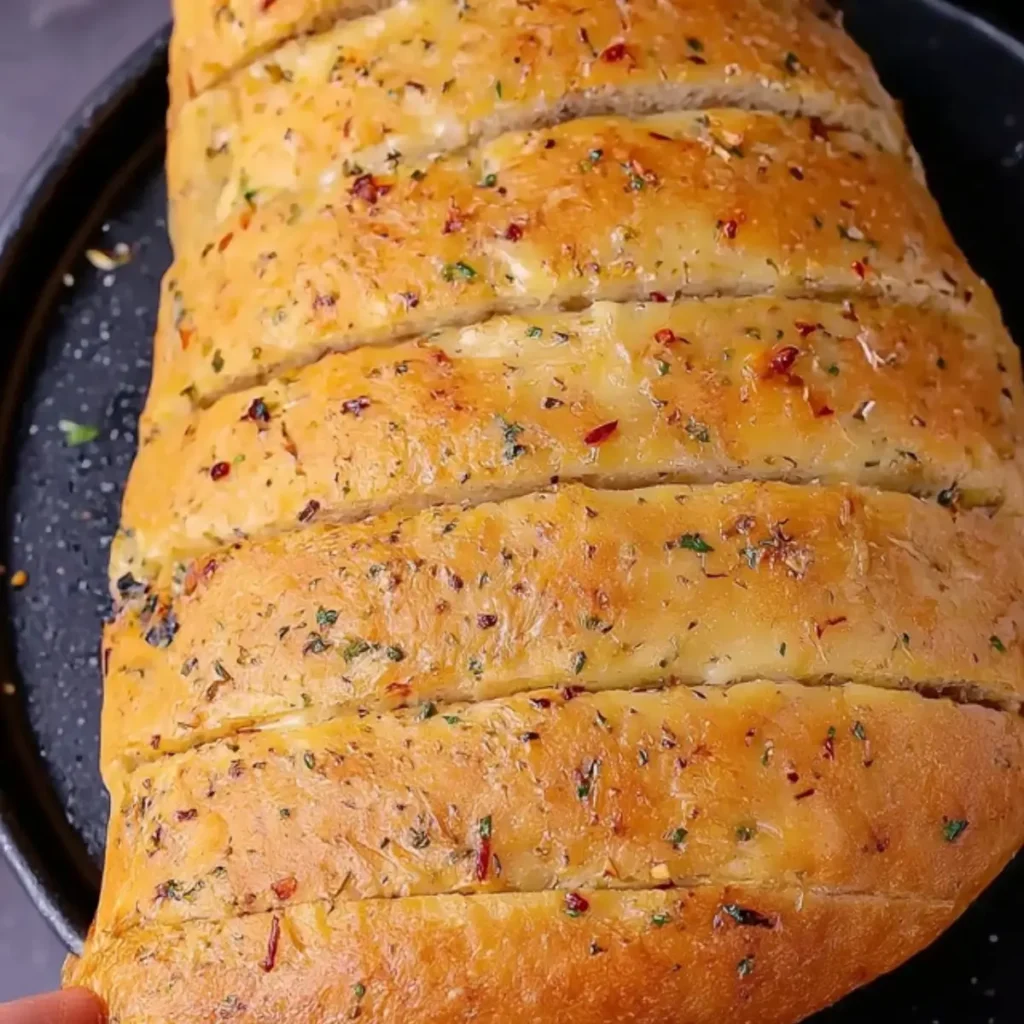
Table of Contents
Recipe Overview & Why You’ll Love It
This cheesy garlic bread has everything you love: a soft, fluffy interior, a rich garlic butter glaze, and a melty cheese center. It’s baked right on your stovetop using a pressure cooker — no fancy oven required. That means it’s incredibly accessible, even if you’re cooking in a dorm room, small apartment, or anywhere off-grid.
The flavor is bold and comforting: warm garlic meets creamy cheese with a touch of heat from red pepper flakes. It’s versatile enough to serve as a snack, appetizer, or side dish for pasta night. And since you’re making the dough from scratch, you get full control over ingredients and customization.
Ingredients & Substitutions
Making your own cheesy garlic bread means using simple ingredients that come together with big flavor. Here’s what you’ll need.
For the Dough
- 1 cup warm water (around 110°F / 43°C)
- 2 tsp sugar
- 1 tsp instant dry yeast (or 2 tsp baking powder if yeast is unavailable — note texture will differ)
- 2 cups maida (all-purpose flour)
- 2 tbsp milk powder (omit for dairy-free, or sub with soy milk powder)
- 1 tsp crushed garlic
- 1 tsp mixed dried herbs (or ½ tsp oregano + ½ tsp thyme)
- ½ tsp salt
- 2 tbsp neutral oil (like sunflower or light olive oil)
For the Garlic Butter
- 4 tbsp softened butter (plant-based butter or olive oil for vegan option)
- 1 tsp crushed garlic
- ½ tsp mixed herbs
- ½ tsp red chilli flakes
For the Filling
- Shredded mozzarella cheese (or a mix of mozzarella, cheddar, and parmesan)
- 2–3 tbsp sweet corn
- Extra chilli flakes for heat (optional)
Equipment You’ll Need
You don’t need an oven or stand mixer to make this cheesy garlic bread. These are the essentials:
- Large mixing bowl
- Rolling pin or your hands
- Sharp knife (for scoring)
- Brush or spoon for garlic butter
- Pressure cooker (without whistle) or thick-bottomed deep pan with lid
- Heat-safe plate or base to fit inside the cooker
Optional: Oven or OTG preheated to 180°C/350°F for 15–20 minutes if not using a pressure cooker.
Step-by-Step Instructions
This recipe is straightforward, with hands-on time of about 15 minutes and a total turnaround of under 3 hours, including proofing. Here’s how to make it.
Step 1 – Activate the Yeast
In a large bowl, mix 1 cup warm water, 2 tsp sugar, and 1 tsp instant dry yeast. Let it sit for 10 minutes until frothy. This means the yeast is active and ready.
Step 2 – Make the Dough
Add 2 cups maida, 2 tbsp milk powder, 1 tsp garlic, 1 tsp herbs, ½ tsp salt, and 2 tbsp oil to the activated mixture. Mix and knead until smooth and soft. Add extra water 1 tbsp at a time if the dough feels dry. Cover with a damp cloth and let it rest in a warm spot for 2 hours, or until doubled.
Step 3 – Make the Garlic Butter
In a small bowl, combine 4 tbsp softened butter with 1 tsp garlic, ½ tsp herbs, and ½ tsp chilli flakes. Mix until fully incorporated.
Step 4 – Shape and Fill the Bread
Once the dough has risen, punch it down gently. Take a ball-sized portion and roll it flat to about ½-inch thickness, fitting your cooker base. Spread garlic butter generously over the surface. Sprinkle a generous layer of cheese, corn, and extra chilli flakes on one half. Fold it over into a semi-circle and press the edges to seal.
Step 5 – Score and Finish
Using a knife, score the top in thick strip patterns (do not cut all the way through). Spread more garlic butter on top, making sure to get into the grooves.
Step 6 – Cook in Pressure Cooker
Preheat your pressure cooker on medium flame for 10 minutes without the whistle. Place a stand or ring at the bottom and carefully set your dough (on a greased plate) inside. Cover and cook on medium heat for 20–25 minutes. You’ll know it’s done when the base is crisp and golden and the top feels set.
Step 7 – Serve Hot
Brush with any remaining garlic butter and slice along the scored lines. Serve immediately while the cheese is still gooey.
Why This Recipe Works
What makes this cheesy garlic bread special is the combination of home-kneaded dough and stovetop cooking. The yeast-based dough results in a tender interior and bakery-style flavor. Milk powder adds softness, while the garlic and herbs are built into the dough for more flavor in every bite.
Using a pressure cooker mimics the even heat of a baking oven, creating steam that keeps the bread moist while still forming a crust. The preheating step is key — it allows the bread to cook evenly and prevents soggy bottoms.
By sealing the bread like a calzone, you trap the cheese inside for that satisfying melt without leaks.
Pro Tips & Variations
- Use a mix of cheeses for better flavor: mozzarella for stretch, cheddar for body, and parmesan for sharpness.
- Add fresh parsley or chopped cilantro to your garlic butter for color and freshness.
- Want a thinner crust? Roll the dough a bit more and reduce cooking time by 3–4 minutes.
- Make mini versions for parties — just divide the dough into smaller rounds and adjust cooking time to 12–15 minutes.
- For spice lovers, add a few jalapeño slices or a pinch of smoked paprika to the filling.
Make-Ahead, Storage & Freezing
This cheesy garlic bread is freezer- and prep-friendly.
- Make-ahead: Prepare the dough and refrigerate overnight. Let it come to room temperature before shaping.
- Storage: Leftovers keep well in an airtight container in the fridge for up to 2 days.
- Reheating: Warm in a skillet over low heat, covered, or microwave in 30-second bursts.
- Freezing: Bake, cool, and freeze in foil. Reheat directly from frozen in a pan or oven.
Serving Suggestions & Pairings
This cheesy garlic bread is delicious on its own, but it also pairs beautifully with:
- Tomato basil soup or creamy mushroom soup
- Pasta dishes like penne arrabbiata or white sauce spaghetti
- Crisp green salads with tangy vinaigrettes
- Light sparkling beverages or cold buttermilk for balance
- Garnish with grated parmesan or fresh herbs for a restaurant-style finish
Dietary Notes & Allergen Considerations
- Gluten: Contains wheat flour. Substitute with a gluten-free blend, though texture will vary.
- Dairy: Contains butter, cheese, and milk powder. Use vegan substitutes for all.
- Nut-free as written.
- Egg-free naturally — no eggs are used in the dough or filling.
Troubleshooting & Common Mistakes
- Flat bread? → Yeast may have been inactive. Check that it foams when proofed.
- Burnt base? → Heat was too high. Use a diffuser or cook on low-medium flame.
- Dry texture? → Overcooked. Shorten time and monitor after 18 minutes.
- Leaking cheese? → Edges weren’t sealed well enough. Press firmly to close.
- Uneven bake? → Didn’t preheat cooker. Always give it a 10-minute head start.
Nutritional Information (per serving; estimated)
- Serving Size: 1 bread
- Calories: 419
- Sugar: 4g
- Sodium: 403mg
- Fat: 20g
- Saturated Fat: 8g
- Unsaturated Fat: 11g
- Trans Fat: 0.5g
- Carbohydrates: 52g
- Fiber: 2g
- Protein: 8g
- Cholesterol: 34mg
FAQs
Can I double this cheesy garlic bread recipe?
Yes. Simply double all ingredients and bake in batches or freeze extra dough for later use.
What’s the best cheese combo for cheesy garlic bread?
Mozzarella is essential for melt, but combining it with cheddar or parmesan adds deeper flavor and richness.
Can I bake cheesy garlic bread in an oven instead of a cooker?
Absolutely. Preheat your oven to 180°C (350°F) and bake for 15–20 minutes, or until golden and cooked through.
How long does cheesy garlic bread stay fresh?
Best eaten fresh, but it can be refrigerated for up to 2 days and reheated gently before serving.
Can I make cheesy garlic bread without yeast?
Yes, you can substitute yeast with 2 tsp baking powder. The result will be less airy and more biscuit-like, but still delicious.
Conclusion
Few things bring comfort like homemade cheesy garlic bread — especially when you’ve made the dough with your own hands and skipped the oven entirely. Whether you’re cooking for family, entertaining friends, or just craving something warm and satisfying, this recipe meets the moment.
It’s forgiving, customizable, and impressively flavorful. So the next time you’re out of oven access (or just don’t feel like using it), pull out your pressure cooker and give this a try. You might just discover a new staple in your kitchen.
More Tasty Ideas
- Cheesy Parmesan Mozzarella Bites: These golden, gooey bites deliver a double-cheese punch with melted mozzarella and a crisp parmesan crust. Perfect as a side or standalone snack, they echo the rich, cheesy essence of garlic bread in a poppable form.
- Easy Pizza Bread Parcel: This quick-to-make bread parcel wraps classic pizza flavors — cheese, herbs, and sauce — inside a golden dough. A satisfying snack or appetizer, it shares the same warm, bakery-style base and comforting bite as cheesy garlic bread.
- Halloween Breadstick Bones: Fun and festive, these garlicky breadsticks offer the same soft interior and crisp edges as garlic bread. Serve with marinara or cheese dip for a spooky spin on a familiar favorite.
The Ultimate Cheesy Garlic Bread Guide

This cheesy garlic bread is a soft, flavorful Dominos-style appetizer made entirely without an oven. It’s stuffed with cheese and sweet corn, slathered in garlic butter, and cooked to golden perfection in a pressure cooker.
- Prep Time: 10 minutes
- Cook Time: 30 minutes
- Total Time: 40 minutes
- Yield: 4 bread
- Category: Bread
- Method: Pressure Cooker
- Cuisine: Indian
- Diet: Vegetarian
Ingredients
- 1 cup warm water
- 2 tsp sugar
- 1 tsp instant dry yeast
- 2 cups maida (all-purpose flour)
- 2 tbsp milk powder
- 1 tsp crushed garlic
- 1 tsp mixed herbs
- 1/2 tsp salt
- 2 tbsp oil
- 4 tbsp softened butter
- 1 tsp crushed garlic (for garlic butter)
- 1/2 tsp mixed herbs (for garlic butter)
- 1/2 tsp red chilli flakes
- Cheese (as needed, for stuffing)
- Sweet corn (as needed, for stuffing)
- Extra chilli flakes (optional, for stuffing)
Instructions
- In a large bowl, mix 1 cup warm water, 2 tsp sugar, and 1 tsp instant dry yeast. Let it activate for 10 minutes.
- Add 2 cups maida, 2 tbsp milk powder, 1 tsp garlic, 1 tsp mixed herbs, 1/2 tsp salt, and 2 tbsp oil. Mix and knead into a smooth dough.
- Cover and rest the dough for 2 hours until it doubles in size.
- In a separate bowl, mix 4 tbsp softened butter with 1 tsp garlic, 1/2 tsp herbs, and 1/2 tsp chilli flakes to make garlic butter.
- Punch the risen dough and knead slightly. Pinch a ball-sized portion and flatten it to fit the base of your cooker.
- Spread garlic butter generously on the dough. Add cheese, sweet corn, and extra chilli flakes.
- Fold the dough in half and seal the edges. Score the top into strips using a knife. Spread more garlic butter on top.
- Preheat a pressure cooker without the whistle for 10 minutes.
- Place the shaped bread on a greased plate or rack inside the cooker. Cover and cook on medium heat for 25 minutes.
- Brush with remaining garlic butter and serve hot.
Notes
- For extra softness, ensure the dough is well-kneaded and fully proofed.
- You can use a mix of cheeses like mozzarella, cheddar, and parmesan.
- This recipe can be baked in a preheated oven at 180°C for 20 minutes.
- Sweet corn can be swapped for olives or bell peppers.
- Use plant-based butter and vegan cheese for a vegan version.