The first sign that holiday baking season has landed in my kitchen is the unmistakable scent of butter, brown sugar, and pastry drifting from the oven. There’s a magic to that aroma—cozy, nostalgic, and irresistible. Classic Canadian Butter Tarts with Raisins are the dessert I reach for when I want to channel homey comfort and old-fashioned sweetness in every bite. Each tart is a balance of flaky pastry and gooey filling that’s just set at the edges but still soft and luscious in the center. There’s no corn syrup in this version—just a rich brown sugar base, warm vanilla, plump raisins, and buttery richness that pulls you straight into a wintry afternoon. Serve these with coffee, tuck them into a lunchbox, or enjoy them as a homemade gift—they always disappear in a flash.
What Makes These Classic Canadian Butter Tarts with Raisins So Utterly Tempting
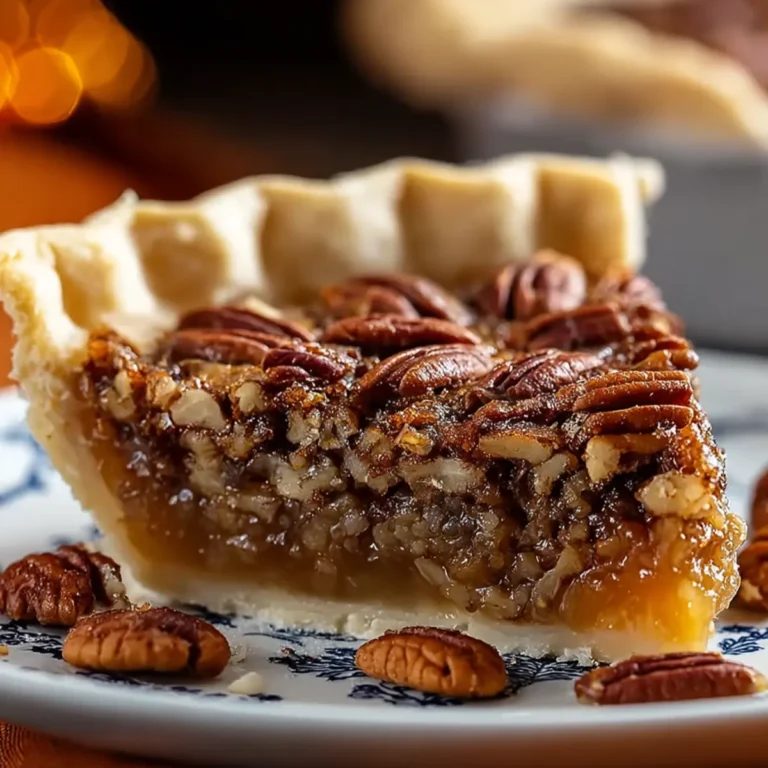
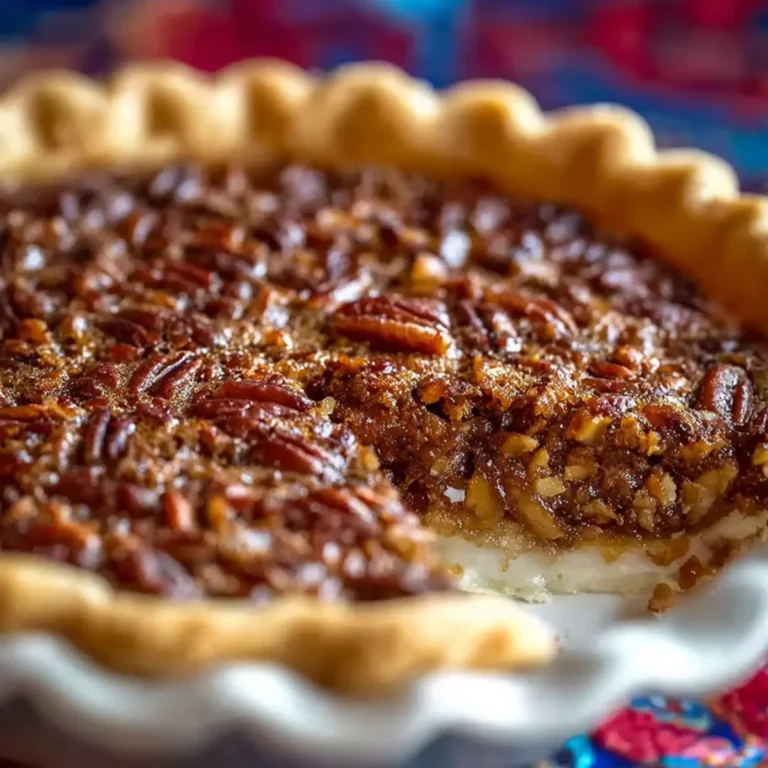
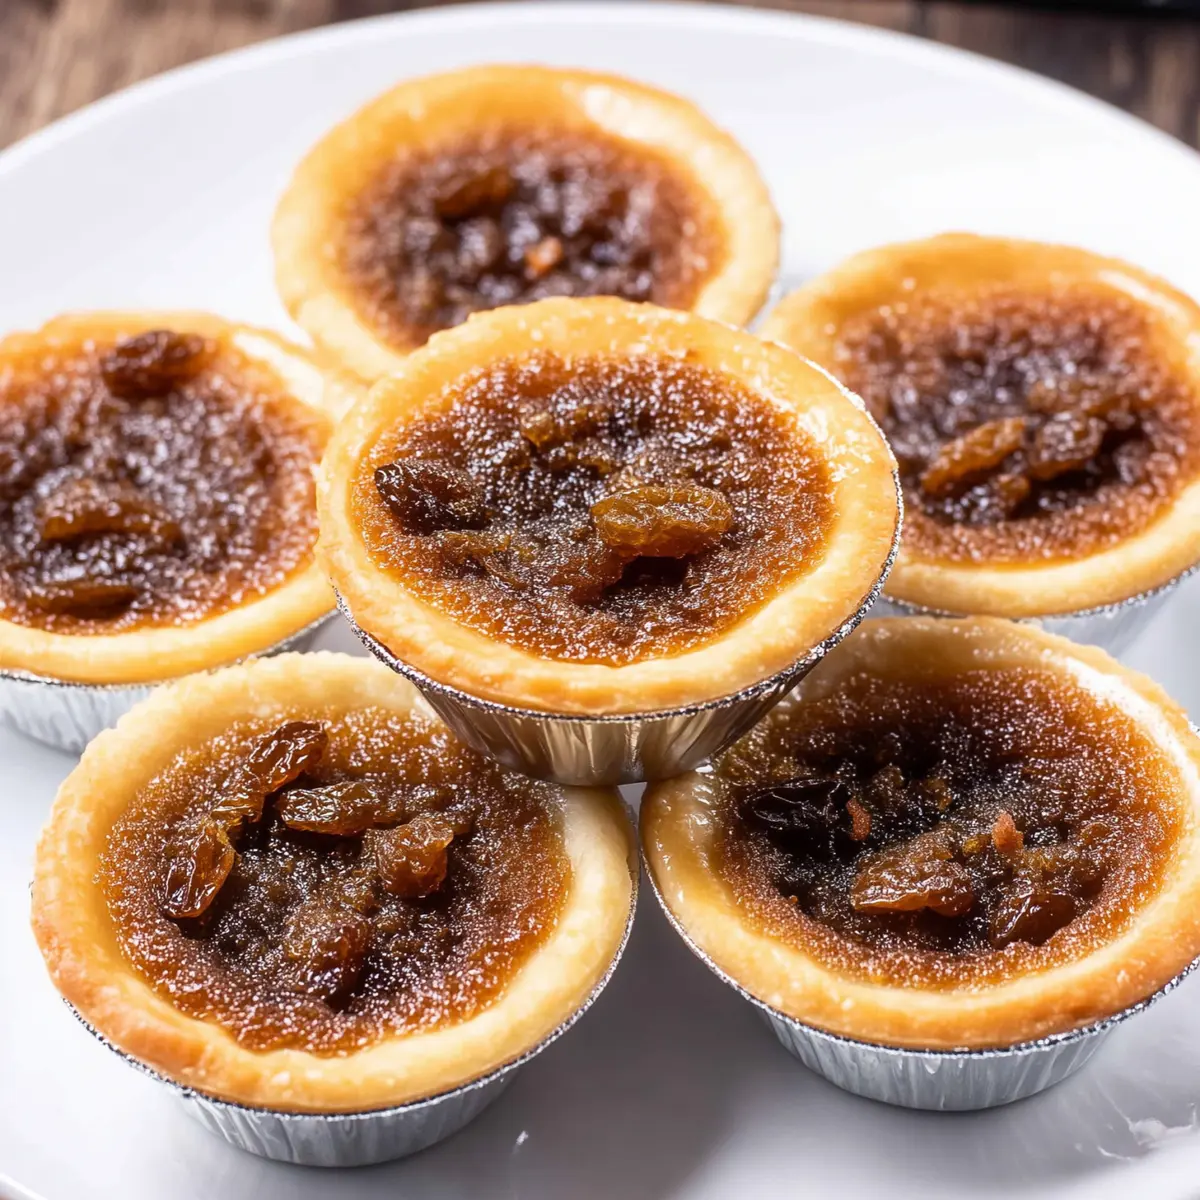
There’s something about classic Canadian butter tarts with raisins that’s pure comfort on a plate. It’s that contrast between the crisp, golden pastry shell and the gooey, glossy brown sugar filling dotted with sweet, juicy raisins. If you’ve never sunk your teeth into one of these, picture the pastry shattering gently under your fork, then a pool of luscious, buttery filling that’s just set enough to hold shape but still slightly molten inside. The raisins add a subtle chew and introduce a burst of subtle fruitiness—a little nod to tradition that makes every tart feel homemade. For me, these butter tarts are the taste of wintry afternoons and family gatherings, whether served warm beside a mug of tea or tucked into a cookie tin alongside other holiday favorites.
The Essential Ingredients in Classic Canadian Butter Tarts with Raisins
Cozy flavor starts with simple ingredients, and each one pulls its weight in creating that signature butter tart experience:
- Frozen tart shells – Unsweetened and ready to use, these let you focus on the filling (but you can absolutely roll your own pastry if you want a rustic touch).
- brown sugar – For that deep caramel sweetness and the gooey, glossy texture you recognize after one bite.
- Unsalted butter – Lends rich depth and makes the filling silky-smooth.
- Heavy cream (or half-and-half, or milk) – Adds a creamy finish and keeps the filling soft at the center.
- Large egg (room temperature) – Binds everything together and helps the filling bake up just set, never dry.
- Vanilla extract – Rounds out every bite with classic bakery warmth.
- Raisins – Plump bursts of fruity chewiness, the classic addition that signals you’re eating a real Canadian butter tart.
See the recipe card below for the full list of ingredients and measurements.
Bringing These Butter Tarts Together Step by Step
No stand mixer, fancy gadgets, or even corn syrup needed—just a few bowls, a saucepan, and an oven. Here’s how to bring these classic Canadian butter tarts with raisins to life:
- Start by preheating your oven and arranging your tart shells on a baking sheet. No need to thaw—the shells go in straight from the freezer.
- In a saucepan over gentle heat, melt the butter just until liquid. Stay close and watch that it doesn’t brown—you want pure, nutty aroma, not toastiness.
- Take the pan off the heat and stir in the brown sugar. Work it in with a spoon until the mixture is smooth and lump-free, then blend in your cream and vanilla extract. It’ll look thick and glossy at this point.
- Patience here pays off: let the butter-sugar mixture rest for five minutes. While it cools, beat your egg lightly in a separate bowl.
- Pour the beaten egg into the butter mixture in a slow, steady stream, whisking constantly so it blends in smoothly and doesn’t scramble. Gently stir in the raisins to distribute them evenly.
- Spoon the filling into the tart shells, filling each about three-quarters full. That’s the sweet spot for getting a gooey center without boiling over in the oven.
- Bake until the pastry turns golden and the filling is bubbling like warm caramel—keep an eye out those last few minutes, as they can go from perfect to overdone quickly.
- Once baked, transfer each tart gently to a wire rack. Let them cool completely—the filling will continue to set as it cools but should always be a little soft in the middle.
The Secret to Getting the Perfect Gooey Filling
A true butter tart aficionado knows the quest: that soft-set center, never dry, never runny enough to flood your fingers—just a luxurious, gooey middle. The magic comes down to letting the sugar-butter-cream mixture cool enough so the egg integrates smoothly, creating a custard that sets gently in the oven. Always whisk the egg in gradually, and never rush the cooling step or you might end up with scrambled bits instead of silky filling. Watch the tarts closely near the end of baking. Pull them when you see active bubbling but before the centers look firm—carryover heat does the rest. The sweet perfume that fills your kitchen is your cue that the classic Canadian butter tarts with raisins are ready to cool (if you can wait that long).
Tips, Variations, and How to Store These Butter Tarts
If you love a classic, stick to the script—but butter tarts are wonderfully adaptable. Swap the raisins for currants or chopped walnuts for a little crunch. Skip the raisins entirely if you prefer a pure custard experience (there’s a longstanding Canadian debate on that). For extra depth, try browning the butter ever so slightly before adding the sugar—just keep a close eye so it doesn’t go too far. If you’re baking ahead, these keep well in an airtight tin at room temperature for a couple of days (if you haven’t eaten them all by then!). For longer storage, pop them in the fridge, and let them come to room temperature before serving. You can also freeze baked tarts—just layer them with parchment paper and thaw overnight before serving. They’re best enjoyed with a cup of hot tea or coffee, or packed into a festive dessert tray for gatherings. Every bite will bring a little spark of Canadian coziness, no matter the weather outside.
FAQs about Classic Canadian Butter Tarts with Raisins
Can I make classic Canadian butter tarts with raisins ahead of time?
Yes, you can easily prepare butter tarts a couple of days in advance. Just store them airtight at room temperature or refrigerate if you want them to last even longer. Let them come back to room temp before serving for the best gooey texture.
What can I use instead of raisins in these butter tarts?
You can swap raisins for dried currants, dried cranberries, or even chopped dates if you want a different fruitiness. Some people leave out dried fruit altogether for a pure butter-custard tart—totally your call.
How should I store leftover butter tarts?
Store your butter tarts in an airtight container at room temperature for up to two days. For longer keeping, refrigerate or freeze them. When you’re ready to serve, let chilled or frozen tarts come to room temperature, or give them a quick warm-up in the oven.
Can I use homemade pastry instead of frozen tart shells?
Absolutely! Homemade pie dough gives a rustic, flakier base if you like rolling out pastry. Just cut rounds to fit your tart pan and bake as directed—either option works beautifully for these classic Canadian butter tarts with raisins.
Is it possible to freeze classic Canadian butter tarts with raisins?
Yes, these tarts freeze well once fully cooled. Layer them between parchment paper in an airtight container and freeze for up to two months. Thaw at room temperature before enjoying—no need to reheat unless you like them slightly warm.
The real test of a good butter tart is that first bite, where flaky pastry barely holds in the buttery, glossy filling, and the gentle chew of raisins adds a classic touch. Classic Canadian butter tarts with raisins promise that combination each and every time—sweet, messy, and thoroughly cozy. Grab a napkin and pour yourself a coffee; these are made for savoring, sharing, and, honestly, sneaking just one more.
More Delicious Recipes
- Irish Soda Bread with Cranberries and Raisins: This recipe features raisins, adding a similar fruity touch to bread that complements the coziness of butter tarts.
- Irish Cream Poke Cake: A delightful dessert that brings the same rich and creamy flavors reminiscent of the buttery filling in butter tarts.
- Irish Apple Cake with Custard Sauce: This cake features a warm, comforting sweetness similar to classic butter tarts, perfect for cozy occasions.
Classic Canadian Butter Tarts with Raisins
Ingredients
Equipment
Method
- Preheat oven to 375°F and set rack to middle position. Arrange frozen tart shells on an aluminum foil or parchment-lined baking sheet, keeping them in their foil tins.
- In a medium saucepan over medium-low heat, melt the butter until completely liquid but not browned, about 2-3 minutes. Remove from heat immediately to prevent browning.
- Add the brown sugar to the melted butter and stir with a wooden spoon until fully combined with no lumps remaining. Pour in the cream and vanilla extract, stirring until the mixture becomes smooth and glossy. The mixture will be quite thick at this stage.
- Let the butter-sugar mixture cool for exactly 5 minutes before adding the egg. While waiting, lightly beat the egg in a small bowl with a fork.
- Very slowly stream the beaten egg into the cooled butter mixture, whisking constantly. Once fully mixed, gently stir in the raisins until evenly distributed throughout the filling.
- Fill each frozen tart shell about 3/4 full with the filling (approximately 1 tablespoon of filling per shell). Don't overfill, or the filling will bubble over during baking.
- Bake for 15-18 minutes at 375℉ until the pastry turns golden brown and the filling is actively bubbling.
- Remove from the oven. Carefully transfer each tart to a wire rack to cool completely.
- Let the tarts cool fully before serving. The filling will set more as it cools but should remain slightly gooey in the center. Enjoy!