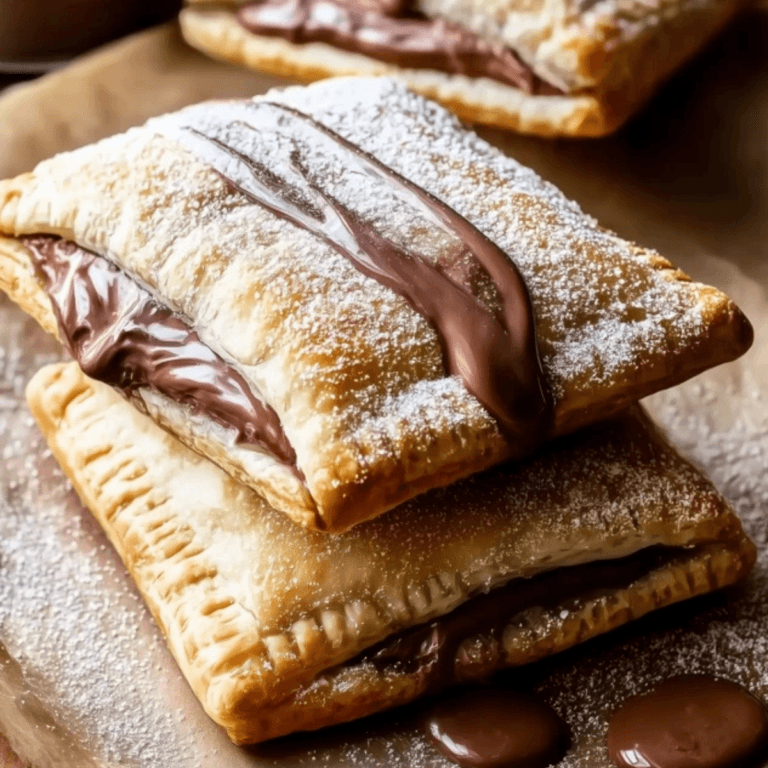
If there’s ever a reason to make breakfast from scratch on a Saturday morning—rainy, sleepy, or sunshine bright—it’s homemade chocolate pop tarts. There’s something about the way chocolate pastry perfumes the whole kitchen: it’s got this rich, warming smell, almost like a bakery when the croissants are still snug on their trays. But these aren’t your average grab-and-go pop tarts. No, this chocolate version is next-level decadence. You get tender, flaky pastry that isn’t too sweet, a lush, almost silken filling that feels like chocolate truffles in the center, and a glossy chocolate frosting that begs for sprinkles.
Honestly, you may never look at the grocery store version the same way again. I’ve made these as a treat for brunches, for birthdays (pop tarts instead of cake is absolutely a thing in our household), and also as that over-the-top comfort food for a cozy evening. There’s a kind of magic in assembling these—rolling, cutting, filling, sealing each one by hand. You hear the pastry crackle as you press a fork along the edges, and—be warned—it’s hard not to sneak spoonfuls of that chocolate filling as it cools.
Let’s call it: these homemade chocolate pop tarts are pure, nostalgic fun with the kind of chocolate payoff that gets both kids and grownups swooning.
When Chocolate Pop Tarts Become Comfort Food
There are mornings that call for a quick slice of toast, and then there are those rare mornings where you want to linger, roll some dough, and feel chocolate under your nails. That’s the territory of homemade chocolate pop tarts—the kind of treat that transforms a regular day into something special. Making these is almost meditative. The pastry dough is soft, totally unlike anything from a store-bought box. As you whisk the filling together, it smells a bit like fudge shops at the beach. And when they emerge from the oven, the kitchen is filled with that unmistakable comfort: warm chocolate and the buttery promise of pastry.
Part of the joy here is sharing. I’ve passed around trays of these to sleepy-eyed friends, celebrating birthdays or just celebrating nothing at all. Each tart is made by hand, and each one carries a little bit of that homey, cozy moment with it. These chocolate pop tarts remind you—whether you eat them warm, or sneak them cold—they’re very much made for slow mornings, for rainy afternoons, or whenever you want to turn breakfast into a chocolate event.
The Ingredients That Give Homemade Chocolate Pop Tarts Their Depth
- Flour – the backbone of the dough, giving structure but letting the pastry stay tender and flaky.
- Cocoa powder – brings that deep, chocolate flavor all the way through the crust.
- Granulated sugar – just enough to sweeten the pastry without making it cloying.
- Table salt – tones down the sweetness and sharpens each chocolate note.
- Unsalted butter – cold, chopped in, and absolutely essential for flaky layers that shatter when you bite in.
- Sour cream – makes for softer, supple dough with the faintest tang.
- Semisweet chocolate chips – these melt into a ganache-like filling, rich but not overpowering.
- Salted butter – adds both creaminess and an extra kick to the filling.
- Heavy cream – blends into the chocolate mixture for that truffle-rich center.
- Vanilla extract – cuts through the chocolate with a sweet, warm lift.
- Powdered sugar – used for smooth texture in both the filling and the glaze.
- Egg – helps the pastry brown, sets the edges, and binds the layers together.
- Water – just enough to thin the egg wash for a proper golden sheen.
- Milk – brings the icing together smoothly for that perfect spreadable consistency.
- Light corn syrup – makes the frosting glossy and helps it set without getting chalky.
- Nonpareils or sanding sugar – completely optional, but they add both crunch and a little playfulness on top.
See the recipe card below for the full list of ingredients and measurements.
Bringing These Chocolate Pop Tarts to Life
Get ready for a few stages—the process itself is half the fun. Everything starts with the chocolate pastry crust. You’ll want all your gear cold: flour, cocoa, sugar, and salt pulse together in a food processor until they’re a uniform earth-brown. Then, scatter cubes of very chilly butter on top and pulse just until it looks a bit like beach sand with a few pebbles tucked in. Those little pieces of butter are what makes magic happen in the oven—a flake here, a shatter there.
Next comes the sour cream. Pulse it in just until dough almost comes together, but resist the urge to process too much. It’ll look a bit shaggy, but that’s what you want. Turn it out, work gently, flatten into a thick disk, and wrap it up for a chill in the fridge. It’s not negotiable; time in the fridge keeps that butter firm and the pastry easy to roll out later.
As the dough chills, start on the chocolate filling. Grab a heatproof bowl and combine chocolate chips, salted butter, and cream. Heat—either slowly over simmering water or in short bursts in the microwave—stirring every so often. When it melts into one shiny, thick pool, whisk in the vanilla and powdered sugar. It’ll thicken as it sits; if you sneak a taste here, you’ll see why waiting is hard.
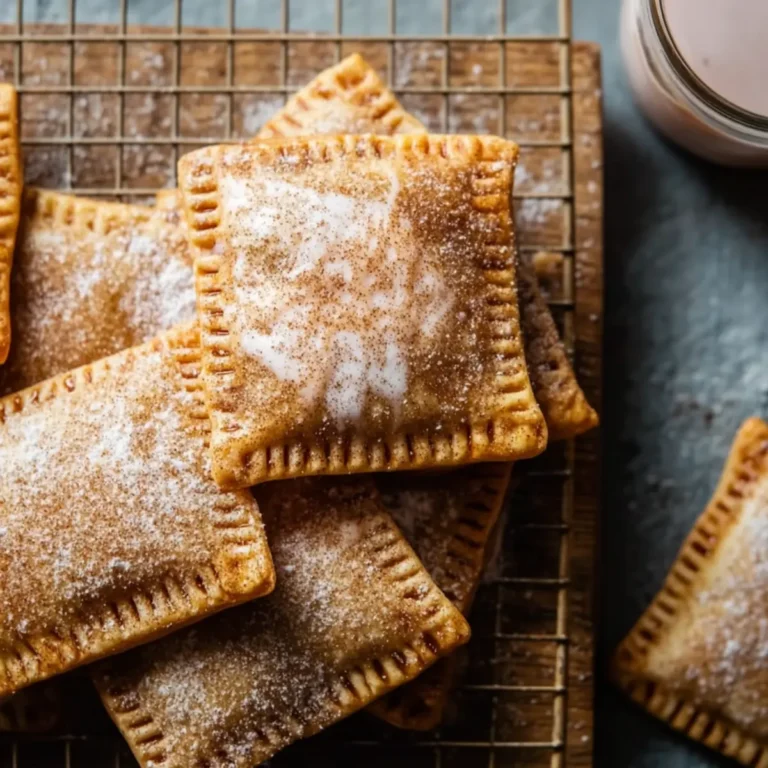
Once the dough is cold but workable, roll it out on a floured surface until it’s thin but not fragile. Slice into rectangles—rustic edges totally allowed. Lay out half on your lined baking sheet, brush each with a bit of egg wash, and then dollop the cooled chocolate filling in the center. Top each with another dough rectangle, crimp the edges with a fork (the little ridges let you know it’s homemade), brush again with egg wash, and use a toothpick to poke a few tiny vents on top.
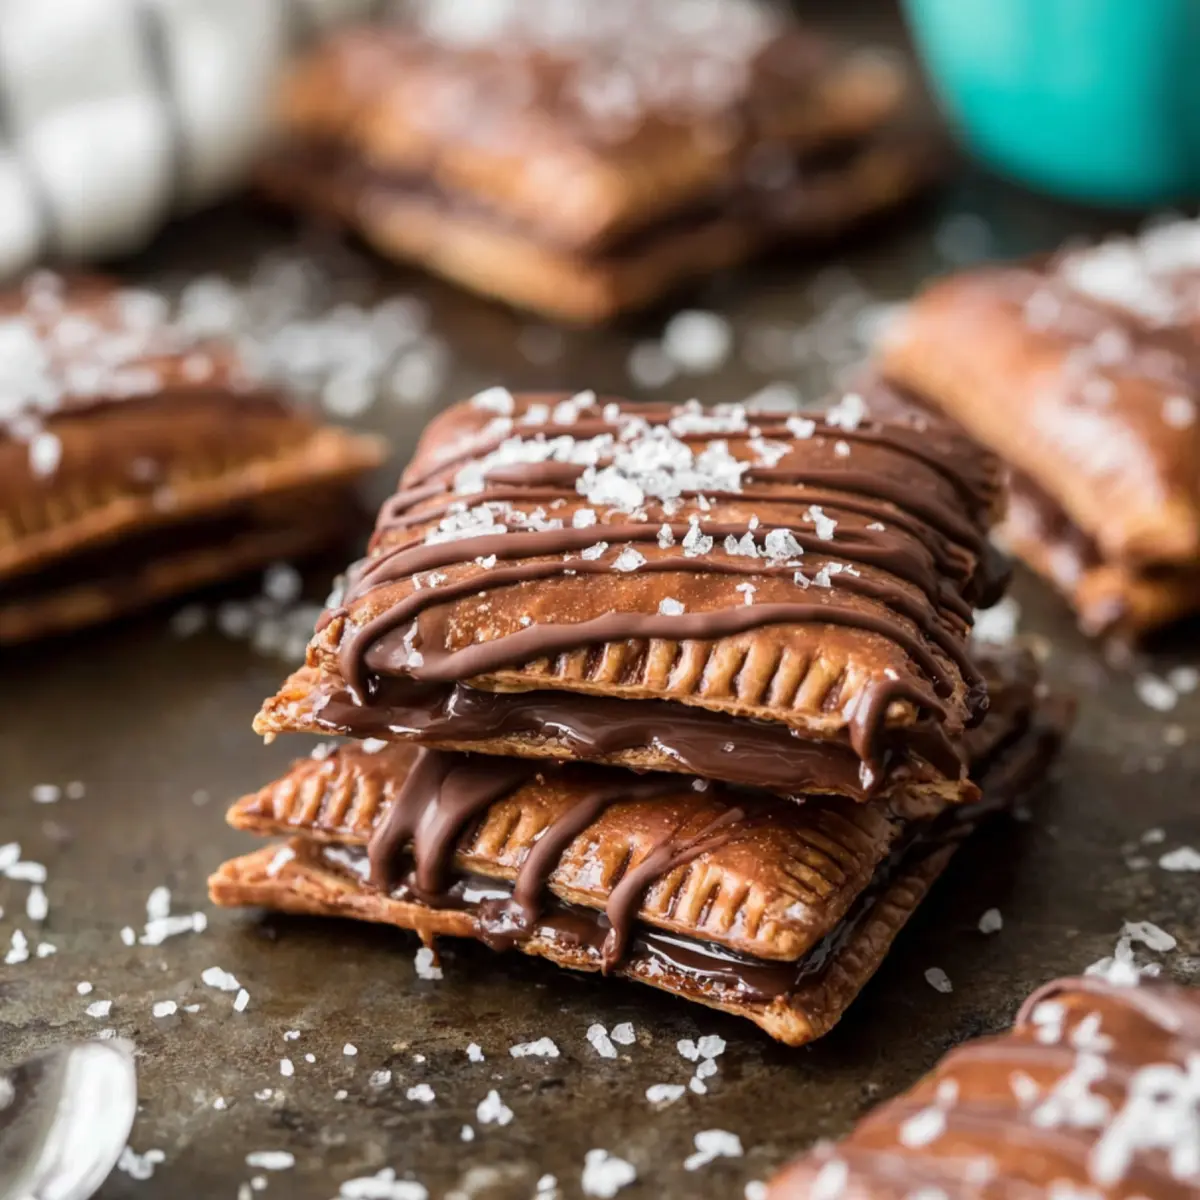
Bake in a hot oven until just set but still slightly soft. Let the pop tarts cool on the sheet while you make the frosting: powdered sugar, cocoa, milk, corn syrup, and vanilla extract. Whisk into a glossy, thick icing that cools to a fudgey, smooth finish. Spread onto completely cooled pop tarts and, only if you want extra joy, finish with sprinkles.
The Pastry and the Filling: Real Chocolate on Chocolate
If you’ve never made chocolate pastry from scratch, there’s a wonderful surprise waiting. The dough itself isn’t overwhelmingly sweet. It’s more like the shell of a dark chocolate truffle—rich, with a background cocoa note that deepens as it bakes. The butter layers puff just slightly in the oven, so each pop tart is sturdy on the outside, but with just a little give as you bite in.
Pair that with a silky filling: pure chocolate richness, thanks to semi-sweet chips and a swirl of heavy cream. The inside turns almost gooey right out of the oven, then firms up with each passing hour. That contrast between the flaky crust and creamy center is pure comfort—the kind of thing you’ll want to eat with a cup of strong cold brew or that first cup of weekend tea.
Texture, Flavor, and That First Bite
You get it all at once. The pastry edges, crimped and golden, have that faint crunch. The middle layers—just under the icing—are tender, not dry, thanks to the sour cream and all that butter. When you actually bite in, you’ll hit the creamy chocolate heart: fudgy, a little warm if you’re lucky enough to grab one fresh from the pan.
The taste is balanced—each part brings its own: deep cocoa in the crust, lush sweetness in the filling, sharp notes of vanilla and salt pulling it all back from being too much. Add a slick of chocolate icing that sets with a soft snap, and then, if you like, a smattering of crunchy nonpareils or sparkly sugar for contrast. There’s no mistaking this for anything from a wrapper.
Small Habits That Make Homemade Chocolate Pop Tarts Absolute Perfection
Let pastry dough rest and chill as long as needed; if you rush, the butter melts into the flour and you lose all those flaky pockets. If your kitchen runs hot or you have warm hands, chill your rolling pin and work surface, too. Shaggy dough looks wrong but bakes up perfect… don’t overwork it trying to smooth out every last crumb.
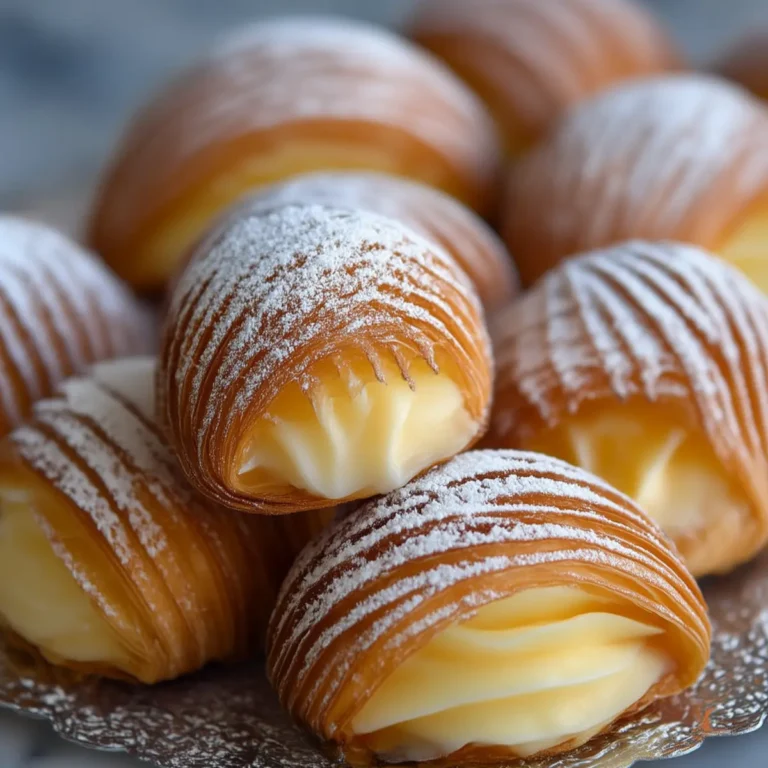
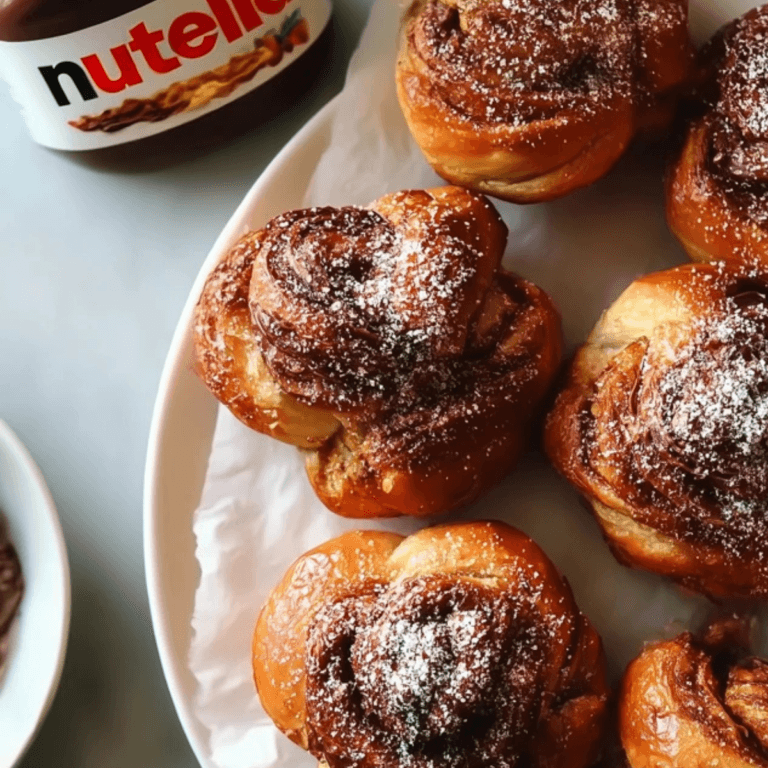
For fun, swap semisweet chips for dark or even milk chocolate if you’re feeling bold. Add a tiny shake of instant espresso powder to the filling for mocha vibes, or swap out the chocolate center for Nutella, cherry jam, or even fig preserves if you’re not in a strictly chocolate mood.
When it comes to frosting, let the pop tarts cool all the way. Spread icing thick or thin—there’s no wrong answer—but wait until it sets before stacking or storing. To freeze, place them undecorated between sheets of parchment; thaw and rewarm in the oven, then ice just before serving for the best texture.
Serving Homemade Chocolate Pop Tarts in Style
There’s no wrong time for chocolate pop tarts, but they place themselves at the center of a special brunch spread—think sliced fruit, strong coffee, and maybe even a mimosa or two. Kids go wild for them as dessert, especially when they get to pick the sprinkles or help with crimping the edges. For parties, stack them in piles on big wooden boards for people to grab; they cool beautifully and taste just as good at room temp as they do warm. Pair with whipped cream, a scoop of vanilla ice cream, or even a drizzle of raspberry sauce if you want to swing to the fancy side.
FAQs about Homemade Chocolate Pop Tarts
Can I freeze homemade chocolate pop tarts before or after baking?
Absolutely—you can freeze them before baking (assemble, then lay flat and freeze on a tray before transferring to a freezer bag) or after baking, before icing. Once cooled, they keep well in the freezer for a few months. Thaw and warm in the oven, then frost right before serving.
What’s a good substitute if I don’t have sour cream for the dough?
Plain full-fat Greek yogurt works nicely in place of sour cream and offers a similar tang and moisture to the dough. You can also try thick crème fraîche if you prefer, but avoid thin yogurts which will make the dough sticky and hard to handle.
How do I reheat homemade chocolate pop tarts, especially after freezing?
For best results, reheat unfrosted pop tarts in a preheated oven until just warmed through—the pastry gets crisp and the filling returns to a soft center. Avoid microwaving, as it can make the pastry rubbery. Frost once they’ve cooled slightly for classic texture.
Can I use milk chocolate or darker chocolate in homemade chocolate pop tarts instead of semisweet?
Yes, you can swap out semisweet chocolate chips for milk chocolate if you want something sweeter, or use dark chocolate for a more intense, bittersweet filling. Just keep an eye on the filling’s taste (and maybe adjust powdered sugar slightly) to balance the sweetness.
Nothing beats the satisfaction of pulling a tray of homemade chocolate pop tarts from the oven, watching the icing set as you impatiently wait to take that first bite. It’s a little ceremony for yourself: flaky chocolate pastry, an indulgent filling, and that glossy shell of frosting. Whether you make them for a big crowd, to spoil your family, or just as a decadent treat to savor with your morning tea, these pop tarts bring the fun and nostalgia of childhood together with the wholesome indulgence of homemade baking. I can’t think of a better way to turn an ordinary day into something worth remembering—go ahead, make a batch and claim that chocolate moment for yourself.
More Delicious Recipes
- Breakfast Enchiladas: These enchiladas can add a savory twist to your morning, perfect for satisfying breakfast cravings.
- Easy Breakfast Quiche: A delicious and easy egg-based dish that pairs wonderfully with sweet pastries like chocolate pop tarts.
- English Muffin Breakfast Pizzas: These savory breakfast pizzas are quick to make and would complement your homemade chocolate treat perfectly.
Homemade Chocolate Pop Tarts
Ingredients
Equipment
Method
- Combine flour, cocoa powder, granulated sugar and salt in the basin of a food processor and pulse briefly to combine.
- Scatter cubed butter evenly over the surface of the flour mixture and pulse until the butter is cut into the mixture and mixture resembles coarse crumbs. Discernible pieces of butter may remain in the mixture, this is fine!
- Add sour cream and pulse until dough is beginning to cling together. It may still be a bit crumbly but the flour and cocoa should be absorbed and if you press the dough between your thumb and forefinger it should stick together.
- Remove from food processor and transfer to a piece of plastic wrap. Flatten into a disk and chill for at least 30-60 minutes before rolling out. In the meantime, prepare your filling.
- Combine chocolate, butter, and cream in a heatproof bowl and heat in 25-second increments until melted and smooth.
- Stir in vanilla extract and powdered sugar until smooth.
- Set aside, filling should cool (and will thicken some) before being used to fill pastry.
- Once pastry dough has chilled, preheat your oven to 400F (205C) and line a baking sheet with parchment paper.
- Prepare egg wash by thoroughly whisking together egg and water.
- Transfer pie crust to a clean, lightly floured surface and dust with additional flour as needed. Roll dough into a rectangle about ⅛-¼” thick and cut into 2.5”x4” (6x10cm) rectangles.
- Place one rectangle on the prepared baking sheet and lightly brush the surface with egg wash.
- Drop a rounded Tablespoon of chocolate filling into the center, then top with another rectangle of dough. Use a fork to crimp the sides to seal and brush the surface of the dough with egg wash. Use a toothpick or wooden skewer to poke 6-8 holes in the surface of the pop tart to allow it to vent.
- Repeat the steps above until you have formed all of your chocolate pop tarts, then transfer to 400F (205C) oven and bake for 15-17 minutes. Allow to cool on baking sheet before decorating with icing.
- Combine sugar, cocoa powder, milk, corn syrup, and vanilla extract and whisk until combined. If mixture is too thick, add additional milk as needed until smooth, and if icing becomes too thin, you can always thicken it with a bit more powdered sugar. Look for a consistency where, when you lift the spoon out of the icing, the ribbon of icing that drizzles back into the bowl holds its shape for several seconds before dissolving back in the icing.
- Spoon icing over the center of the pop tarts and top with sprinkles, if using. Allow frosting to harden before serving and enjoying.