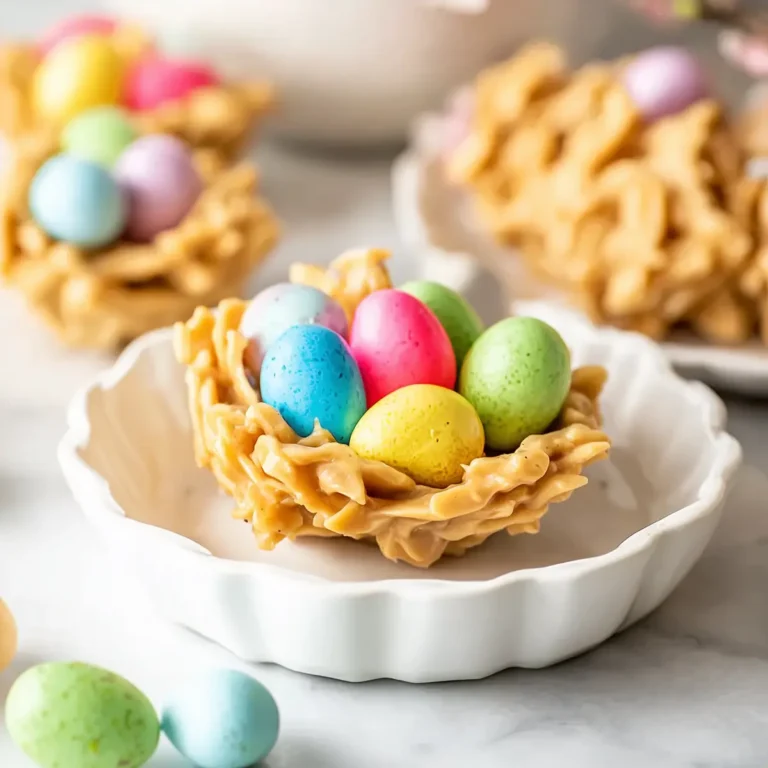
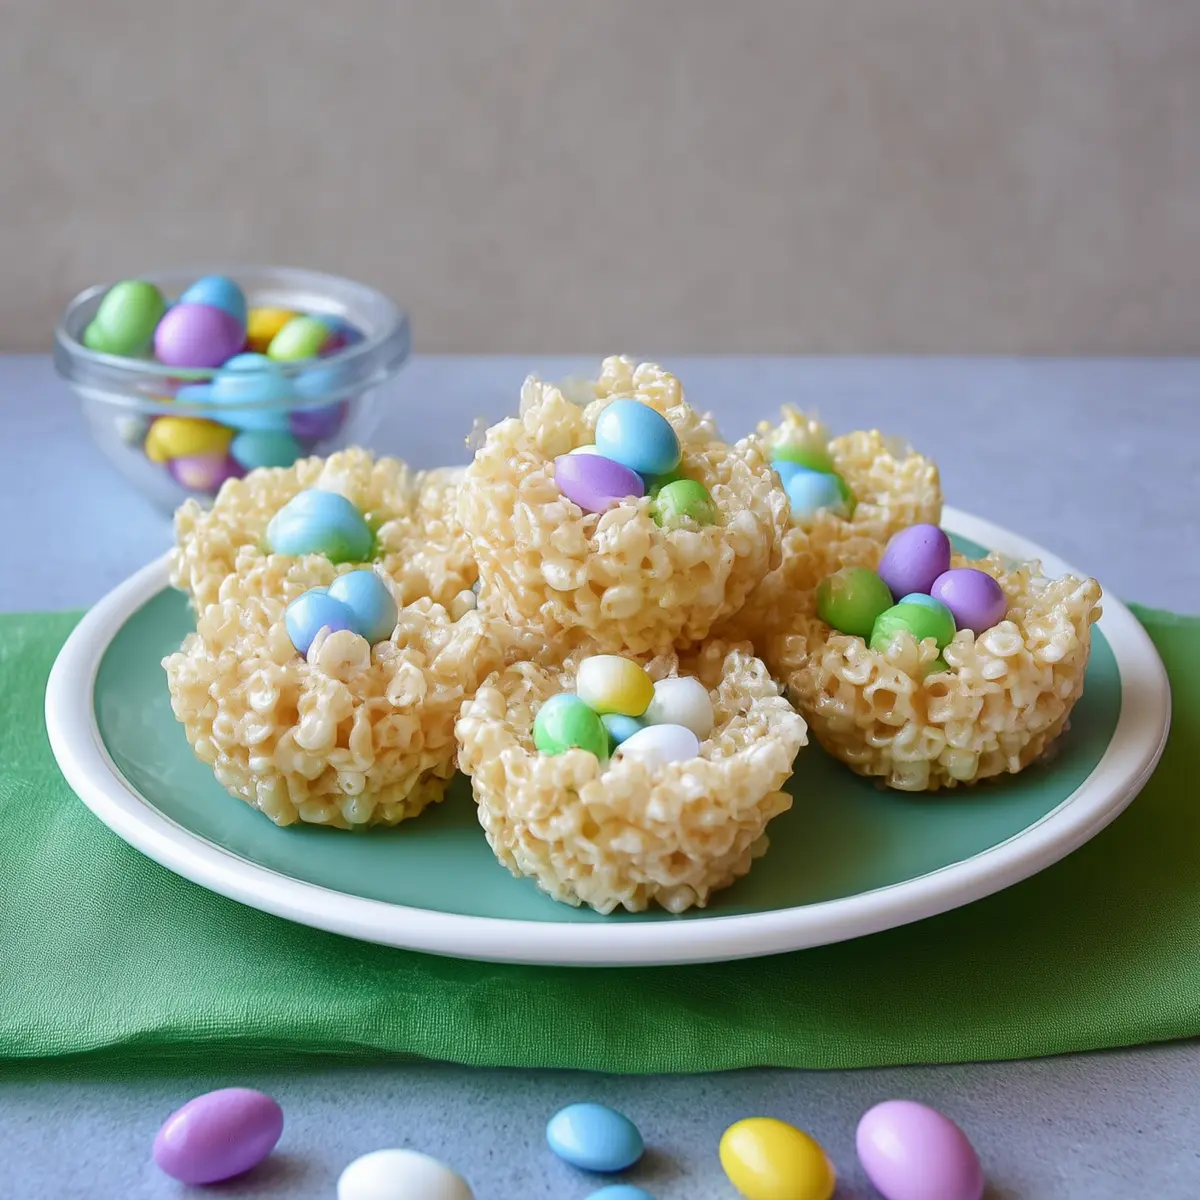
Rice Krispie Easter Nests are the kind of treat that instantly brings back all those childhood memories of spring, pastel candies, and sticky fingers in the kitchen. These no-bake delights are as simple as they are joyful—crunchy, gooey, sweet, and just begging to be decorated with your favorite mini eggs. Whether you’re planning fun with kids or just love a cheerful, classic Easter dessert, this recipe makes it deliciously easy.
What I love most is the hands-on nature of making these little nests. You get to shape each one, watch the marshmallows melt into gooey magic, and maybe sneak in a few extra candies here and there. The whole process smells faintly of toasted cereal and marshmallow, and before you know it, you’re looking at a tray of edible Easter baskets.
Making Memories With Fun and Simple Equipment
You don’t need a fancy gadget collection to make Rice Krispie Easter Nests—just a few reliable basics you probably already have. Here’s what works best for both making and decorating your festive nests:
- Muffin pan – Essential for shaping those crisp little nests and keeping things tidy.
- Large saucepan or pan – The place where marshmallows and butter go from separate to magical togetherness.
- Wooden spoon or spatula – For stirring and folding the sticky mixture, plus shaping the nests with a quick butter-oil wipe.
- Mixing bowl (optional) – If you prefer to mix the cereal and marshmallow off the heat.
- Small bowl and spoon – Just right for mixing and adding the colored icing and sprinkles.
- Measuring spoons – Helpful for mixing the icing and adding water just a drop at a time.
- Oil or oil spray – Not exactly equipment, but crucial for greasing your muffin pan and spoon so cleanup is a breeze.
Every Easter Moment in These Sweet Ingredients
- Butter – Gives richness and flavor, helps everything meld smoothly as you melt it with marshmallows.
- Marshmallows – The main sticky agent, melting into that classic, chewy-sweet texture everyone loves.
- Rice Krispies cereal – Delivers a signature crunch and lightness in every bite, perfect for nest shapes.
- Powdered icing sugar – Used to create a quick, decorative icing with just the right touch of sweetness.
- Water – For thinning the icing to a spoonable texture and helping it cling inside each nest.
- Green food colouring (optional) – Lets you tint the icing so every nest has a pop of grassy, springtime color.
- Mini egg candies – The colorful star of your nests—choose chocolate, candy-coated, or your own favorites.
- Sprinkles – Adds festive sparkle and extra kid-appeal to every treat.
See the recipe card below for the full list of ingredients and measurements.
Shaping Your Rice Krispie Easter Nests Step by Step
- Grease the muffin pan. Lightly coat each cup of a muffin tin with oil or cooking spray so your nests will pop out easily later.
- Melt the butter. Place the butter in a large pan and melt gently over medium-low heat until it smells rich and is completely liquid.
- Stir in the marshmallows. Add the marshmallows to the pan and stir continuously as they soften, then completely melt into a sticky, white cloud. You’ll notice the mixture grow smooth and glossy.
- Remove from heat and add Rice Krispies. Take the pan off the heat, then pour in the Rice Krispies cereal. Stir until every bit of cereal is evenly coated with the warm, marshmallow mixture—it’ll look shiny and start smelling sweet and toasty.
- Shape the nests. Spoon the mixture into the greased muffin tin, dividing it roughly equally. Press gently in the center of each mound to make a little well, forming the unmistakable nest shape. Grease your spoon or fingers very lightly for easier shaping—less sticking, more fun.
- Cool completely. Let the nests cool thoroughly in the muffin pan. They should feel firm and hold their shape before you remove them.
- Make and tint the icing. In a small bowl, mix powdered icing sugar with 2 teaspoons of water to form a thick paste. If it’s too stiff, add a drop more water; if too thin, blend in a little more sugar. For spring flair, mix in a few drops of green food colouring.
- Decorate the nests. Spoon a little icing into each nest. Press a handful of mini eggs right into the icing and scatter with sprinkles while everything’s still a bit tacky.
Troubleshooting Your Nests: Keeping Them Crisp and Cute
Rice Krispie Easter Nests are wonderfully forgiving, but a few simple tricks will help you get perfect results (and avoid sticky snafus). If your mixture feels too hard to work with, it might have cooled too quickly—just work briskly while it’s still warm and pliable. Greasing your spoon or fingertips lightly keeps them from sticking. If the nests fall apart, make sure your marshmallows were fully melted and your cereal was thoroughly coated, so everything binds beautifully.
If your icing is too runny, gradually mix in a spoonful more powdered sugar. If it’s too thick and won’t move, a few extra drops of water will loosen it right up. And remember: you want the nests completely cool before decorating, so the icing and eggs stay put and don’t melt away.
Finally, don’t be afraid of rustic shapes. Slightly uneven “nests” look more natural and inviting!
Pairing and Variations for All Your Easter Parties
Rice Krispie Easter Nests are a festive addition to any spring table, and they play especially well with other light desserts like fruit salad, carrot cake, or lemon tarts. Serve them with cups of tea, hot cocoa, or a cool glass of milk—each sip or bite balances the sweetness and crunch.
To make them your own, try swapping the mini eggs for other colorful candies or jelly beans. You can use vegan marshmallows and plant-based butter for a dairy-free spin, or add a touch of vanilla extract to the marshmallow mixture for extra flavor. Theme the sprinkles and candy to fit any occasion: rainbow colors for birthdays, spooky shapes for Halloween, or all-pink for a baby shower.
If you want them extra-chocolatey, stir in a little cocoa powder with your Rice Krispies or try chocolate-flavored cereal for a deeper twist. Let kids do the decorating for an interactive (and sometimes chaotic) treat-making session that’s as memorable as it is delicious.
FAQs about Rice Krispie Easter Nests
How long will Rice Krispie Easter Nests stay fresh?
Rice Krispie Easter Nests keep best in an airtight container at room temperature for up to 3 days. They’ll retain their crunch and hold their shape, making them perfect for make-ahead celebrations or school parties. Just be sure they’re stored somewhere cool and dry—avoiding direct sunlight or heat will prevent the marshmallow from getting sticky or softening too much.
Can I freeze Rice Krispie Easter Nests?
It’s possible to freeze Rice Krispie Easter Nests, but the texture may change. If you want to try, place the nests (without decorations) in a single layer in an airtight container, separating layers with parchment paper. Let them thaw at room temperature before icing and decorating for the best results.
What can I use instead of mini egg candies for the topping?
If you don’t have mini egg candies, use jelly beans, fun-shaped sprinkles, or even small chocolate truffles. Anything bite-sized and colorful will work beautifully as a nest “egg”—just go for what you love or what matches your holiday table.
The Joy of Serving Rice Krispie Easter Nests
There’s something irresistibly cheerful about sharing Rice Krispie Easter Nests with friends and family. That crisp marshmallow crunch, the playful colorful candies nestled on top, and the pure nostalgia of no-bake treats make every bite a celebration of spring. Serve on a platter, tuck them into lunchboxes, or offer as a sweet surprise at your next gathering—they always disappear long before the last cup of tea is poured.
More Delicious Recipes
- Easter Egg Fruit Pizza: This fruity dessert is a fantastic way to celebrate Easter, providing a colorful and sweet alternative to traditional treats.
- St. Patrick’s Day Mint Blossom Cookies: These cookies feature a fun mint flavor, perfect for festive gatherings and pairing well with springtime treats.
- Loaded Leprechaun Popcorn: This crunchy snack is a colorful and delightful choice that shares the same fun spirit as Rice Krispie Easter Nests.
Rice Krispie Easter Nests
Ingredients
Equipment
Method
- Lightly grease the cups of a muffin pan with oil or oil spray.
- Add the butter to a large pan and melt over a medium/low heat.
- Add the marshmallow and stir until it’s all melted.
- Remove the pan from the heat, pour in the rice krispies and stir until the cereal is completely coated.
- Spoon the mixture into the muffin pan and form into a nest shape by making an indentation in the middle. A lightly buttered or oiled spoon makes it much easier!
- Allow to cool completely in the pan before removing.
- To decorate, make a fairly thick icing by mixing the powdered sugar with 2 teaspoons of water (add more water or icing sugar as necessary to make a thick paste) and add a few drops of green food colouring if desired.
- Spoon a little icing into the rice krispie nests and place in a few mini eggs. Add a few sprinkles.