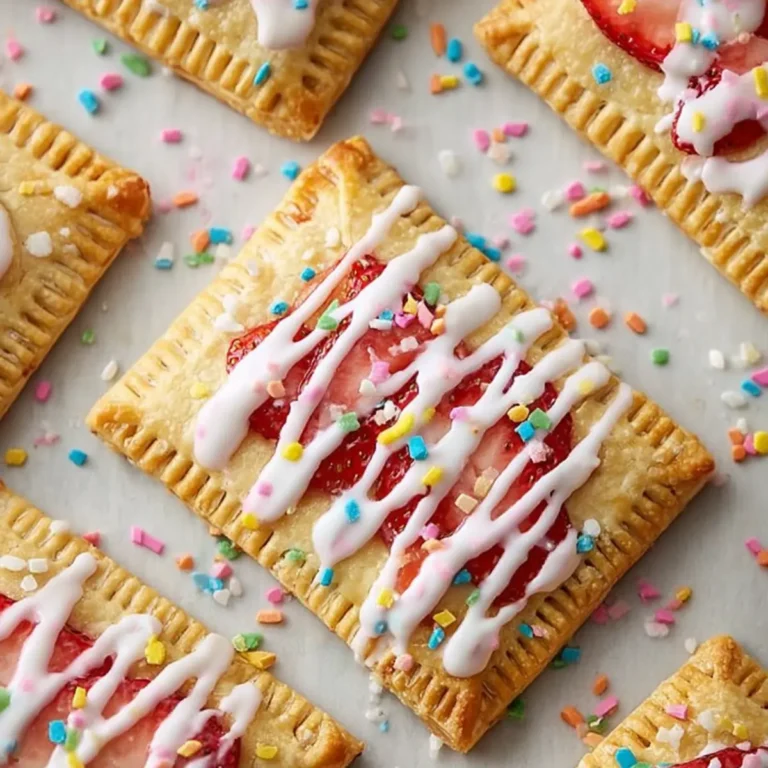
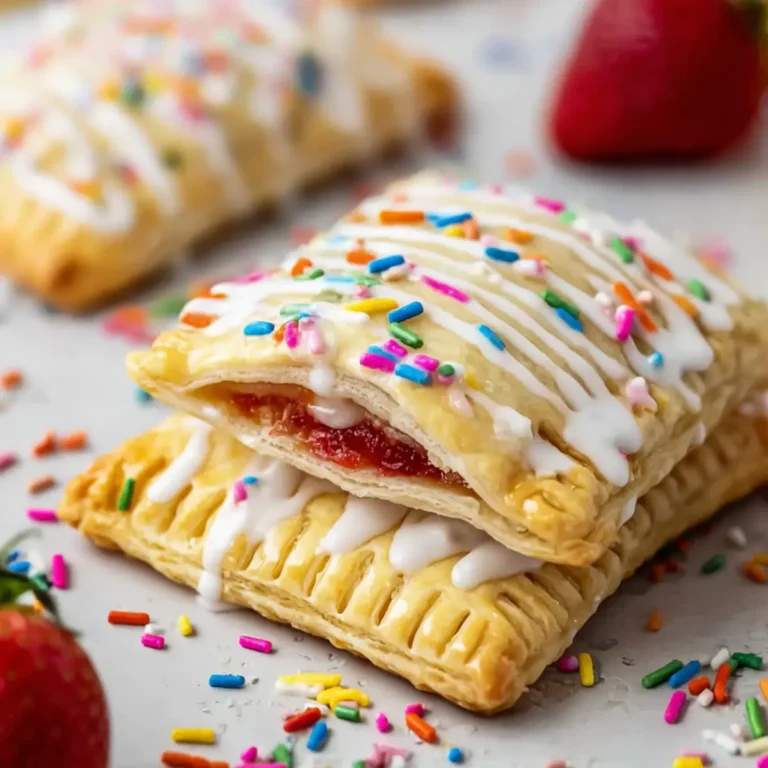
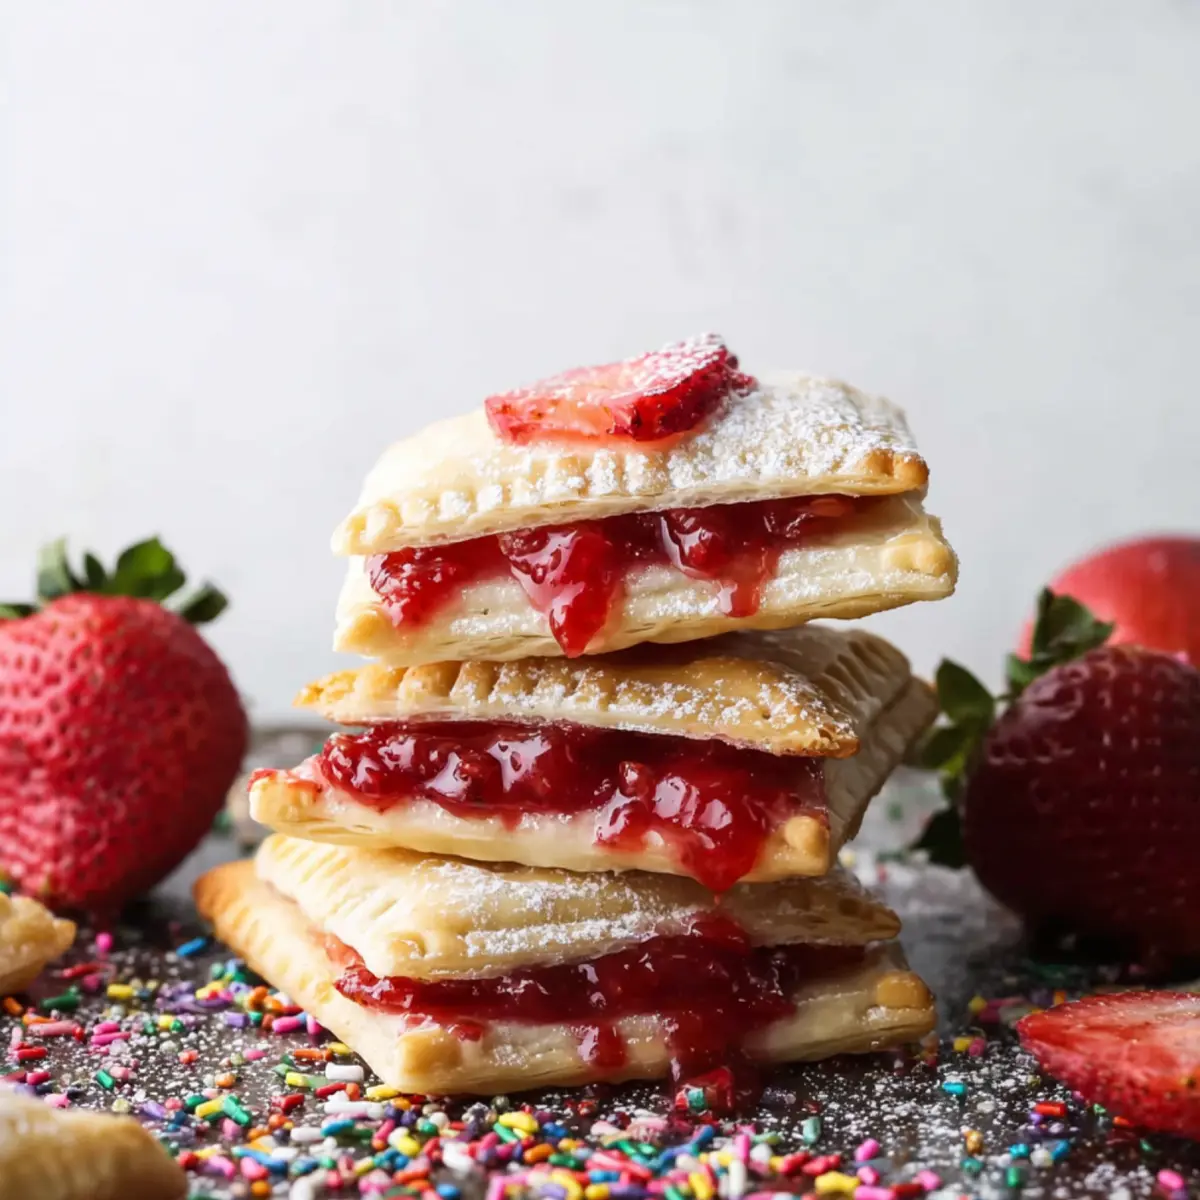
The kitchen smells like rich butter and sweet berries as the oven works its magic. You can hear the faint sizzle from pastry as it puffs up into flaky pockets, and the anticipation starts taking over—homemade Strawberry Pop Tarts are just about ready to be devoured. If you’ve only ever tried the store-bought kind, you’re in for something completely different. Think bright, jammy fruit nestled inside a crisp golden shell, finished with a swirly, dreamy glaze.
Most of the time, making your own treats from scratch sounds fussy, but these hand pies are worth every step. With a buttery crust and a strawberry center that actually tastes like ripe summer fruit, you end up with something both nostalgic and entirely new.
Why These Strawberry Pop Tarts Beat the Boxed Version
You don’t have to be a pastry chef to pull off Strawberry Pop Tarts that absolutely trounce the ones from the grocery aisle. It’s all about that combination of flaky, buttery pastry and real fruit filling—a pairing the boxed treats never quite get right.
These hand pies have a golden, crisp exterior that shatters gently when you bite in, revealing a layer of addictively sweet strawberry preserves. The flavor isn’t flat or fakey—just pure, tangy berry essence, the way it ought to be. Homemade really does make all the difference here. Plus, you can tweak everything exactly to your liking, from the filling to the glaze to the sprinkles (or not—your call).
If you’ve got childhood memories of toasting up pop tarts before school, this recipe will give you that comfort, but with taste turned all the way up. And if you’re feeding kids, these are as fun to make together as they are to eat. Bonus: there’s no foil wrapper, and you get to lick the spoon.
Inside the Perfect Strawberry Pop Tarts
The magic of homemade pop tarts is really in the details—each ingredient has its job, and every swap changes the final bite just a little. Here’s what goes into these Strawberry Pop Tarts:
- – strawberries: juicy, sweet-tart, and the foundation of the filling flavor.
- – Lemon juice: perks up the fruit and adds brightness.
- – Lemon zest: that subtle citrus aroma that makes each bite lively.
- – Granulated sugar: brings out the natural sweetness and gives the preserves structure.
- – Vanilla extract: rounds out the strawberry flavor and adds warmth.
- – All-purpose flour: forms the structure of the crust, creating layers.
- – Coarse salt: sharpens all the flavors and balances sweetness.
- – Granulated sugar (for dough): adds just a hint of sweetness to the pastry itself.
- – Unsalted butter: makes the crust tender, flaky, and ultra-rich.
- – Cold water: helps bring the dough together without melting the butter.
- – Strawberry preserves: the sweet, thick jammy center; you can use homemade or a favorite jarred kind.
- – Double pie crust: works as the dough to sandwich everything together.
- – Egg: for an optional egg wash—gives the pastry that lovely golden finish.
- – Powdered sugar: makes the glaze that you drizzle on top.
- – Heavy cream or milk: creates a smooth, pourable icing.
- – Rainbow sprinkles: for a pop of color and throwback bakery vibes (optional, but delightful).
See the recipe card below for the full list of ingredients and measurements.
Swap It Up: Ingredients for Every Baker
If you’re out of something or working around dietary needs, there’s plenty of room to play with these homemade hand pies. Swap in raspberries or blueberries for the strawberry preserves if you want a whole new kind of pop tart. Don’t eat dairy? A plant-based butter gives you a crisp, golden crust without any animal products. Pie dough feeling like too much work? Grab a quality premade crust and take a shortcut.
For the jammy center, nearly any thick preserve will work—as long as it’s not too runny. Gluten-free flour blends can be used instead of all-purpose to make these treats accessible without losing that flaky texture. And if lemon isn’t your thing or all you have is orange, citrus zest always adds depth.
Glazing? Almond extract adds a fragrant twist in place of vanilla. No sprinkles? Dust the glaze with freeze-dried berry powder or just go classic and leave them plain for a more grown-up vibe.
How to Make Strawberry Pop Tarts, Step-by-Step
There’s nothing complicated about making these—but a little patience makes for the best flaky layers. Here’s how it all comes together:
- Start by making your pie crust. Combine flour, salt, and sugar in a bowl, then work in cold cubes of butter until things look sandy with visible tiny butter lumps. Add cold water just until the dough holds together, then split into two disks and chill. Cold dough means you’ll get those crisp, flaky layers.
- While the dough chills, cook the preserves. Toss the berries, citrus, and sugar into a saucepan. The mixture will bubble, and you’ll want to mash it so the fruit breaks down—keep going until it’s thick and glossy. Stir in vanilla at the end for extra depth.
- Roll out the chilled dough on a floured surface, aiming for even thinness. Get creative with your shape—rectangles are easiest, but any hand pie works. Trim up the edges for neat, bakery-style squares or embrace rustic shapes if that’s your style.
- Spoon a thick layer of strawberry preserves onto half of the pieces. Top each with a matching piece of dough, pressing around the edges with your fingers to seal, then give them a fork press for that classic look. Poke a few holes in the top to let steam escape.
- Space the assembled pop tarts out on a lined baking tray—don’t crowd them or the edges won’t crisp. If you want a deep golden color, brush with a little beaten egg on top before they go in the oven.
- Bake until the pop tarts are deeply golden and the aroma makes it impossible to wait any longer. Transfer to a rack and let cool completely so the glaze won’t melt on contact.
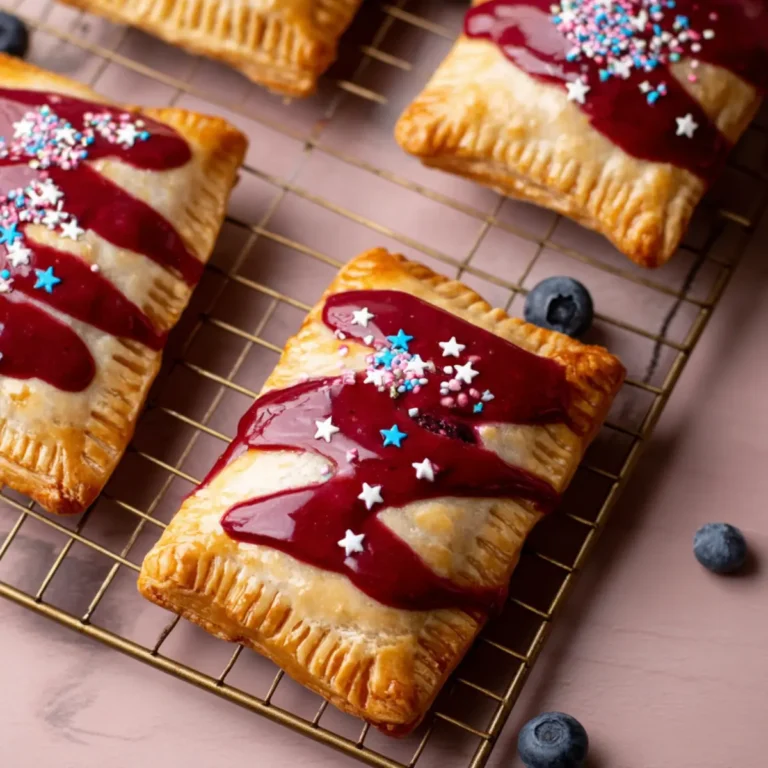
- For the glaze, whisk powdered sugar with cream or milk until smooth and pourable. You can add a little strawberry preserves for a hint of color and sweet flavor. Smear or drizzle across each tart, then scatter sprinkles on top if you like.
Little Tricks for Flaky, Sweet Success
Don’t skimp on chilling your dough—cold butter is what turns into pockets of steam, creating puff and crunch. If your kitchen is warm, chill the assembled hand pies for a few minutes before baking as well. For a clear berry flavor, don’t overcook the preserves; let them thicken just enough to set up inside the tart.
Let pop tarts cool completely before glazing, or you’ll end up with a melted, runny mess. If you want sharper bakery-style lines, wait for each layer of glaze to set before adding extras like sprinkles. Leftovers last longest if kept in an airtight container in the fridge, but honestly, these disappear fast.
Want them warm the next day? A quick pass in the toaster oven or a brief bake in the oven crisps them up like new, and the filling gets that just-baked jammy texture again.
Serving, Pairing, and Variations
Strawberry Pop Tarts need very little besides a mug of coffee or a cold glass of milk, but you’ve got plenty of options for serving. For a brunch spread, serve alongside yogurt parfaits or a simple fruit salad. If you’re making dessert, pair them with a scoop of vanilla ice cream—hot and cold, creamy and crisp, it’s absolute heaven.
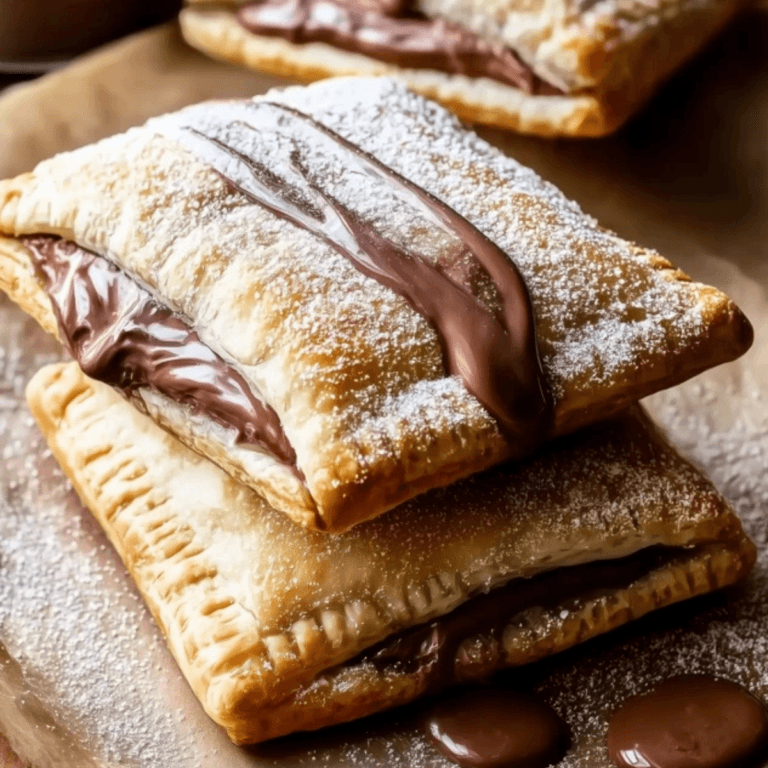
Thinking beyond strawberry? Any thick, lush jam works—apricot, cherry, even tangy marmalade if you want to shake things up. For a grown-up twist, add a sprinkle of sea salt to the icing or swap the glaze altogether for a drizzle of melted chocolate.
If you want to plan ahead, these freeze nicely (glaze after defrosting for best results), so go ahead and make a double batch for later cravings. The recipe is infinitely adaptable, whether you’re making hand pies for a crowd or just satisfying a Sunday sweet tooth.
FAQs about Strawberry Pop Tarts
Can I use premade pie dough instead of making my own?
Yes, premade pie dough works perfectly for Strawberry Pop Tarts. Just let it soften a little before rolling out so you can easily shape and seal your hand pies.
What’s the best way to store homemade pop tarts?
Store them in an airtight container in the fridge to keep the crust from softening. If you want a crisp texture, reheat briefly in the oven or toaster before eating.
Can I freeze these pop tarts for later?
Absolutely, pop tarts freeze beautifully. Wait to add the icing until after thawing, then glaze and enjoy fresh as if you just baked them.
How do I stop the filling from leaking out?
Make sure the edges are really sealed with both your fingers and a fork. A few small holes in the top help steam escape, so the jam stays neatly inside.
Final Thoughts on These Homemade Pop Tarts
Homemade Strawberry Pop Tarts are such a satisfying upgrade from the boxed version, and honestly, once you try them, there’s no going back. Each bite is a perfect blend of buttery, flaky pastry and that real, vibrant berry flavor.
Whether you eat them straight from the pan or pack a few for a sunny park snack, you’ll find yourself craving these again and again. It’s the kind of treat that never goes out of style, and the small bit of effort pays off big in every jammy, golden, sweet-tart bite.
More Delicious Recipes
- Chickpea Feta Avocado Salad: This refreshing salad offers a perfect balance to the sweetness of pop tarts with its savory flavors and creamy texture.
- Easy Breakfast Quiche: A delicious breakfast option that complements those sweet pop tarts, making for a balanced brunch spread.
- Cranberry Cream Cheese Crescent Bites: These sweet bites share the jammy fruit theme, perfect for those who love fruit-filled treats like pop tarts.
Strawberry Pop Tarts
Ingredients
Equipment
Method
- Combine the flour, salt, and sugar in a bowl. Add the cubed butter and cut into the dry ingredients with a pastry cutter, fork, or your fingers. Continue until the mixture resembles coarse sand and the butter is the size of small peas. Add the cold water a tablespoon at a time, mixing until the dough comes together into a ball. Divide into two and form each into a disk. Wrap in plastic wrap and chill in the fridge for at least 30 minutes.
- Meanwhile, prepare the preserves if making from scratch.
- Put the strawberries, lemon juice and zest, and sugar in a medium sauce pan and set over medium high heat. Stir and mash with a potato masher or large fork and bring to a boil. Boil for about 2-3 minutes until sugar is dissolved and combined with the mashed strawberries.
- Reduce heat to medium low. Continue to simmer for 10-15 minutes until thickened. Add vanilla extract.
- Cool to room temperature before spooning onto the prepared pastry squares. Any leftovers may be stored in the fridge for a few weeks.
- Preheat oven to 375°F and line a baking sheet pan with parchment paper.
- Remove one disk of dough and place on a lightly floured surface. Roll out into a large rectangle about to about 1/8th inch thick. Trim so edges are straight. Cut into 8 5x3-inch rectangles. Repeat with second disk. Gather trimmed dough scraps together and re-roll as needed.
- Spoon 1 ½ tablespoons of the preserves onto the pastry squares and cover with the remaining pastry squares. Press all edges together with your fingers to seal, then use a fork to double seal. Use a toothpick to poke holes in the tops of the pastries. Place on prepared sheet pan 1 inch apart. Brush with egg wash if desired for more color.
- Bake the pop tarts until golden, about 25-30 minutes.
- Cool completely on a wire rack.
- To make the frosting, whisk together powdered sugar and heavy cream/milk to make a thick but pour-able consistency. To make the frosting pink, add a spoonful of remaining strawberry preserves.
- Spread over cooled pop tarts and sprinkle with rainbow sprinkles. Frosting should set up in about 20 minutes, or more quickly if chilled in the fridge.