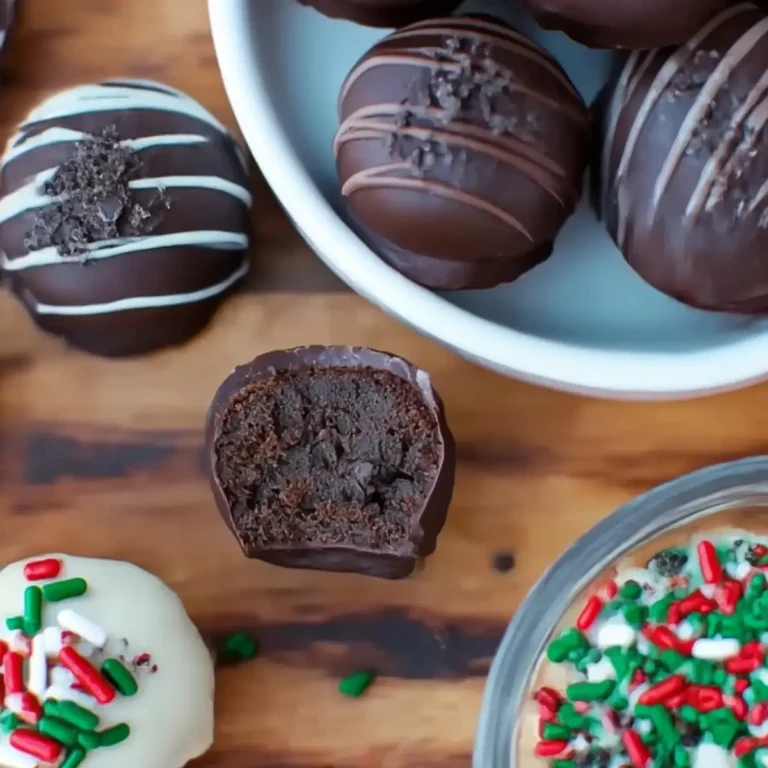
Danish Butter Cookies have always been a sweet tradition in many households. These delicate, buttery treats are a delight with their rich flavor and melt-in-your-mouth texture. Whether you’re relishing them as an afternoon snack or sharing them with loved ones, these cookies bring a taste of indulgence.
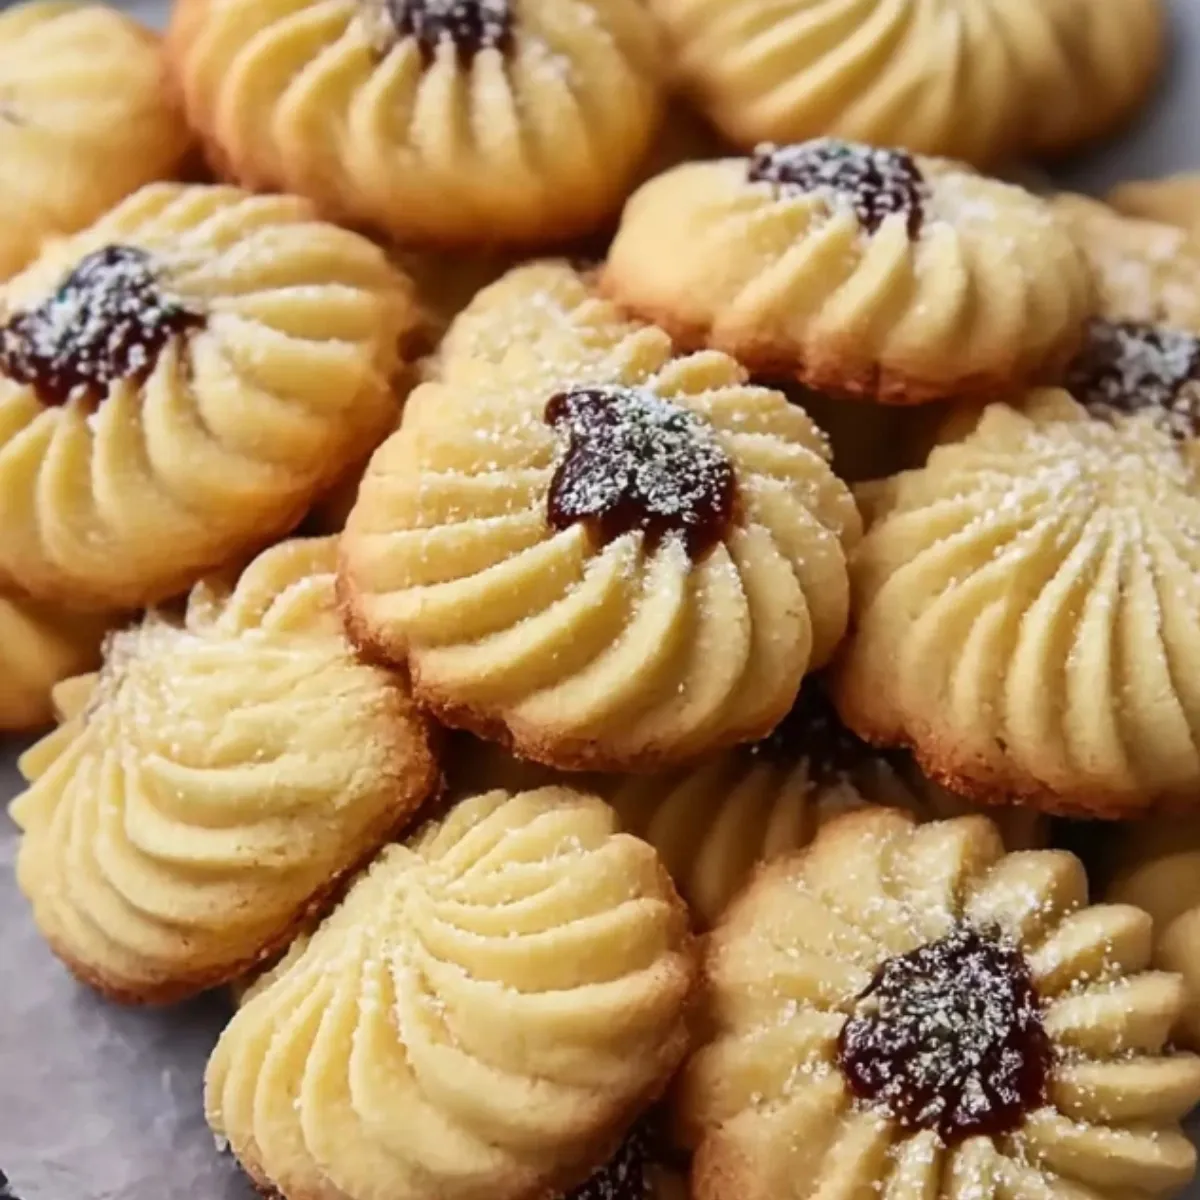
Table of Contents
A unique, recipe-specific section about what makes it great
These Danish Butter Cookies stand out for their simple elegance. Made with just a few basic ingredients, they offer a pure, buttery taste that is universally loved. The cookies are enhanced with a hint of vanilla and finished with a dip in rich chocolate and festive sprinkles, making them a beautiful addition to any cookie plate.
Equipment you’ll use
- Large mixing bowl
- Hand mixer or stand mixer
- Piping bag with a large star tip
- Baking sheet
- Wire rack
- Microwave-safe bowl
Ingredients
- 1 cup unsalted butter, softened to room temperature
- 2/3 cup granulated sugar
- 1 large egg, at room temperature
- 1 teaspoon vanilla extract
- 2 cups all-purpose flour
- 1/4 teaspoon salt
- 2 teaspoons milk
- 3 oz semi-sweet or milk chocolate, chopped
- 3 tablespoons decorative sprinkles
Step-by-step instructions
- In a large mixing bowl, beat the softened butter and sugar together until the mixture turns light and fluffy.
- Add the egg and vanilla extract, and continue to blend until the mixture is smooth and well combined.
- Gradually add the all-purpose flour and salt, mixing on a low setting just until the dough forms.
- Pour in the milk and mix again until the dough is soft yet firm enough to pipe.
- Transfer the dough into a piping bag fitted with a large star-shaped tip.
- Pipe 2-inch swirls directly onto an unlined baking sheet, leaving about 3 inches between each cookie.
- Chill the piped cookies in the refrigerator for about 15 to 20 minutes.
- While the cookies chill, preheat your oven to 350°F (177°C).
- Bake the cookies for around 15 minutes, or until the edges are a light golden brown.
- Let the cookies cool on the baking sheet for approximately 10 minutes before transferring them to a wire rack to cool completely.
- In a microwave-safe bowl, melt the chopped chocolate in 20-second intervals, stirring each time until smooth.
- Dip half of each cooled cookie into the melted chocolate, place on parchment paper, and sprinkle with decorative sprinkles.
- Allow the chocolate to set fully before serving or storing the cookies.
Tips, troubleshooting, and common mistakes
- Butter Softness: Ensure the butter is truly at room temperature for easier mixing. Cold butter won’t blend well, leaving you with lumpy dough.
- Consistency: If your dough is too firm to pipe, add a tiny bit more milk to achieve the right consistency.
- Piping: When piping, maintain even pressure to get consistent shapes.
Pairing ideas and variations
Imagine these cookies alongside a warm cup of tea or hot cocoa. For a citrus twist, try adding a bit of orange zest to the dough. If you’re a nut lover, crushed almonds or pecans can be sprinkled over the chocolate coating.
FAQs about Danish Butter Cookies
Why are Danish Butter Cookies often piped?
Can these cookies be frozen?
What makes Danish Butter Cookies different from other cookies?
Conclusion
Inhaling the aroma of these freshly baked Danish Butter Cookies is a sensory delight. The buttery richness and subtle vanilla intertwine, inviting you to savor each bite. Perfect for sharing at gatherings or simply indulging in a quiet moment, these cookies are a testament to the simple joy of homemade treats. Enjoy them with your favorite hot beverage, and experience the cozy magic they bring.
More Delicious Recipes
- Vanilla Ice Cream: This rich and creamy vanilla ice cream pairs perfectly with cookies for a delightful dessert experience.
- Butter Pecan Cookies: Similar in their buttery flavor and melt-in-your-mouth texture, these cookies are a delicious variation worth trying.
- Peppermint Chocolate Chip Cookies: These festive cookies combine chocolate and mint, offering a modern twist to classic cookie recipes.
Danish Butter Cookies

Danish Butter Cookies have always been a sweet tradition in many households. These delicate, buttery treats are a delight with their rich flavor and melt-in-your-mouth texture. Whether you’re relishing them as an afternoon snack or sharing them with loved ones, these cookies bring a taste of indulgence.
- Prep Time: 15 minutes
- Cook Time: 15 minutes
- Total Time: 30 minutes
Ingredients
- 1 cup unsalted butter, softened to room temperature
- 2/3 cup granulated sugar
- 1 large egg, at room temperature
- 1 teaspoon vanilla extract
- 2 cups all-purpose flour
- 1/4 teaspoon salt
- 2 teaspoons milk
- 3 oz semi-sweet or milk chocolate, chopped
- 3 tablespoons decorative sprinkles
Instructions
- In a large mixing bowl, beat the softened butter and sugar together until the mixture turns light and fluffy.
- Add the egg and vanilla extract, and continue to blend until the mixture is smooth and well combined.
- Gradually add the all-purpose flour and salt, mixing on a low setting just until the dough forms.
- Pour in the milk and mix again until the dough is soft yet firm enough to pipe.
- Transfer the dough into a piping bag fitted with a large star-shaped tip.
- Pipe 2-inch swirls directly onto an unlined baking sheet, leaving about 3 inches between each cookie.
- Chill the piped cookies in the refrigerator for about 15 to 20 minutes.
- While the cookies chill, preheat your oven to 350°F (177°C).
- Bake the cookies for around 15 minutes, or until the edges are a light golden brown.
- Let the cookies cool on the baking sheet for approximately 10 minutes before transferring them to a wire rack to cool completely.
- In a microwave-safe bowl, melt the chopped chocolate in 20-second intervals, stirring each time until smooth.
- Dip half of each cooled cookie into the melted chocolate, place on parchment paper, and sprinkle with decorative sprinkles.
- Allow the chocolate to set fully before serving or storing the cookies.
Notes
- Ensure the butter is truly at room temperature for easier mixing. Cold butter won't blend well, leaving you with lumpy dough.
- If your dough is too firm to pipe, add a tiny bit more milk to achieve the right consistency.
- When piping, maintain even pressure to get consistent shapes.