Some desserts just have a way of making a room go quiet—in the best way. That’s always what happens in my house when I bring out Red Velvet Trifle Cups. There’s something about seeing those deep red cake cubes stacked with swirls of cream cheese filling, topped with snowy clouds of whipped cream, that turns even a weekday evening into a celebration. Each cup promises a few moments of pure indulgence: the light tang of cream cheese, the airy, almost mousse-like crumb of red velvet, and that classic, sweet finish.
The best part? These little trifle cups are both striking and surprisingly easy to pull off. Whether you line them up for a birthday party, pass them around at a cozy holiday gathering, or sneak one out of the fridge as a midnight treat, they never disappoint. My family’s developed quite the radar for them—I can barely keep them in the fridge for more than a day. There’s just something magical about dessert in its own little glass, layered and ready to dig into.
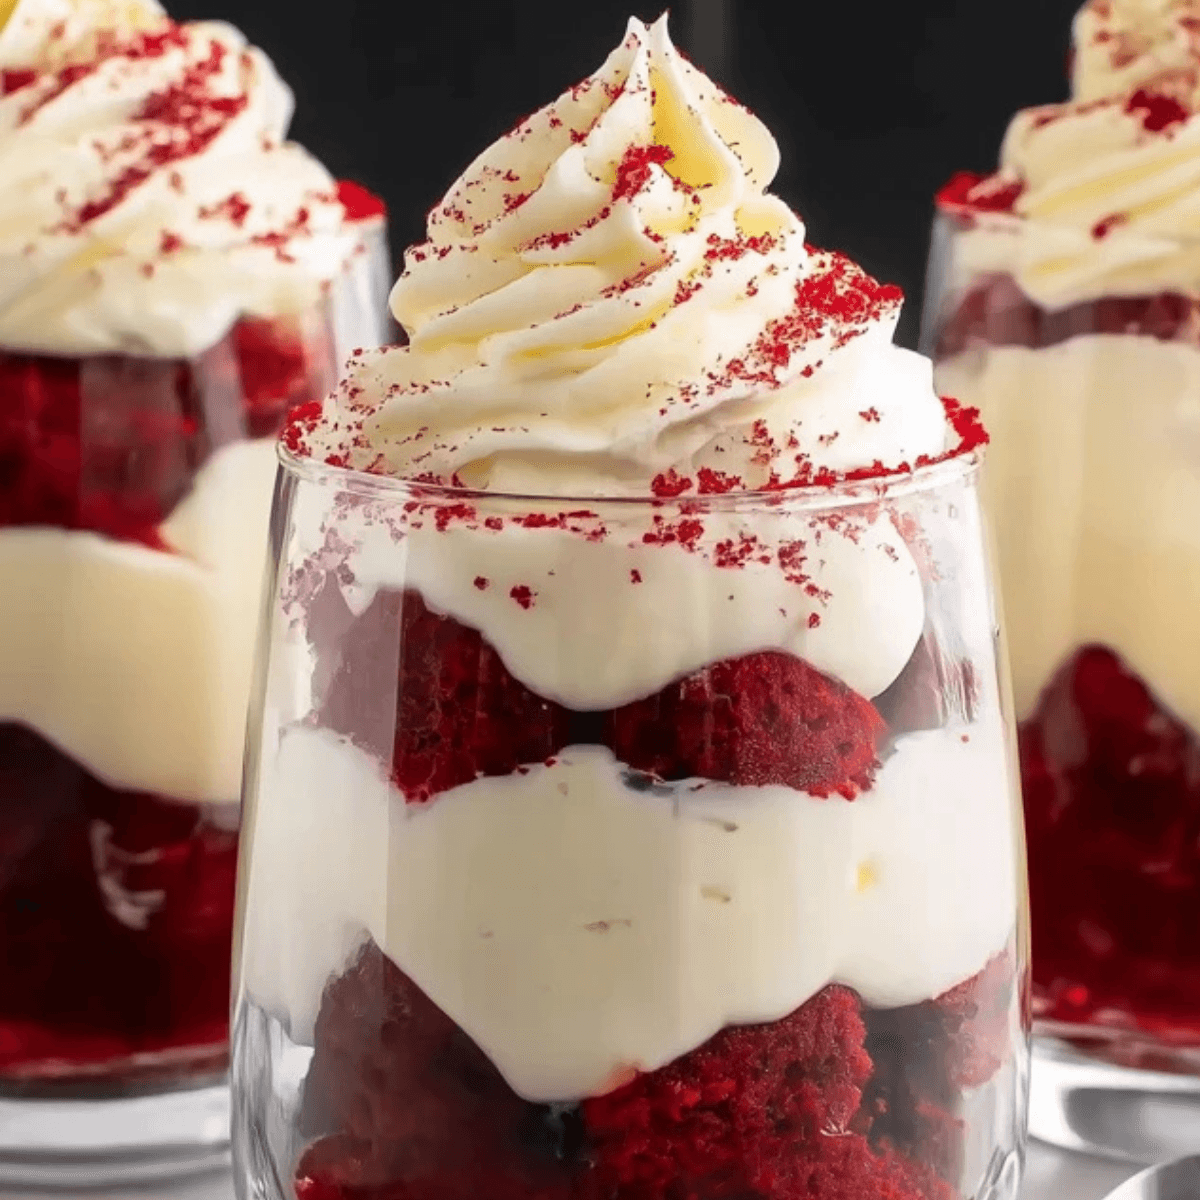
Table of Contents
When Red Velvet Trifle Cups Steal the Show
There’s an unmatched joy in presenting desserts people don’t see every day. Red Velvet Trifle Cups are a little dramatic, a little playful, and always guaranteed to be the focal point on your dessert table. I first started making these for holiday parties, but they quickly found their way into birthdays, baby showers, even the occasional picnic (layer them in jars—trust me, everyone loves it).
What really makes them stand out is how approachable the process feels, even though they look like you’ve spent hours doing something fancy. The contrast of rich red against creamy white is an instant mood-lifter—even the messiest eater ends up admiring their own spoonful before that first, dreamy bite. Pair them with strong coffee or chill rosé, and you’ll see plates scraped, glasses empty, and not a crumb left behind.
The Ingredients That Turn Trifles to Sheer Luxury
If you peeked into my pantry the week before a special event, you’d catch these ingredients waiting for their moment. Each brings its own personality—nothing is wasted, and every bite tells.
- Red velvet cake mix – This shortcut gives us the classic cocoa flavor and deep scarlet color with barely any fuss; a homemade version is always welcome if you’ve got a favorite.
- Instant vanilla pudding mix – Layers on an extra touch of silkiness; it also helps the cream cheese stay light and airy.
- Cold milk – Pulls the pudding together and keeps everything luscious rather than dense or claggy.
- Cream cheese – Softened, it brings the signature tang and rich backbone trifles need.
- Sugar – Sweetens the cream cheese and rounds out the sharp edges without overwhelming the delicate cake flavor.
- Cool Whip – The underrated hero here; it ensures each bite is light, fluffy, and cloud-like. Fold it through the filling and crown the top.
See the recipe card below for the full list of ingredients and measurements.
Building Layers for the Perfect Red Velvet Trifle Cups
I’ve always been a layers person, whether it’s in my outfits or my desserts. With these trifle cups, each step is a little moment of anticipation building up to the grand finale.
Start by preparing the red velvet cake, following your favorite mix or homemade recipe, and let the baked cake cool completely on the counter; if you rush this, your layers might melt into a pinkish swirl, so patience is key here. Once the cake’s cool, slice it into cubes—small enough to layer neatly, but hearty enough to have some weight in the cup. Set a few crumbs aside for a finishing touch.
While the cake cools, whisk together the instant vanilla pudding and cold milk until it thickens up—it only takes a couple minutes, and it’s honestly kind of fun just watching the mixture go from thin to a thick, dreamy consistency.
In a separate bowl, beat the softened cream cheese until it’s truly smooth and billowy. This step transforms the filling from good to great, so don’t skimp on mixing until every little bit is velvety. Slowly add your sugar until no granules remain, then fold the thickened pudding into your cream cheese. If you taste at this point (and you should), it’s going to be tough not to eat half the bowl.
Add a generous scoop of the Cool Whip, gently folding it through to keep everything fluffy. Now comes the best part: layering. In each cup, start with red velvet cubes, followed by a dollop of that creamy filling. Keep alternating until you’re nearly to the rim, finishing with a proud spoonful of cream and a shower of cake crumbs for drama. Pop the assembled cups in the fridge for at least half an hour, or longer if you can wait. That chilling step matters—the layers settle, flavors meld, and the trifle somehow gets even better.
What Happens When Cake Collides with Clouds of Creaminess
Let’s talk about that first bite. There’s the soundless slide of your spoon through whipped topping, then a little resistance from the cake, and finally the cool sweep of cream cheese filling layered beneath. Every mouthful is a blend: a crumbly, chocolatey, faintly tangy cake; a cloud of vanilla cream cheese—almost like cheesecake if it took a nap and woke up lighter; and finally, a sweet finish that’s smooth but never cloying.
What separates Red Velvet Trifle Cups from your classic trifle is the balance. You get all the decadence, but none of the heaviness. Even after a big celebratory meal, there’s always room for one more. Kids love the color (and frankly, so do adults). And because you serve them individually, you avoid the mess of scooping out portions—each cup is a mini celebration, perfectly contained.
Little Tweaks That Take Your Trifles Up a Notch
Over the years, I’ve picked up a few tricks to make sure every trifle shines. If your cake turns out a bit dry (it happens to the best of us), sprinkle a little milk or even coffee over the cubes to bring them back to life. Want to turn up the flavor? Swirl a bit of orange zest or a splash of almond extract into the cream cheese filling. For more texture, layer in some berries—raspberries and blackberries work beautifully.
Not a Cool Whip fan? Use freshly whipped cream, just barely sweetened. If you need a dairy-free version, there are now plenty of plant-based “whipped” toppings and cream cheese alternatives that hold up surprisingly well. Leftovers keep in the fridge for a day or two (though, honestly, I’ve rarely had leftovers).
If you’re prepping these trifle cups ahead, assemble all the layers except the topmost whipped cream and decorations—add those just before serving for the prettiest finish. And if you want them portable, mason jars or lidded containers make transporting them a breeze.
Serving Up Red Velvet Trifle Cups for Every Moment
There’s no wrong time for Red Velvet Trifle Cups. Arrange them in elegant glassware for a holiday feast, or opt for clear plastic cups at a kid’s birthday party—either way, they sparkle at the table. For fancy gatherings, garnish with a few white chocolate curls or a sprig of mint for a subtle nod to dessert artistry.
Want to make them fit the moment? Layer in colored sprinkles for festive flair, a touch of edible glitter for birthdays, or swap the red velvet for chocolate or vanilla cake when you’re craving a twist. They’re just as good eaten curled up on the couch as they are at a sprawling buffet.
If you’re feeling extra playful, let guests build their own: set out bowls of cake cubes, cream filling, and toppings, and watch everyone lean into their own dessert style. You’d be surprised how often grown-ups become kids again around a build-your-own trifle bar.
FAQs about Red Velvet Trifle Cups
Can Red Velvet Trifle Cups be made in advance?
Yes, you can assemble the trifle cups a day ahead. Just keep them covered in the fridge, and wait to add the final whipped cream and garnishes until just before serving. This keeps the textures distinct and the toppings bright.
What’s the best substitute for Cool Whip in these trifle cups?
Freshly whipped cream with a touch of vanilla works beautifully as a substitute for Cool Whip. Just be sure to whip it until soft peaks form so it holds up between the layers and stays dreamy in texture.
Can I freeze Red Velvet Trifle Cups for later?
It’s best not to freeze these cups, since the cream cheese and whipped toppings can separate or become grainy after thawing. They’re at their best freshly made or enjoyed within a couple days of assembling.
How should leftover Red Velvet Trifle Cups be stored?
Keep any leftovers tightly covered in the refrigerator. The layers will stay fresh for about 1–2 days, though the cake may soften further over time. Enjoy them soon for the best combination of textures.
A Sweet Finish with Every Layer
Every time I put together a batch of Red Velvet Trifle Cups, I’m reminded how desserts can transform an everyday moment into something special. The contrast of colors and flavors, the playful layering, and the sheer joy of digging into your own personal dessert always feel like a celebration, no matter the occasion. If you’re ready for a treat that’s part showstopper, part comfort food, and wholly delicious, these trifle cups won’t let you down. Here’s to that unmistakable first spoonful, and to making memories—one creamy, cake-filled cup at a time.
More Delicious Recipes
- Fudgy Red Velvet Brownies: These rich brownies capture the classic red velvet flavor in a chewy, indulgent treat.
- Valentines Day Brownies Delightful Treat: A perfect dessert for sharing, these brownies will melt hearts with their deliciously sweet chocolate flavor.
- Strawberry Tiramisu: This twist on a classic offers light layers of creamy mascarpone and fresh strawberries, making it a delightful dessert option.
Red Velvet Trifle Cups
Ingredients
Equipment
Method
- Preheat the oven and prepare the red velvet cake according to the package instructions in a 9×13-inch pan.
- Once baked, allow the cake to cool completely at room temperature.
- Cut the cooled cake into 1-inch cubes and set aside a few pieces to crumble for topping.
- In a medium bowl, whisk together the instant vanilla pudding mix and cold milk for 2 minutes until thickened. Set aside.
- In another large bowl, beat softened cream cheese with an electric mixer on medium speed for 2–3 minutes until smooth and fluffy.
- Reduce the speed to low and gradually add powdered sugar until fully combined.
- Fold the pudding mixture into the cream cheese mixture until smooth.
- Add 8 oz of Cool Whip to the mixture and gently fold until evenly blended.
- Assemble the trifles by layering red velvet cake cubes and the cream cheese pudding mixture alternately in individual cups.
- Finish with a layer of pudding mixture, top with remaining Cool Whip, and sprinkle with cake crumbs or garnish as desired.
- Refrigerate for at least 30 minutes before serving or until ready to enjoy.