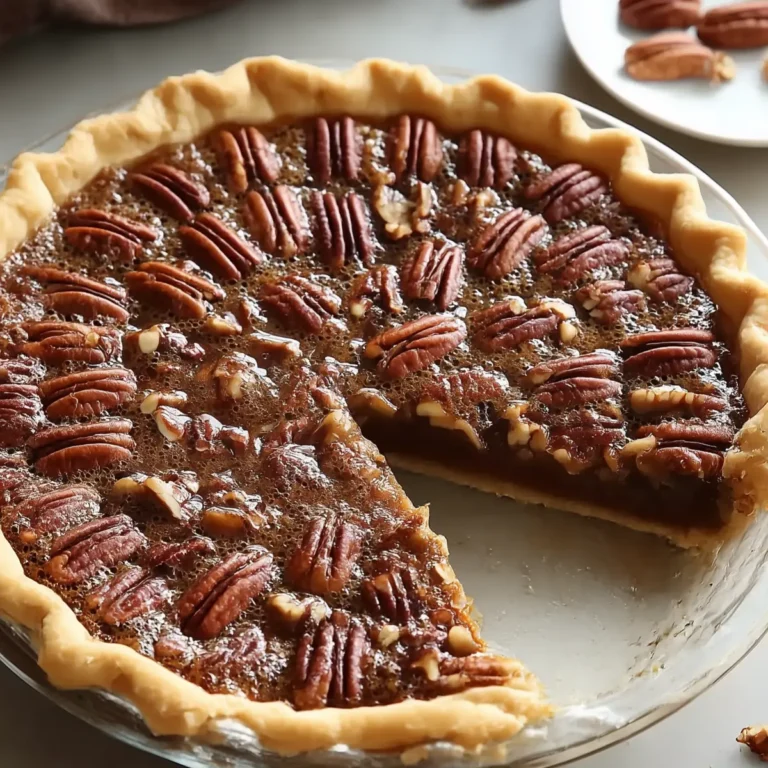
You know you’ve got a winner when the timer dings, the kitchen is filled with the smell of caramelized sugar and butter, and you’re about to pull a tray of Mrs. Welch’s Butter Tarts from the oven. Whether it’s a chilly afternoon or you’re just craving something nostalgic, these gooey, brown sugar-filled pastries are the sort of treat that turns any day into something special. There’s a reason Canadians are fiercely protective of their butter tart traditions—one bite and you’ll get it.
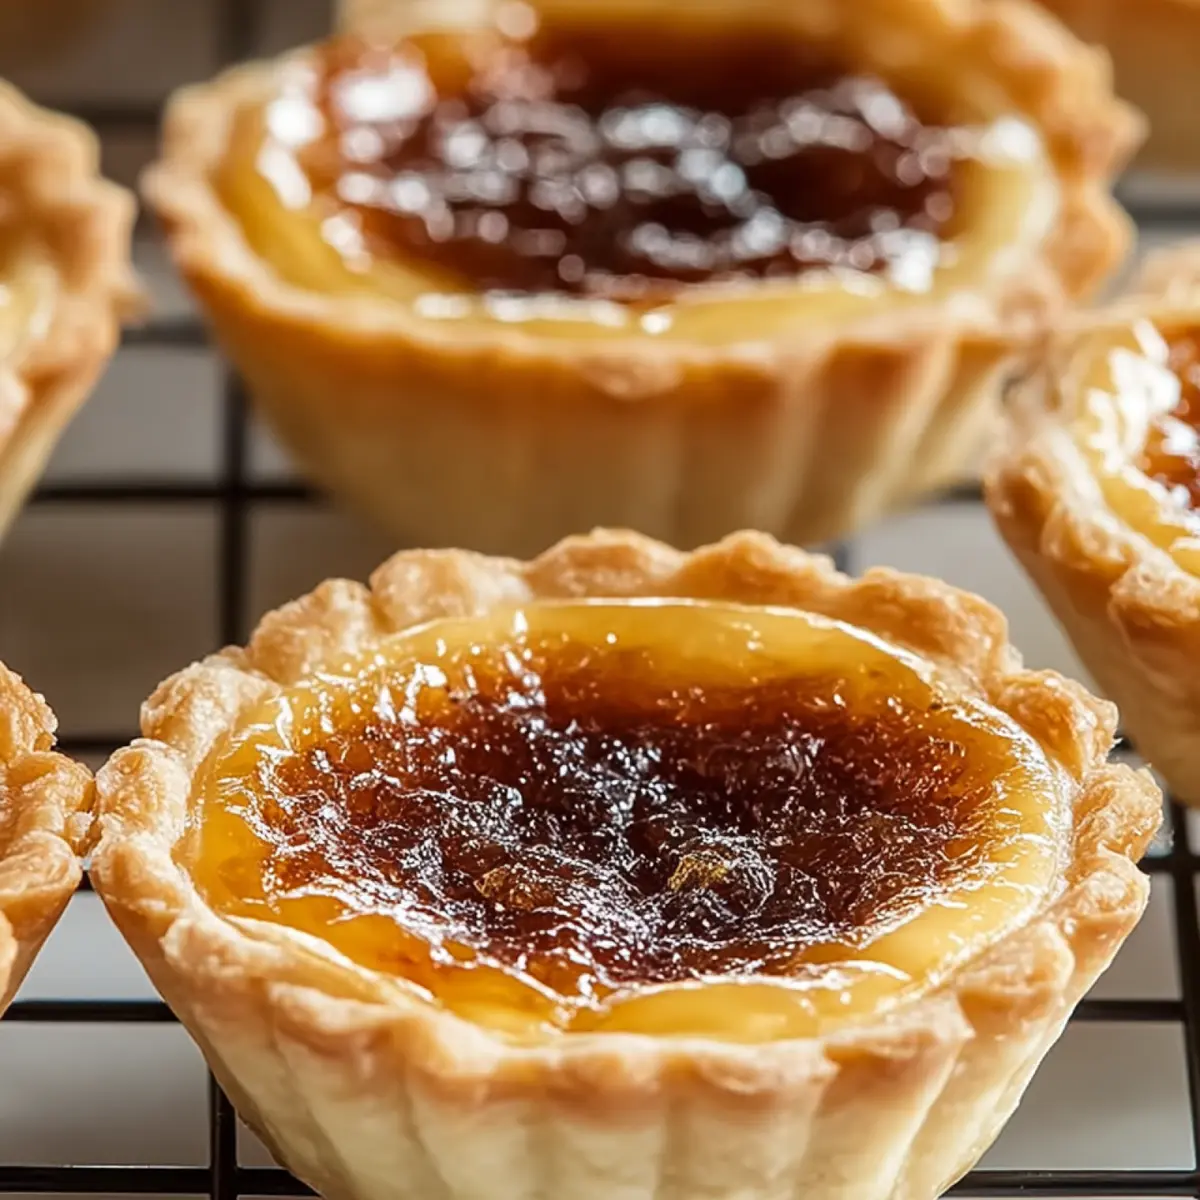
Some desserts are creamy, others crisp, but butter tarts walk a glorious line between flaky-crusted and molten-centered. The combination of rich, buttery pastry and that almost-toffee-like filling is totally irresistible. Honestly, if you’ve never tried Mrs. Welch’s version, you’re in for the ultimate comfort-food ride.
Why Mrs. Welch’s Butter Tarts Are a Family Favorite
Maybe you grew up scooping gooey filling from a tart shell at summer picnics, or maybe you’re just getting curious about what makes a classic Canadian dessert. Either way, Mrs. Welch’s Butter Tarts have an irresistible appeal that stretches across generations. These aren’t just sweet pastries; they’re the kind of thing you sneak off the plate before holiday dinner’s even started.
What makes these tarts really stand out? For starters, the pastry is super flaky and buttery—seriously, it’s the kind that shatters just a little when you bite in. But it’s the filling that keeps you coming back: deeply caramelized, just on the edge between set and runny, with a toasty brown sugar flavor that melts on your tongue. They’re good warm, they’re good cold, and if you’re lucky enough to grab one before someone else does, you’ll probably want another.
These are the tarts you bring to family reunions or bake for late-night treats, knowing full well you’ll have to “taste test” at least two before sharing. It’s that combination of simplicity, nostalgia, and a little bit of messy indulgence that makes Mrs. Welch’s Butter Tarts so beloved.
Simple Ingredients for Irresistible Mrs. Welch’s Butter Tarts
It’s always amazing how a short ingredient list can make something unforgettable. Here are the heroes behind Mrs. Welch’s Butter Tarts:
- flour – Forms the base of the pastry and gives that signature tender crunch. Go for all-purpose for the best texture; whole wheat works in a pinch for a slightly heartier shell.
- Unsalted butter (cold) – Essential for flaky pastry. Cold is key—this keeps the dough light and those layers perfect.
- Brown sugar – Brings complex, caramel notes to the filling. Swap for dark brown sugar if you love things intensely toffee-ish.
- Granulated sugar – Balances sweetness and makes the filling glossy and satiny. It’s what helps the tarts set up just right.
- Large eggs – These bind the filling and create that custardy, gooey middle you dream about in a butter tart.
- Vanilla extract – Adds warmth and rounds out the filling’s flavor. Real vanilla makes all the difference, but use what you have.
- Salt – Just a pinch wakes up all the other flavors and prevents the tarts from tipping into flat sweetness.
See the recipe card below for the full list of ingredients and measurements.
Making Mrs. Welch’s Butter Tarts Step by Step
Ready to make your kitchen smell completely unbelievable? Here’s how to make these classic tarts with a bakery-worthy finish.
- Start by firing up your oven so it’s hot and ready for those pastry shells.
- In a mixing bowl, toss together the flour and cold butter. Rub the butter into the flour with your fingertips or a pastry cutter until the mix looks like coarse sand—little buttery lumps are a good thing. This is what makes the crust flaky.
- Add cold water, just a splash at a time, mixing very gently until your dough holds together. Don’t overwork it! Shape the dough into a flat disk and stash it in the fridge. Letting it chill gives you an extra tender, easy-to-roll pastry.
- Once chilled, roll the dough out on a lightly floured surface until it’s thin but not see-through. Cut out circles with a cookie cutter, glass, or whatever you’ve got handy.
- Press each dough round into a muffin tin, molding them up the sides to form tart shells. If the dough cracks, just pinch it back together—no judgment here.
- In a separate bowl, whisk together the brown sugar, granulated sugar, eggs, vanilla extract, and a pinch of salt until everything’s silky smooth and glossy. The filling should be thick but pourable.
- Spoon or pour that gorgeous filling into your prepared pastry shells. Fill each one about three-quarters full so the filling has room to bubble and rise.
- Bake until the crusts are golden and the centers puff up and look just barely set. You’re aiming for a softly wobbling middle, not a firm custard.
- Let the tarts cool in the tin before removing them. They’ll firm up a bit on standing but stay gloriously gooey in the center.
Tricks for Truly Unforgettable Butter Tarts
If you want Mrs. Welch’s Butter Tarts to come out bakery-beautiful every time, a few easy tricks make all the difference. For the flakiest crust, never skip chilling your dough—rushed pastry tends to bake up tough instead of tender. Don’t be afraid of visible butter specks in the dough; that’s how you get those dreamy, layered shells.
When you mix up the filling, whisk gently so you don’t introduce too much air; you’re after silkiness, not froth. Pouring the filling into the pastry just before baking helps keep the crust delicate. If you ever find your filling bubbles up and leaks over, try filling the pastry a tiny bit less and baking just until the center is barely set—it should jiggle slightly, not slosh.
Let the tarts cool before removing them from the pan (I know, the wait is tough). If you try to pop them out too soon, they’ll likely tear or collapse. To store, keep the tarts in an airtight container; the texture stays best at room temperature for a day or so, then move to the fridge for longer keeping. If you like them slightly warm, a quick stint in a low oven brings them right back to life.
Delicious Ways to Serve or Customize Butter Tarts
Tradition is wonderful, but tarts like these beg for a few creative spins (and extra toppings, if you ask me). Serve Mrs. Welch’s Butter Tarts straight-up on a pretty plate, dusted with a whisper of powdered sugar, or nestled beside fresh berries for a bright and juicy contrast.
If you want to go classic Canadian, add a scoop of vanilla ice cream or a dollop of sweetened whipped cream—the warm-cold combo is pure magic. Around the holidays, I love sprinkling a touch of orange zest or a few dried cranberries into the filling for a festive twist.
For variation, swap in chopped pecans or walnuts for a bit of crunch, or stir a handful of raisins or currants into the filling if you like your tarts chewy (the “raisins or no raisins” debate is serious business—choose your side!). If you’re baking for a crowd, you can double the batch and freeze baked tarts; just thaw at room temperature or warm gently in the oven when you’re ready to serve. These are the sorts of treats that disappear in a flash at brunches, potlucks, or as midnight snacks with a hot coffee.
FAQs about Mrs. Welch’s Butter Tarts
Can you freeze Mrs. Welch’s Butter Tarts?
Absolutely! Once the tarts are completely cooled, arrange them in a single layer in a freezer-safe container. They’ll keep well for a couple of months. Just thaw at room temperature before serving, or gently warm them in a low oven for that fresh-baked feel.
How do I keep the filling from overflowing when baking butter tarts?
Fill each pastry shell only about three-quarters full to give the filling space to puff and set without bubbling over. Also, avoid over-whisking the filling—too much air makes it rise and spill. Chilling the filled tarts for a few minutes before baking can help, too.
Can I swap out the brown sugar in Mrs. Welch’s Butter Tarts for something else?
You can experiment with dark brown sugar for a richer, more robust flavor, or use a mix of honey and molasses for something a bit different. The classic brown sugar gives the best oozy texture, but it’s fun to play around!
What’s the best way to store leftover Mrs. Welch’s Butter Tarts?
Keep any extras in an airtight container at room temperature for up to two days. For longer storage, move them to the fridge. Butter tarts are delicious enjoyed cold, but a gentle reheat in the oven restores their just-baked taste.
The beauty of Mrs. Welch’s Butter Tarts is how they take a handful of kitchen staples and turn them into something special—gooey, golden, and downright addictive. Whether you eat them warm from the oven with your fingers or sneak the last one late at night, these tarts are all about coziness and little moments of joy. Pile them on a platter, share with friends (or not), and let every bite remind you why the classics are always worth revisiting.
More Delicious Recipes
- Classic Canadian Butter Tarts with Raisins: This recipe offers a twist on the traditional butter tart by adding chewy raisins for extra texture and flavor.
- Brownie Bottom Mini Cheesecakes: Combining two beloved desserts into one, these mini cheesecakes have a rich brownie base that complements the creamy filling perfectly.
- Cinnamon Roll Bunnies: These delightful treats are perfect for special occasions and share that comforting sweetness similar to butter tarts.
Mrs. Welch's Butter Tarts
Ingredients
Equipment
Method
- Preheat the oven to 375°F (190°C).
- In a mixing bowl, combine flour and cold butter; mix until crumbly.
- Gradually add cold water until the dough holds together. Shape into a disk and refrigerate for 30 minutes.
- Roll out the chilled dough to about 1/8 inch thick and cut out circles.
- Press circles into muffin pans to form tart shells.
- In another bowl, whisk together brown sugar, granulated sugar, eggs, vanilla extract, and salt until smooth.
- Pour filling into each tart shell and bake for 20-25 minutes until set but slightly wobbly.
- Allow to cool before serving warm.