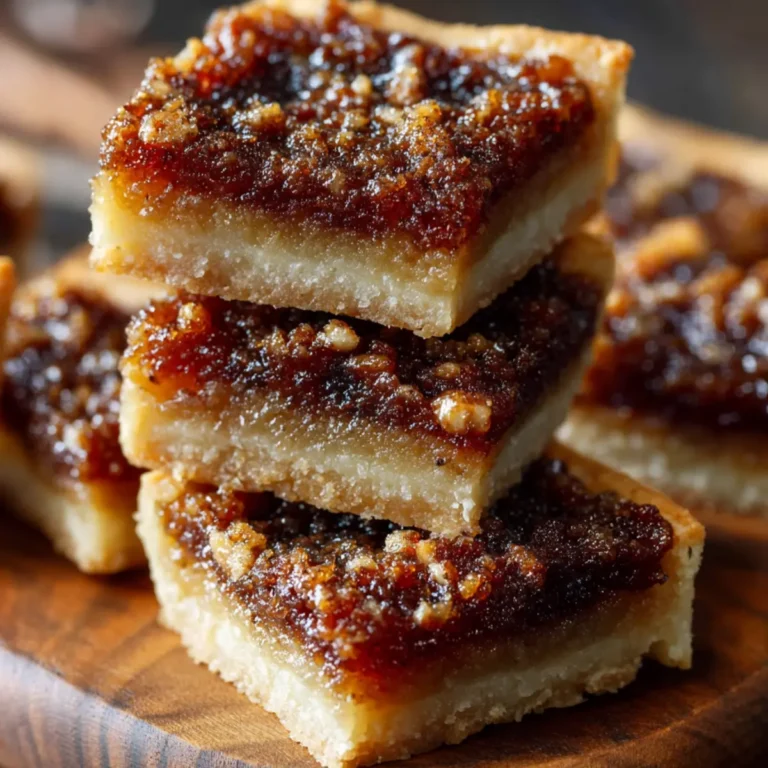
If you love a classic, sweet, and buttery treat, these Butter Tart Squares will hit every nostalgic note. They take everything you adore about the legendary Canadian butter tart—but transform it into fuss-free dessert bars with a crackly, golden top and chewy, gooey filling. No rolling or fussy shells here, just layers of texture and brown sugar caramel richness in each bite.
Whether you’re headed to a holiday gathering, organizing a bake sale, or just craving something wonderfully indulgent with your afternoon coffee, Butter Tart Squares are your shortcut to instant comfort. The crisp shortbread base with its sweet, raisin-studded topping is simple yet impossible to stop at one. Something about the brown sugar bubbling in the oven always reminds me of winter afternoons growing up, when the kitchen would fill with that toasty, almost toffee-like aroma that made everyone drift in, hungry and smiling.
Gear and pans that make these squares a breeze
You won’t need a ton of tools to pull off the magic of Butter Tart Squares—just a few kitchen basics. Here’s what you’ll want within arm’s reach:
- Mixing bowls – For prepping both the crust and the filling.
- Baking pan (20×20 cm) – An 8×8-inch square pan gives you thick, even squares.
- Parchment paper – Ensures the bars lift out easily without sticking.
- Whisk or fork – For blending the filling until smooth.
- Spatula – For spreading layers evenly.
I find having an offset spatula or even the back of a spoon handy for smoothing out that gooey filling before baking.
The building blocks of Butter Tart Squares’ flavor
- Flour – Forms a tender, sturdy base that soaks up the sweet topping perfectly.
- Granulated sugar – Adds subtle sweetness and crunch to the shortbread crust.
- Unsalted butter, cold and cubed – Delivers that rich, toasty flavor and helps create a crisp, melt-in-your-mouth bottom layer.
- Brown sugar, packed – Brings chewy texture and unmistakably deep caramel flavor to the filling.
- Eggs – Bind the gooey topping and create that classic, custardy set.
- Vanilla extract – Rounds out the flavors with warm, aromatic notes.
- White vinegar – Keeps the filling soft and chewy by balancing the sweetness.
- Salt – Just a pinch sharpens all the flavors and steers things from overly sweet to perfectly balanced.
- Raisins – Add pops of chew and nostalgic sweetness in every bite.
See the recipe card below for the full list of ingredients and measurements.
Simple steps to chewy Butter Tart Squares
- Preheat the oven and line your pan. Set your oven to 175°C. Line a 20×20 cm square baking pan with parchment paper, making sure there’s enough overhang to lift the bars out easily when baked.
- Make the shortbread crust. In a bowl, mix together your flour, granulated sugar, and cold cubed butter. Use your fingertips or a pastry cutter to blend until you have a crumbly mixture. The texture should be like coarse sand but will clump if you squeeze it—no wet patches remaining.
- Press and prebake the base. Firmly press your crumb mixture into the bottom of the lined pan, making sure it’s evenly smooth all over—this helps prevent soggy spots later. Bake for 15 minutes, or until just lightly golden at the edges. Remove from the oven and set aside.
- Mix the gooey filling. In a separate bowl, whisk together your brown sugar, eggs, vanilla extract, white vinegar, and salt until completely smooth and slightly frothy. You want no streaks of egg left—just a glossy, even golden mixture.
- Fold in the raisins. Stir the raisins into the sugar-egg mixture so they’re evenly distributed and each bite will have a little chewy pop.
- Assemble and bake. Pour the filling over your warm, prebaked base. Spread gently with a spatula to reach every corner. Pop everything back into the oven and bake for 25–30 minutes. It’s ready when the top is golden, slightly puffed, and the center only jiggles a little if you gently shake the pan.
- Cool, then cut into perfection. Let the pan cool completely on a rack—this helps the filling set and makes slicing so much easier. Once cooled, use the edges of the parchment to lift out the giant square. Slice into 16 neat bars.
Troubleshooting Butter Tart Squares and pro baking tips
- Crust too crumbly? If your shortbread base falls apart, the butter may not have been fully incorporated—or it might’ve needed a firmer press into the pan. Don’t be shy about tamping it down well before baking.
- Filling too runny or loose? Baking time is crucial. If the center still wobbles a lot after 30 minutes, give it a few more minutes and check again—it should be barely set, not liquid. Cooling fully also helps firm up the squares.
- Bars sticking to the pan? Always use parchment paper with enough overhang. This is your best friend when it comes to easy lifting and clean slicing.
- Chewy edges and gooey middle? That’s normal—and delightful! The squares are done when the top is lightly golden. Overbaking can make them dry, so err toward less time if you prefer a gooier center.
- Cutting clean bars? Wait until the squares are fully cooled; a sharp knife will give you tidy edges. If you’re storing them for later, wipe the blade between cuts.
Sweet pairings and flavorful variations to try
These Butter Tart Squares are incredible on their own, but even better when you get a little creative. Here are some pairing and twist ideas:
- Serve with: A hot mug of coffee, black tea, or even alongside a scoop of vanilla or cinnamon ice cream.
- Add a holiday flair: Sprinkle chopped pecans or walnuts over the filling for extra crunch. For festive color, swap half the raisins for dried cranberries.
- Chocolate dream: Scatter mini chocolate chips on top before baking, or swirl in a little melted dark chocolate with the filling for a decadent touch.
- No-raisin option: Not a raisin fan? Simply leave them out—the gooey brown sugar filling is plenty delicious on its own.
- Gluten-friendly swap: Try your favorite 1:1 gluten-free all-purpose blend for the crust—just make sure it’s one that’s meant to sub directly for wheat flour.
- Make it citrusy: Add some orange or lemon zest to the filling for a fresh, zippy finish.
Whether you like yours classic or want to riff, these squares play well with all sorts of flavors and occasions.
FAQs about Butter Tart Squares
Can you freeze Butter Tart Squares?
Yes, Butter Tart Squares freeze beautifully. Once fully cooled, cut them into squares and layer in an airtight container with parchment between layers. Thaw at room temperature for about an hour before serving—they’ll taste just as chewy and delicious as fresh.
How long do Butter Tart Squares last, and how should you store them?
Kept in an airtight container at room temperature, Butter Tart Squares stay fresh for 2–3 days. For longer storage, keep them in the fridge for up to a week, letting them come to room temp before eating for the best texture. The crust stays crisp and the filling keeps its caramel chew.
Can I make Butter Tart Squares without raisins or substitute another fruit?
Absolutely—you can leave out the raisins entirely, or swap in dried cranberries, currants, or chopped dried apricots. The filling is flexible and will shine no matter which mix-ins you use, or if you opt for a smooth, classic version.
The perfect finish to any cozy gathering
There’s something irresistible about the layers in these Butter Tart Squares—the buttery, crisp base giving way to a crackly top and lush, gooey filling. Every bite feels like warmth and nostalgia, sweet enough to make any casual get-together feel special. Let them cool, slice them up, and watch them disappear—one golden, caramelly square at a time.
More Delicious Recipes
- Christmas Coffee: This festive drink pairs perfectly with your Butter Tart Squares for a cozy gathering.
- Cranberry Pecan Cheese Ball: A sweet and savory appetizer that complements the richness of the dessert bars.
- Honey Glazed Carrots and Green Beans: This colorful side dish adds a sweet touch to any festive meal, rounding out your holiday spread.
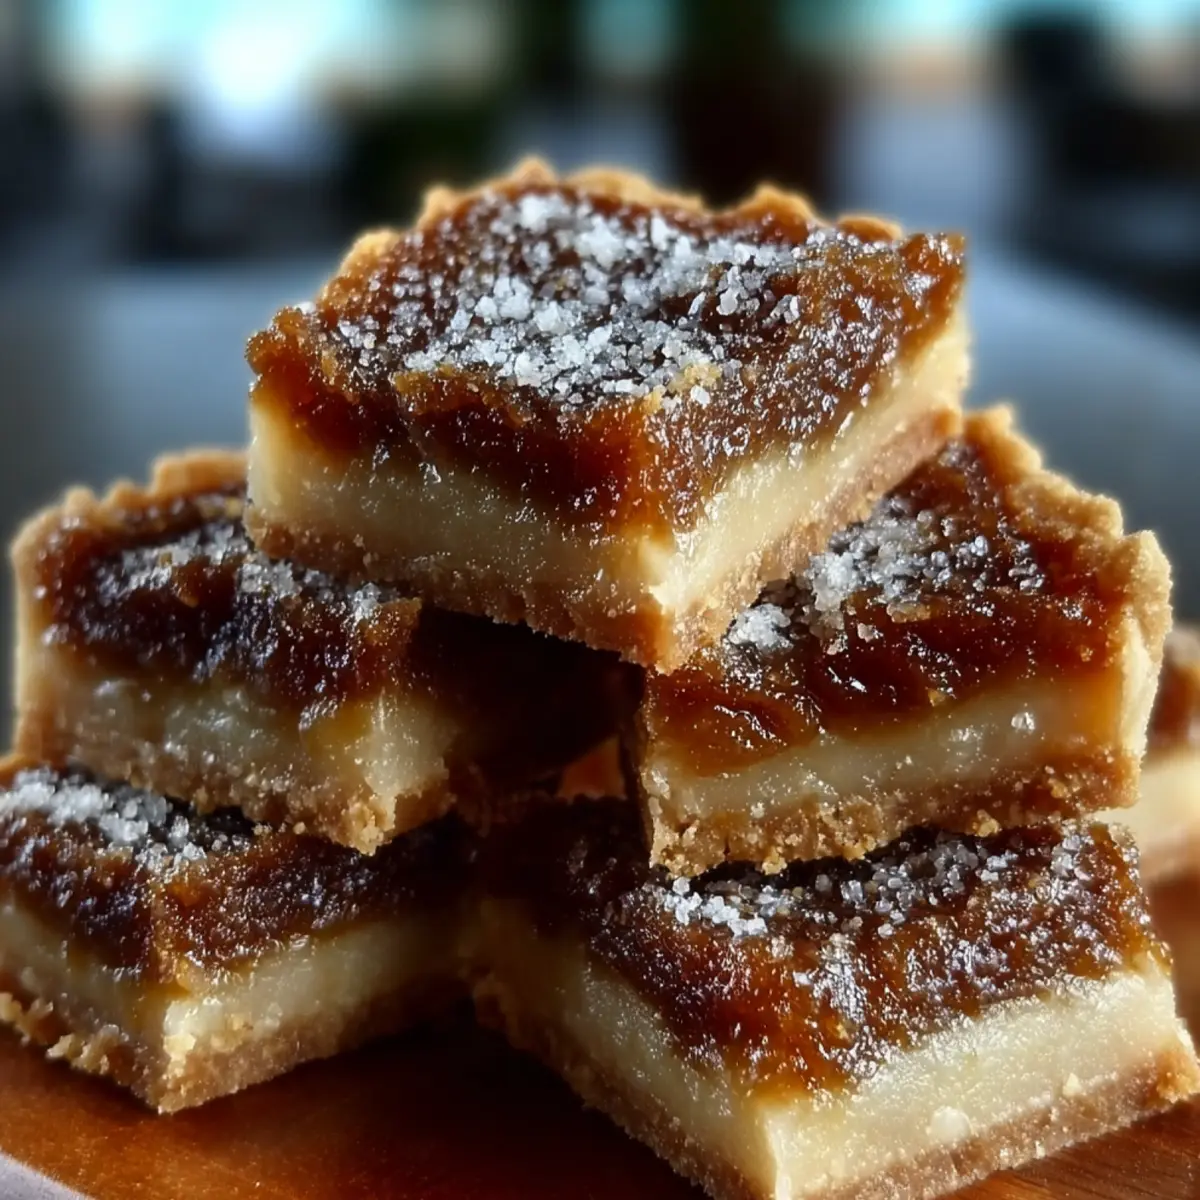

Butter Tart Squares
Ingredients
Equipment
Method
- Preheat your oven to 350°F (175°C). Line an 8x8-inch baking pan with parchment paper.
- In a bowl, mix 1 cup all-purpose flour, 1/4 cup granulated sugar, and 1/2 cup cold cubed butter until crumbly.
- Press crust mixture evenly into the baking pan. Bake for 15 minutes until lightly golden.
- Meanwhile, whisk 1 cup brown sugar, 2 eggs, 1 tsp vanilla, 1 tbsp vinegar, and a pinch of salt until smooth.
- Stir in 1/2 cup raisins.
- Pour filling over the pre-baked crust and spread evenly.
- Bake again for 25–30 minutes until the center is set and top is golden.
- Cool completely in the pan, then lift out using parchment and cut into 16 squares.