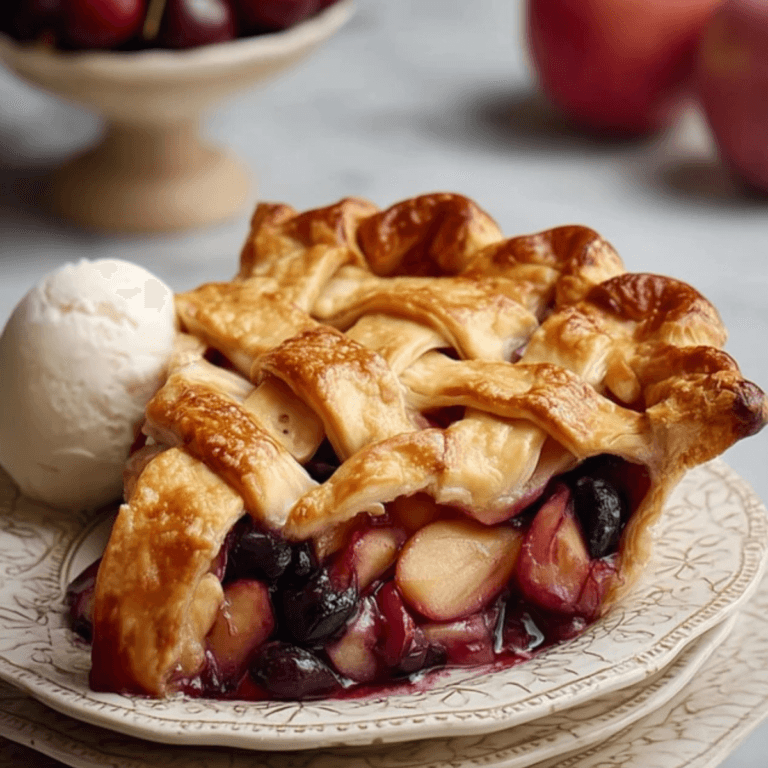
If you’ve ever felt let down by a soupy pie or a flat, flavorless filling, I get it. That craving for a cozy, gooey apple middle with just enough cinnamon and the apples holding their shape? That’s what we’re after. This homemade apple pie filling gives you all the glossy, spiced comfort of a bakery pie but right from your own stovetop—no mixes, no shortcuts, just big homemade flavor.
The aroma of apples and cinnamon simmering away instantly takes over your kitchen. You’re left with a filling that’s sweet-tart, spiced, and thick enough to pile tall in a pie or spoon over morning oats. It’s a simple process, but every bite will remind you why apple pie filling is the real star of so many treats.
Why This Apple Pie Filling Is Extra Special
You know when you slice into a pie and the filling gushes out, more juice than apple, and you think, “Well, that’s a mess?” Not here. This apple pie filling is thick, rich, and the apples stay tender but still hold their shape. It’s everything a classic dessert is supposed to be—but without a laundry list of ingredients or an afternoon lost in the kitchen.
What really makes this filling stand out is just how adaptable it is. Want a pure, nostalgic apple pie? Got it. Need a topping for ice cream, yogurt, or pancakes? This does the trick. Planning ahead for the holidays or meal-prepping breakfast? It’s freezer-friendly and just as tasty thawed as when it’s freshly made. The blend of tart apples, brown sugar caramel vibes, and the scent of cinnamon and nutmeg makes this a recipe you’ll want to make on repeat.
What You Need for Homemade Apple Pie Filling
Let’s break down what goes into this irresistible apple pie filling. Here’s what gives it that classic taste and texture:
- Apples – The heart of the recipe. Go for firm, tart varieties like Granny Smith or Braeburn for a bit of tang and lovely structure as they cook.
- Sugar – Adds sweetness and helps draw out the juices from the apples so that sauce turns glossy and rich.
- Brown sugar – Brings in caramel notes and a touch of moisture, making the filling extra luxurious.
- Lemon juice – Just enough acidity to keep the apples bright and prevent browning while adding a subtle zing.
- Ground cinnamon – The essential warming spice—classic, cozy, and totally necessary.
- Nutmeg – For a whisper of spice and extra depth.
- Salt – A pinch sharpens the other flavors and keeps the sweetness from taking over.
- Cornstarch – The key thickener, giving you that perfect, hearty spoonful (no more runny pie, promise).
- Water – For simmering everything together into a cohesive, silky sauce.
- Unsalted butter – Stirred in at the end for silkiness, flavor, and that glossy finish.
- Vanilla extract – Rounds out the filling with comforting, fragrant warmth.
See the recipe card below for the full list of ingredients and measurements.
How to Make Apple Pie Filling at Home
Ready to fill your kitchen with the scent of bubbling apples and spice? Here’s how to make your best-ever apple pie filling from scratch:
- Start with the apples. Peel, core, and slice them into even pieces. The thinner you slice, the softer your finished filling will be—thicker slices mean more bite. Toss the sliced apples in a bowl with a splash of lemon juice. This keeps them bright and stops browning before they ever hit the pan.
- Mix the dry ingredients. In a separate bowl, whisk together sugar, brown sugar, cinnamon, nutmeg, salt, and cornstarch. This mixture becomes the backbone of your sauce, ensuring it thickens without clumping and carries all that spice evenly.
- Cook up a base. Pour water into a large saucepan and whisk in your dry mixture. Set the heat to medium and keep whisking—soon you’ll see it start to bubble and thicken, and it’ll go from runny to glossy and pudding-like in just a few minutes.
- Add the apples. Stir the apple slices into the hot sauce so they’re well coated. Lower the heat and cook, stirring often. You want the apples just tender—don’t walk away at this point. When the sauce is luscious and clings thickly to the apples but they’re still intact, you’re there.
- Finish with butter and vanilla. Take the pan off the heat and let the residual warmth work for you. Add a generous spoonful of butter and a splash of vanilla. Stir gently until the butter has melted, and everything becomes beautifully silky and fragrant.
- Cool and use (or save for later). Let the filling cool to room temperature before spooning it into your pie crust, layering it in desserts, or stashing it away. It’ll thicken slightly as it sits, making it perfect for spreading, scooping, or even eating by the sneaky spoonful straight from the fridge.
Little Tricks for the Best Apple Pie Filling
If you want that picture-perfect, bakery-style apple pie filling every single time, keep these practical tips in mind. First up: don’t skimp on the cornstarch. It’s what stands between you and a soggy pie base, so make sure it’s fully whisked in and heated until the sauce really thickens.
For apples, variety matters—a mix of tart (Granny Smith) and sweet (Honeycrisp, Braeburn) is a great way to get different textures and flavors without much fuss. Slice your apples evenly so they cook at the same rate; nobody wants some pieces mushy and others crunchy.
If your filling looks too thick, stir in a drizzle of water—just a little, since you want a robust, not runny, sauce. Too thin? Let it bubble gently a bit longer and it’ll naturally thicken up. If you plan to freeze your filling, be sure to cool it completely first, then store it in an airtight container or freezer bag. It keeps beautifully and is a real lifesaver for spontaneous desserts.
One last tip: let the filling cool before using it in pie unless you’re a fan of soggy pastry! Warm filling can melt your pie crust’s fat, leaving it dense rather than flaky.
Serving Ideas and Tasty Twists for Apple Pie Filling
This apple pie filling is more than just a pie ingredient—it’s your ticket to easy desserts and breakfast upgrades all week. Spoon it hot or cold onto pancakes, waffles, French toast, or thick, creamy Greek yogurt for a quick breakfast treat. Layer it into a parfait with granola or swirl it into your morning oatmeal for autumn vibes any time of year.
Want to go classic? Pile it high in a flaky pie crust, and bake until golden and bubbly. It’s also perfect for rustic apple galettes or folded into hand pies if you want something grab-and-go.
To dress things up, add a splash of spiced rum or bourbon to the filling just before finishing with butter and vanilla—especially cozy for holiday desserts. Craving a summer twist? Stir through a handful of raspberries or blueberries in the last minute of cooking.
For a family-friendly tweak, skip extra spices for just cinnamon, or keep it as is for that bakery-shop flavor. Best of all, this filling freezes perfectly—stash extra away, and you’ll be grateful every time you want something comforting in a hurry.
FAQs about Apple Pie Filling
How long can I store homemade apple pie filling?
Homemade apple pie filling keeps fresh in the fridge for several days when stored in a sealed container. For longer storage, freeze it airtight, and it will stay good for a couple of months. Just defrost overnight in the fridge when you’re ready to use it.
Can I freeze apple pie filling for later?
Absolutely, this apple pie filling is freezer-friendly. Let it cool completely before transferring to a freezer bag or container. It’s perfect for prepping ahead—just thaw in the fridge, stir gently, and use as you like.
Which apples work best in apple pie filling?
Firm, tart apples like Granny Smith or Braeburn hold their shape and deliver that lovely sweet-tart balance. Mixing varieties brings extra depth—just avoid softer apples, which can go mushy too fast.
Can I swap cornstarch for another thickener?
If you’re out of cornstarch, potato starch is a solid backup, or try using arrowroot for a glossy finish. Flour can work in a pinch, but the sauce might look more cloudy and the texture will be less silky.
There’s just something timeless about a spoonful of homemade apple pie filling warming your hands—or cooling on a scoop of vanilla ice cream. The gloss of the sauce, the tart bite of apple, that scent of cinnamon and vanilla—it all means comfort and celebration, big or small. The next time you want to bring a little bakery romance to your kitchen, keep this apple pie filling on hand. However you serve it—cradled in golden pastry or simply swirled into breakfast—it’s classic, cozy, and thoroughly satisfying.
More Tasty Ideas
- Irish Apple Cake with Custard Sauce: This recipe features apples as a main ingredient, making it a delightful twist on apple pie that’s perfect for cozy gatherings.
- Cinnamon Sugar French Toast Muffins: These muffins incorporate delicious cinnamon flavors reminiscent of apple pie, enhancing your breakfast with a touch of sweetness.
- Strawberry Cheesecake Ice Cream: While different in flavor, this dessert offers a creamy, decadent treat perfect for topping with your homemade apple pie filling.

Best Apple Pie Filling
Ingredients
Equipment
Method
- Peel, core, and slice 6 cups of apples (about 6 medium apples). Toss with 2 tablespoons fresh lemon juice in a large bowl.
- In a separate bowl, whisk together 3/4 cup granulated sugar, 1/4 cup packed brown sugar, 2 teaspoons ground cinnamon, 1/4 teaspoon ground nutmeg, 1/4 teaspoon salt, and 1/4 cup cornstarch.
- In a large saucepan, combine 3/4 cup water and the dry ingredient mixture. Whisk until smooth. Cook over medium heat, stirring, until thickened and bubbly (about 3–4 minutes).
- Add apples to the pan, stirring to coat. Reduce heat to medium-low and cook, stirring often, for 8–10 minutes until apples are just tender and sauce is glossy and thick.
- Remove from heat. Stir in 2 tablespoons unsalted butter and 1 teaspoon vanilla extract until the butter melts and the filling is silky.
- Let cool to room temperature. Use in pies, desserts, or transfer to jars for storage in the fridge (up to 5 days) or freezer (up to 3 months).