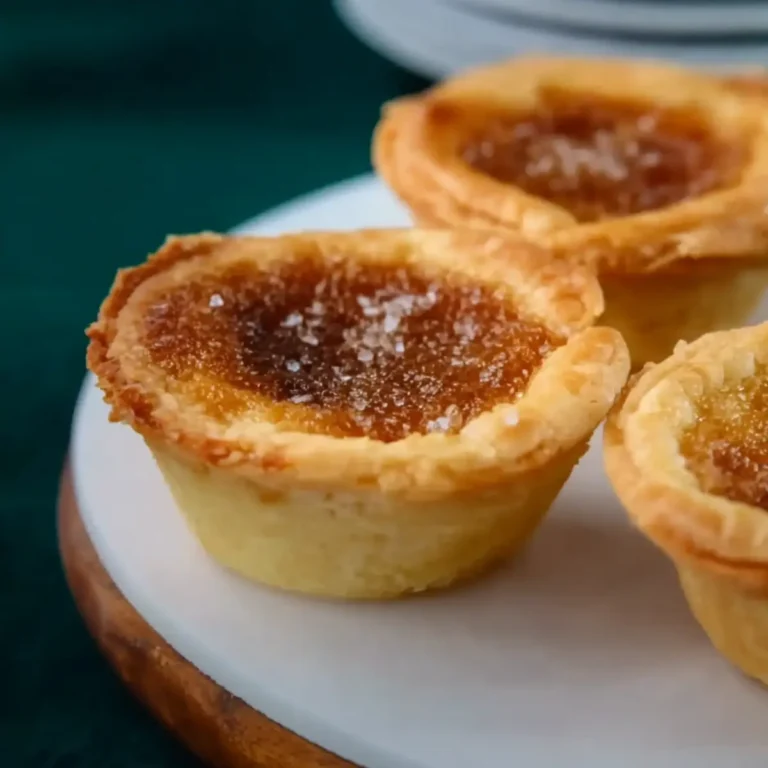
If you’re craving a nostalgic Canadian treat, nothing hits the spot quite like a good butter tart. These tarts are famous for their gooey, caramel-like filling tucked inside tender shells—quick to make, deeply satisfying, and totally crave-worthy. Whether you’re on team raisin or pecan (or just all about that syrupy center), this butter tart recipe could easily become your new go-to.
Honestly, handfuls of warm butter tarts cooling on the counter always remind me of holidays at my grandma’s: sticky fingers, laughter in the kitchen, that sweet smell drifting through the house. Let’s jump right in—you’re closer than you think to fresh-baked butter tarts that everyone will love.
Easy tools for Canadian-style butter tarts
You really don’t need much to whip up a batch of classic butter tarts. Here’s all you’ll want handy:
- Mixing bowl – The place where the gooey magic happens as everything comes together.
- Whisk – For beating your mixture until it’s smooth and well-blended.
- Oven – Essential for baking those gorgeous tart shells to golden perfection.
- Cooling rack – Helps your tarts set just right as they cool, keeping the bottoms crisp.
Simple ingredients that make butter tarts irresistible
- butter – Brings richness and a melt-in-your-mouth texture to every bite.
- brown sugar – The secret to the caramel-like depth in the filling.
- eggs (slightly beaten) – Bind the filling, giving it structure while keeping it lusciously soft.
- cream – Adds silkiness and a touch of luxury to the goo.
- vinegar – A dash sharpens the sweetness and keeps the filling bright.
- raisins (or substitute finely chopped pecans) – Choose raisins for a chewy burst or pecans for a nutty crunch—either way, it’s classic.
- tart shells – Store-bought makes this recipe fast, or go homemade if you love rolling out pastry.
See the recipe card below for the full list of ingredients and measurements.
From empty shells to gooey glory: Butter tart method made simple
- Preheat your oven to 190°C so it’s ready to bake the tarts until golden and beautifully set.
- Drop a few raisins or chopped pecans into each empty tart shell, spreading them out so every tart will have a pleasant surprise inside.
- In a mixing bowl, add the butter, then the brown sugar, eggs, and cream—do this in the order listed for the silkiest base. Whisk it together until the mixture turns glossy and unified. Finally, pour in the vinegar and give it one last good whisk. You want the filling to look smooth with no streaks of egg or sugar.
- Pour the prepared filling into the tart shells until they’re about two-thirds full. This will give the sweetness room to bubble up as it bakes without overflowing. You might hear a satisfying plop as the thick mixture lands among the raisins or pecans.
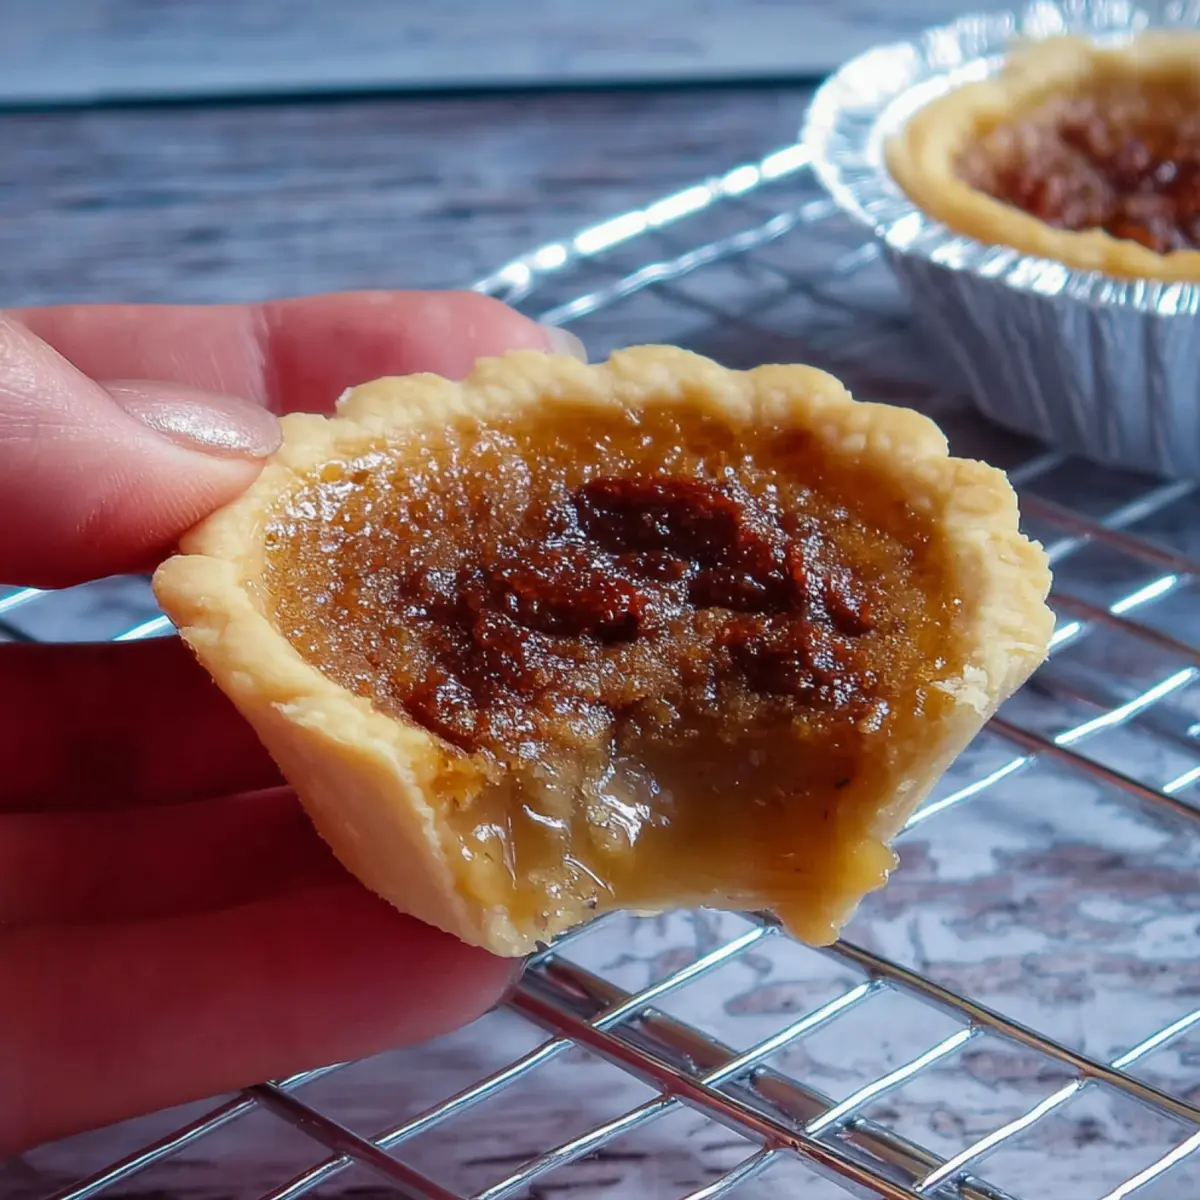
- Bake for 12–14 minutes, watching for the moment when the tops darken just a little and the filling looks set but slightly wobbly in the middle. The crusts should turn a pale gold.
- Remove from the oven and place the tarts on a wire rack. Let them cool for about 10 minutes as the filling settles to that signature gooey (but not runny) consistency. Their scent will fill your kitchen—rich, buttery, utterly tempting.
Tips, troubleshooting, and common mistakes for butter tarts
Butter tarts are forgiving, but a little insider know-how keeps them perfect every time:
- Don’t overfill the shells – Filling more than two-thirds full risks sugary overflow and tough edges.
- If your filling separates or looks grainy, make sure to add the ingredients in the listed order and always whisk thoroughly for that silky texture.
- Crust trouble? Store-bought shells are a time-saver, but if they start to brown too quickly, loosely tent your tray with foil for the last few minutes of baking.
- For a gooey (not runny) center, pull the tarts from the oven when just set—they’ll continue to firm up as they cool on the rack.
- Do the shells stick? Make sure tarts cool for at least 10 minutes before moving to avoid tearing delicate pastry.
And always use a whisk for mixing—it’s the best way to smooth everything together without flecks of unmixed egg or sugar.
Butter tart pairing ideas and delicious variations
Butter tarts are sweet enough to shine alone, but here’s how to make them the star of a dessert spread:
- Pair them with strong, hot coffee or a pot of black tea—the flavors meet in a perfect sweet-bitter balance.
- Add a scoop of vanilla ice cream and watch the warm tart filling turn creamy and dreamy. (If you have leftover filling, try swirling it into homemade ice cream—pure bliss.)
- A bowl of fresh berries brings a tart counterpoint, cutting through the richness.
- Try making some with raisins and some with pecans. Nut-lovers might even go for walnuts or leave out the add-ins for pure gooeyness.
- If you want to really make these festive, add a pinch of cinnamon or a drizzle of maple syrup in the filling for seasonal warmth.
- Make them mini for parties or snack boxes—the recipe is easily scaled up or down.
Butter tarts are just as perfect after a cozy Sunday dinner as they are on a holiday buffet—adapt them to fit your sweet tooth and occasion.
FAQs about Butter Tart
How do I store leftover butter tarts to keep them fresh?
Let your butter tarts cool completely, then store them in an airtight container at room temperature for up to two days. For longer storage, keep them in the fridge for up to a week. Just let them return to room temperature or give a gentle reheat before serving for that fresh-from-the-oven texture.
Can I freeze butter tarts, and how should I thaw them?
Yes, butter tarts freeze well! Place cooled tarts in a single layer in a freezer-safe container, separating layers with parchment if stacking. Freeze for up to three months. Thaw at room temperature or gently warm in a low oven to revive their gooey center.
Is it okay to swap raisins for pecans or go without add-ins?
Absolutely. If you’re team pecan, use them in place of raisins for a nutty crunch, or leave out both for a pure gooey-butter experience. You can even get creative with walnuts, dried cranberries, or chocolate chips—it’s all about what you like best in your butter tart.
The final word on ooey gooey butter tarts
There’s just something undeniably comforting about a butter tart: the flaky crust, the irresistibly sticky center, and that sweet aroma filling your kitchen as they cool. Every bite is a little celebration of nostalgia, indulgence, and simple Canadian joy. Make a batch today, and share them with friends or family—your kitchen will be filled with the warmth that only a classic butter tart can bring.
More Delicious Recipes
- Classic Canadian Butter Tarts with Raisins: This recipe features the same beloved Canadian treat but with raisins for a chewy burst in each bite.
- Brownie Bottom Mini Cheesecakes: A rich dessert that combines creamy cheesecake on a fudgy brownie base, perfect for anyone who loves sweet treats.
- Soft Chewy Lemon Cookies: These cookies offer a citrusy twist, balancing sweetness and tartness, making them a delightful pairing with any dessert spread.
📋 Best Butter Tart Recipe
Ingredients
Equipment
Method
- Preheat oven to 375 degrees F/190 degrees C.
- Place a few raisins or chopped pecans in unbaked tarts shells.
- Mix ingredients in large bowl, in order given (butter, brown sugar, eggs, cream). Then add vinegar last. *It's important that you add in order given.
- Whisk until well combined. * A whisk should be used for this part, although I don't have that in the photo.
- Pour filling in to tart shell to 2/3 full. *If you find yourself with leftover butter tart filling, use the leftovers in this Butter Tart Ice Cream Recipe! In fact, you'll want to double the filling in this recipe just so you'll have leftovers to make this ice cream 🙂 Yes, it's that good!
- Bake for 12-14 minutes or until filling is set and shells are lightly browned.
- Cool on cooling rack for 10 minutes.