There’s something unmistakably magical about the holiday season. The twinkling lights, the scent of pine, the sound of festive music—each detail plays its part. But if there’s one tradition that blends comfort, creativity, and childhood wonder into a single bite, it’s the art of baking candy cane cookies. These peppermint-twisted treats are more than just another dessert; they’re a celebration of everything warm, joyful, and nostalgic about the holidays.
Whether you’re a first-time baker or a seasoned cookie swap champion, this guide walks you through everything you need to know to create the perfect batch of candy cane cookies. Along the way, you’ll learn essential baking techniques, creative twists, storage tips, and answers to the most common cookie-making questions—all while naturally incorporating key elements to help this recipe stand out in both your kitchen and search engine rankings.

Table of Contents
The Magic of Candy Cane Cookies – More Than Just a Treat
Holiday baking isn’t about achieving culinary perfection. It’s about embracing the imperfections that come with memories made in flour-dusted kitchens. Maybe your candy canes turn out more like peppermint snakes, or perhaps the coloring doesn’t swirl quite right. That’s okay. What matters most is the experience—rolling dough beside your kids, laughing with friends, and stealing warm cookies from the tray while the house fills with the unmistakable scent of peppermint and vanilla.
Candy cane cookies have that rare ability to transport you. One whiff and you’re back to childhood winters, pressing your nose against frosted windows or sneaking another cookie while no one’s watching. And the best part? They’re simple enough for beginners, yet charming enough to impress anyone lucky enough to receive a batch.
Candy Cane Cookies Recipe – Ingredients You’ll Need
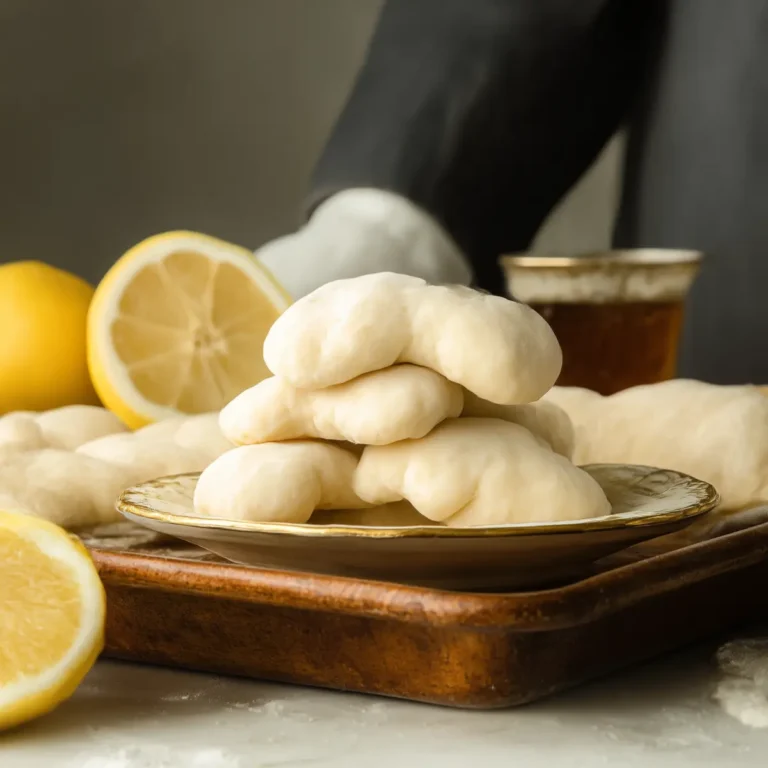
Crafting these cookies requires a few pantry staples and a little creativity. The base is a buttery sugar cookie dough, subtly flavored with peppermint and twisted into the iconic red-and-white shape.
Essential Ingredients
To get started, gather the following:
- 1 cup unsalted butter, softened (helps control salt levels)
- 1 cup powdered sugar (creates a soft, melt-in-your-mouth texture)
- 1 large egg (room temperature for better incorporation)
- 1 teaspoon vanilla extract (or almond for a nutty variation)
- ½ teaspoon peppermint extract (adjust to taste)
- 2½ cups all-purpose flour (spooned and leveled for accuracy)
- ½ teaspoon salt (balances sweetness)
- Red gel food coloring (produces vibrant color without excess liquid)
Substitution Tips & Variations
- No peppermint? Try almond extract for a warm, nutty flavor.
- Avoiding dyes? Beet powder mixed with water makes a great natural red coloring.
- Gluten-free option: Use a 1:1 gluten-free flour blend with ¼ tsp xanthan gum.
- Vegan-friendly version: Substitute with vegan butter and a flax egg (1 tbsp ground flaxseed + 3 tbsp water).
The beauty of this dough lies in its flexibility. It’s forgiving, adaptable, and perfect for shaping into something uniquely yours.
How to Make Candy Cane Cookies – Step-by-Step Baking Guide
Mastering the process is simple once you break it down into clear, manageable steps. Follow this guide for consistent, charming results every time.
Prepping the Dough
- Preheat your oven to 375°F (190°C). Line baking sheets with parchment paper for even baking and easy cleanup.
- Cream the butter and powdered sugar together until light and fluffy—this should take about 3 to 4 minutes with a stand or hand mixer.
- Add the egg, vanilla, and peppermint extracts. Mix until just combined. Overmixing here can toughen the dough.
- Gradually incorporate the flour and salt into the wet ingredients. Start on low speed to avoid a flour cloud. The dough should be soft, pliable, and not sticky. If it’s too dry, add a teaspoon of milk. Too wet? Add flour in small amounts.
Coloring and Shaping the Dough
- Divide the dough in half. Leave one half plain and tint the other red using gel food coloring. Start with 5 drops and add more for deeper color.
- Roll 1 teaspoon of each dough color into 4-inch ropes. Twist one white and one red rope together, then gently curve the top to form a candy cane shape.
- Chill shaped cookies for 10 minutes before baking if the dough feels soft. This helps maintain their structure in the oven.
Baking and Cooling
- Bake for 8–10 minutes. Look for lightly golden bottoms; the tops should remain pale.
- Let cookies cool on the baking sheet for 5 minutes before transferring to a wire rack. This prevents breakage and ensures a crisp bottom.
Festive Finishing Touches & Presentation Ideas
The presentation of your candy cane cookies is as much a part of the experience as the baking itself. Here are several ways to elevate your cookie game:
- Dust with powdered sugar for a snowy, wintery finish.
- Dip half of each cookie in melted white chocolate, then sprinkle with crushed candy canes.
- Stack cookies in a mason jar, tie a ribbon around the lid, and tuck in a handwritten tag for a heartfelt homemade gift.
- Serve on a vintage holiday tray for a nostalgic feel that complements their old-fashioned charm.
- Pair with hot cocoa—peppermint schnapps optional—for a cozy evening treat.
Remember, the little details transform these cookies from everyday bakes to festive delights.
5 Delicious Twists on the Classic Candy Cane Cookie
While the traditional version holds its own, you can easily switch things up to keep the holiday baking exciting. Try these creative variations:
- Chocolate Swirl – Mix 2 tablespoons of cocoa powder into one half of the dough for a chocolate-mint combo.
- Gluten-Free Joy – Use gluten-free flour with a pinch of xanthan gum to retain structure and softness.
- Peppermint Bark – Dip cooled cookies in dark chocolate and sprinkle with crushed candy canes.
- Almond-Cherry – Replace peppermint with almond extract and fold in finely chopped maraschino cherries.
- Vegan Vibes – Use dairy-free butter and a flax egg substitute without sacrificing flavor or texture.
These ideas allow you to tailor the recipe to different dietary needs or taste preferences without losing that festive charm.
Candy Cane Cookie FAQ
Why did my candy cane cookie dough turn out too crumbly?
If your dough falls apart, it’s likely too dry or overmixed. Add 1 to 2 teaspoons of milk to loosen it up. You can also let the dough rest for 10 minutes, allowing the flour to absorb moisture evenly.
How do I keep the red and white colors from bleeding together?
Using gel food coloring instead of liquid helps maintain clean, defined colors. If you’re using a liquid dye, blot the dough gently with a paper towel before shaping to remove excess moisture.
Can I make candy cane cookies in advance?
Absolutely. You can refrigerate the dough for up to 3 days or freeze unbaked dough ropes for up to 3 months. Once baked, the cookies can be stored in an airtight container or frozen for several weeks without losing flavor or texture.
Conclusion
Candy cane cookies are more than a festive dessert—they’re an invitation to slow down, gather with loved ones, and embrace the spirit of the season. Each batch holds the potential to become a memory: the lopsided twist that made your child laugh, the scent that reminded you of grandma’s kitchen, or the gift that brought joy to a neighbor’s doorstep.
So roll up your sleeves, preheat your oven, and let your creativity guide you. Whether you’re baking solo, with little helpers, or hosting a cookie swap, these peppermint-swirled delights promise to bring warmth, cheer, and a touch of magic to your holidays.
Start a new tradition or revive an old one—just don’t forget to save one for yourself. Because when the last bite is gone, it’s not just the cookie you’ll remember. It’s the feeling it left behind.
More Tasty Ideas
- Grinch Sugar Cookies: These festive green sugar cookies bring a whimsical holiday touch with their bold color and sweet vanilla flavor. Perfect for themed parties or family movie nights, they’re playful in design and rich in buttery sweetness, making them a cheerful companion to your candy cane cookie batch.
- Snowball Oreo Cookie Balls: These no-bake treats blend crushed Oreos with cream cheese, then coat them in white chocolate for a snowy finish. Their rich, creamy interior and wintery appearance make them a delightful addition to any holiday cookie tray alongside your candy cane creations.
- Salted Peppermint Bark: Combining dark and white chocolate with crushed peppermint and a hint of sea salt, this bark delivers a sweet and minty crunch in every bite. It’s a flavor match for candy cane cookies and a perfect option for holiday snacking or gifting.
Candy Cane Cookies

Festive and fun, these candy cane cookies are a nostalgic holiday treat with a buttery vanilla and peppermint flavor, shaped into charming red and white twists. Perfect for cookie swaps, gifting, or cozy family baking sessions.
- Prep Time: 20 minutes
- Cook Time: 10 minutes
- Total Time: 30 minutes
- Yield: Approximately 24 cookies
- Category: Dessert
- Method: Baking
- Cuisine: American
- Diet: Vegetarian
Ingredients
- 1 cup unsalted butter, softened
- 1 cup powdered sugar
- 1 large egg, room temperature
- 1 tsp vanilla extract
- 1/2 tsp peppermint extract
- 2 1/2 cups all-purpose flour
- 1/2 tsp salt
- Red gel food coloring
Instructions
- Preheat oven to 375°F (190°C) and line baking sheets with parchment paper.
- In a large bowl, cream the butter and powdered sugar together for 3–4 minutes until light and fluffy.
- Add the egg, vanilla extract, and peppermint extract; mix until just combined.
- Gradually mix in the flour and salt on low speed until a soft dough forms. If too dry, add 1 tsp milk; if too sticky, add 1 tbsp flour at a time.
- Divide the dough in half. Color one half red using red gel food coloring.
- Take 1 tsp of each dough and roll into 4-inch ropes. Twist them together and curve the top to form a candy cane shape.
- Place shaped cookies on prepared baking sheets. Chill for 10 minutes if dough is too soft.
- Bake for 10 minutes or until bottoms are lightly golden.
- Cool on baking sheet for 5 minutes before transferring to a wire rack.
Notes
- Chill dough if it’s too soft to handle.
- Use gel food coloring to avoid color bleeding.
- Add 1/4 tsp extra peppermint extract for a stronger mint flavor.
- Natural dye alternative: beet powder mixed with 1 tsp water.
- Dough can be frozen for up to 3 months.