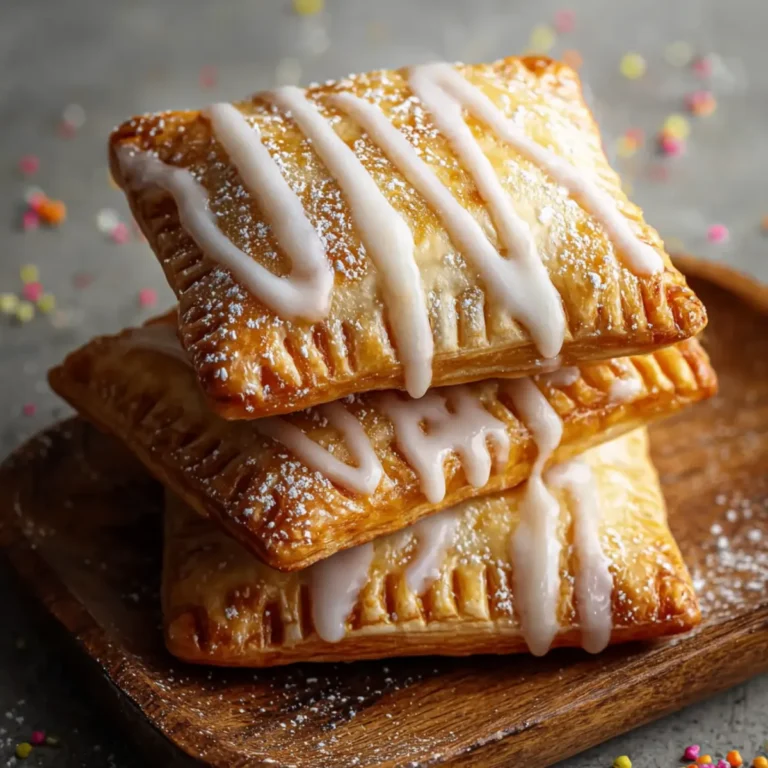
The scent of warm, sweet pastry always brings me right back to my nonna’s kitchen. There’s something magical about pulling golden Cannoncini, Italian Cream Horns from the oven—the crisp, buttery aroma swirling with anticipation, all hinting at the silky pastry cream waiting inside. These treats strike the perfect balance: elegant and nostalgic, delicate but completely satisfying. Whether you grew up with them at holiday gatherings or are meeting them for the first time, Cannoncini have a way of making everyone at the table feel special.
What Makes These Cannoncini, Italian Cream Horns So Irresistible
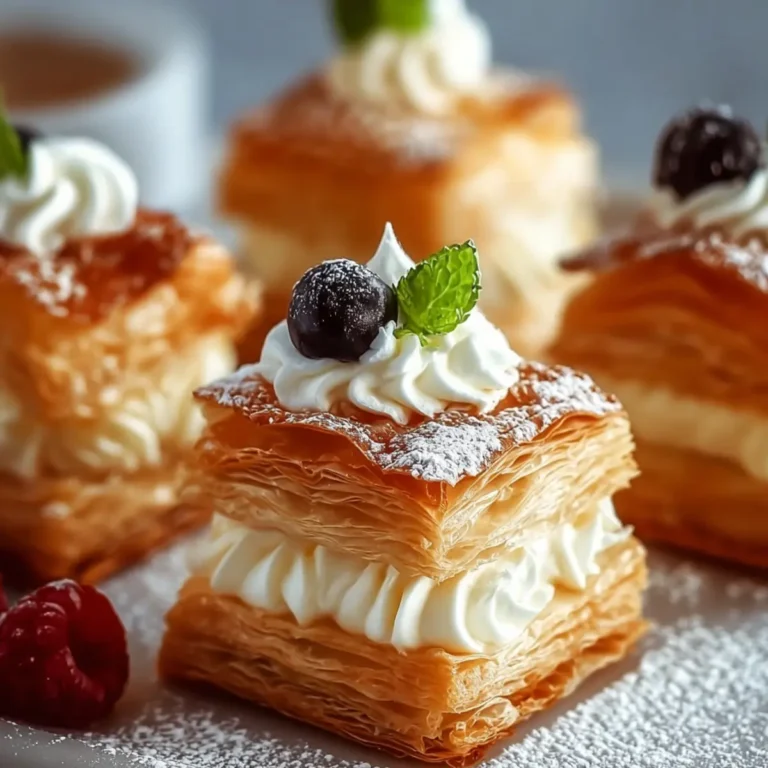
There’s a reason these Italian cream horns hold such a special place on dessert tables and in sweet memories. Each Cannoncini is a study in contrast: the exterior is shatteringly crisp, golden, and impossibly light, while the inside hides a creamy, custardy filling that melts on your tongue. The play between the buttery, flaky pastry and the cool, aromatic crema pasticcera is pure bliss. Bite into one, and you get that delicate crunch, followed by a silky rush of subtle vanilla and just a hint of sweetness.
They’re the kind of pastry that looks like it came straight from a bakery window—fancy enough to impress, but so much easier to make than you’d expect. Whether you serve them at a brunch, as a sweet finish to an Italian feast, or just to treat yourself on a slow afternoon, Cannoncini are guaranteed to disappear the instant you set them out.
The Essential Ingredients for Amazing Cannoncini
The beauty of Cannoncini lies in their simplicity—just a few quality ingredients come together for something truly special. Here’s what you’ll need and why each one matters:
- puff pastry – Delivers those signature flaky, golden layers. Store-bought makes things extra easy, but you can make your own if you’re feeling ambitious.
- Egg – A simple egg wash helps the pastry turn gorgeously glossy and brown in the oven.
- Crema pasticcera – This classic Italian pastry cream brings a backbone of rich vanilla flavor and luxurious texture. Every bite is creamy heaven.
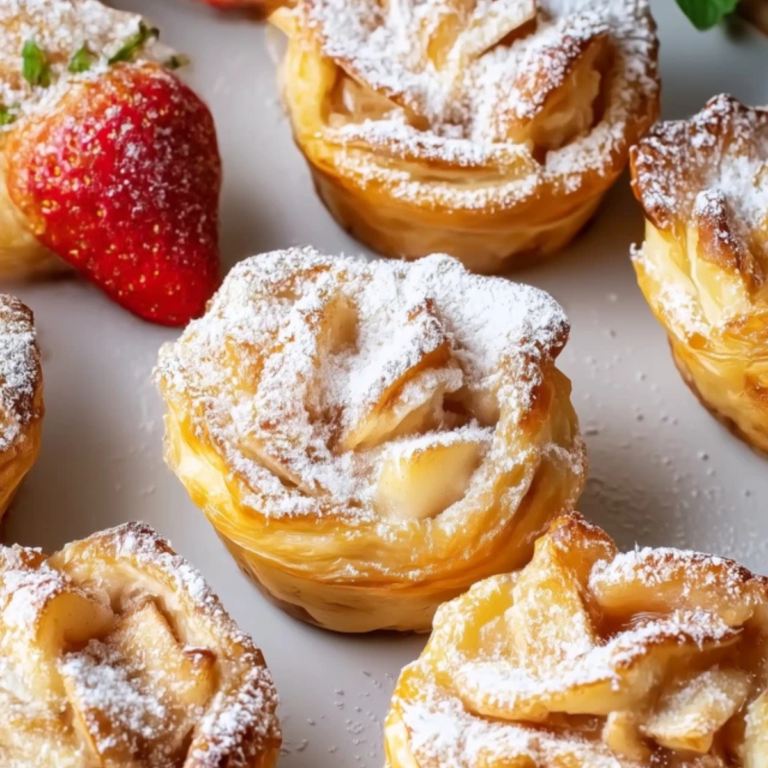
- Powdered sugar – Just a dusting ties everything together and adds that inviting, bakery-style finish.
See the recipe card below for the full list of ingredients and measurements.
Bringing Cannoncini, Italian Cream Horns Together Step by Step
Making Cannoncini, Italian Cream Horns isn’t nearly as fussy as their looks might suggest. Here’s how it all comes together:
- Start with your oven nice and hot—220°C does the trick. Line a large baking sheet with parchment so nothing sticks, and set aside.
- Generously brush your metal cream horn molds with melted butter. It seems like a small step, but it keeps the pastry from clinging on later. Stand the molds upright and let the butter harden up a bit in the fridge while you prep everything else.
- With a sharp knife or pizza cutter, cut your puff pastry sheets into strips, about two centimeters wide. The key is clean, straight cuts for even baking.
- Now, take a strip and gently wrap it around each mold, overlapping the pastry slightly as you spiral from the point up. This is what gives the Cannoncini their signature shape—don’t wrap too tightly or they won’t puff as much in the oven.
- Arrange the wrapped molds on the baking sheet. Then, brush the exposed pastry with beaten egg for that dazzling gold sheen after baking.
- Bake for anywhere from 12 to 20 minutes, peeking in at the halfway mark. They’ll be ready when golden and puffed, with the bottoms a deep amber brown. Thicker pastry needs a little longer, so trust your eyes and nose.
- Let the pastries cool before easing them off the molds. (The wait is tough, but it keeps them perfectly shaped.) Then, fill a piping bag with your cool crema pasticcera and pipe it into each horn, all the way to the bottom.
- Just before serving, dust the finished Cannoncini with a cloud of powdered sugar. Serve and watch them vanish.
Getting That Crisp Puff and Silky Cream Just Right
If you want that magical contrast—the crackly snap of pastry followed by a creamy, velvety center—timing and temperature are everything. Using chilled, well-greased molds means the buttery layers in the pastry get the best possible lift, creating flaky pockets that feel like a dream with every bite. Don’t rush the oven: let the cones get deep golden for maximum crunch, and don’t overfill the cones or the cream will spill and soften the pastry too quickly.
For the filling, make sure your crema pasticcera is completely cool before piping; warm cream can make the pastry soggy. It’s also best to assemble just before serving, which keeps every Cannoncini at its textural peak—crisp, creamy, and totally irresistible.
Tips, Serving Ideas, and Variations for Cannoncini
A few tricks and tweaks can make Cannoncini a treat anytime, anywhere. If you don’t have cream horn molds, you can make quick ones from rolled-up foil—just be sure to grease them well. For a twist, swap in chocolate or coffee crema instead of classic vanilla, or fold a handful of whipped cream into the pastry cream for an even lighter texture.
When it comes to serving, these pastries shine on a platter alongside fresh berries or dipped in melted chocolate for extra decadence. If you need to make them ahead, bake the shells and store them (unfilled) in an airtight container. Only fill before serving to keep the shells crisp. Leftovers keep a day or two when refrigerated, but truthfully, they almost never last that long.
FAQs about Cannoncini, Italian Cream Horns
Can I make Cannoncini, Italian Cream Horns ahead of time?
You can definitely bake the pastry cones a day or two in advance—just store them, unfilled, in an airtight container at room temperature. Fill them with cream right before serving so the shells stay crisp and fresh.
Can I freeze Cannoncini after filling them?
It’s best not to freeze them once filled, as the pastry cream can separate and make the cones soggy when thawed. You can freeze the baked, unfilled pastry shells, then fill with cream after they defrost.
Are there any substitutes for crema pasticcera in Cannoncini?
Yes, if you’re pressed for time, you can use sweetened whipped cream or store-bought custard instead of homemade crema pasticcera. Just keep in mind that the classic Italian cream really brings that authentic flavor.
What’s the best way to store leftover Cannoncini, Italian Cream Horns?
Store any filled Cannoncini in the refrigerator, loosely covered, for up to 1–2 days. The pastry will soften with time, so they’re at their very best the day they’re made.
Can I use a different type of pastry for these cream horns?
Traditional Cannoncini are made with puff pastry because it produces those signature flaky, golden layers. Shortcrust pastry will work, but you’ll miss out on the light, airy crunch that makes these horns so special.
The moment you bite into a Cannoncini still slightly warm, its flakes tumbling everywhere, it’s easy to see why these Italian Cream Horns are loved across generations. That creamy filling with the delicate, caramelized shell feels like a tiny celebration every time. I hope you find as much joy sharing them with friends and family as I do—just be warned, they don’t stick around for long!
More Delicious Recipes
- St. Joseph’s Pastries: These delightful Italian pastries feature a creamy filling much like the crema pasticcera used in Cannoncini.
- Irish Apple Cake with Custard Sauce: This cake pairs beautifully with a rich custard, resembling the sweet filling in Cannoncini.
- No-Bake Bailey’s Chocolate Pie: A luscious chocolate pie that highlights creamy textures similar to the Italian Cream Horns.

Cannoncini, Italian Cream Horns
Ingredients
Equipment
Method
- Preheat oven to 425F (220C), and line one large packing sheet with parchment paper.
- Use melted butter to grease the molds. Place them point facing up and allow the butter to chill while you get the puff pastry ready.
- Use a sharp knife or a pizza cutter to slice the puff pastry into 3/4-inch strips.
- Gently lift a strip and use it to wrap it around the mold, starting with the pointy end and slightly overlapping. Place the wrapped mold over the prepared baking sheet and repeat with the rest of the puff pastry.
- Use a pastry brush to brush the dough with egg wash and bake for 12-20 minutes. The pastries are ready when they are puffed and golden brown, and the bottom is dark golden brown. The baking length depends on the thickness of the puff pastry. The thicker the dough is the longer time it needs to bake. Read the baking instructions on the package for reference.
- Remove from the oven and allow the pastries to cool before removing the molds and filling.
- Fill a pastry bag with the pastry cream and fill the cones.
- Dust with powdered sugar and serve immediately.