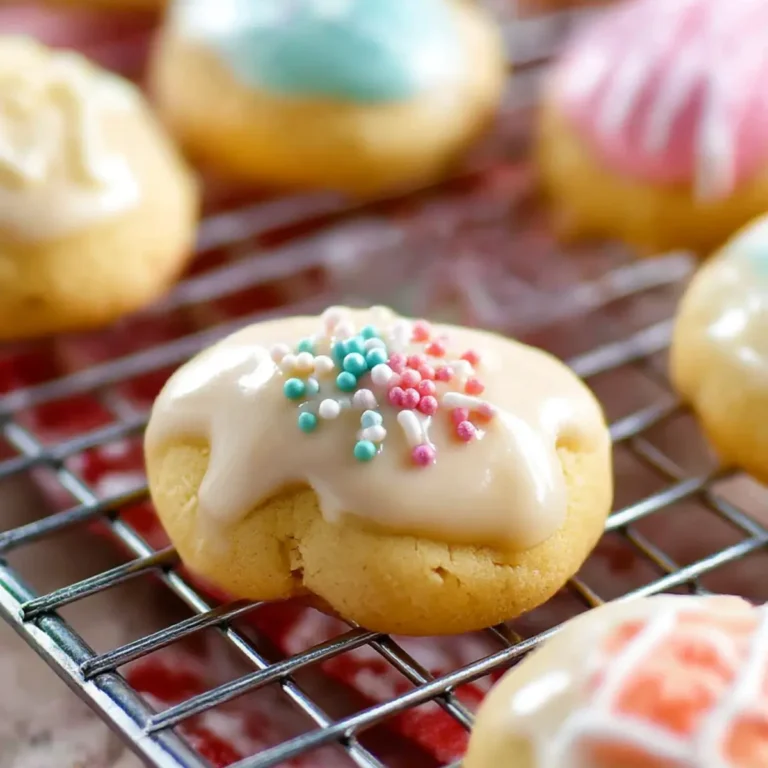
Easter Bunny Button Cookies land in my kitchen every spring, right around the time the grass wakes up and the light lasts a little longer in the evening. There’s something almost magical about these little pastel-buttoned bites—tiny, buttery morsels dressed up with jewel-toned candy centers that catch the sun on your countertop. I always find myself baking them in a flurry the week before Easter, mostly because everyone in the house insists they only taste “right” when the air smells faintly of vanilla and anticipation. Maybe it’s the promise of color after months of grey, or just the joy of a cookie that fits in your palm and disappears in a grin, but Easter Bunny Button Cookies have a way of making even basic afternoons feel like a celebration.
Kids, adults, folks who swear they aren’t really into sweets—there’s no one immune. Platter after platter gets filled, and within minutes, it’s just a scatter of sanding sugar and happy fingerprints left on the table. These cookies are all about a playful crunch, not-too-sweet shortbread crumble, and that unmistakable pop of chocolate tucked right at the center. Plus, they look ridiculously charming in an Easter basket or stacked in a clear jar, waiting to be raided.
Easter Magic in a Single Bite
There’s a mood that takes hold in the kitchen when Easter Bunny Button Cookies are on the schedule. The mixing bowl seems to glow in a patch of afternoon sun, and even seasoned bakers pause before rolling dough, swept up in a sense that something playful is in the works. Unlike some showstopper desserts that demand an audience, these cookies feel personal—made just as much for sneaking from the rack as for wrapping up in pastel ribbon.
The appeal comes from their bite-sized shape, the sparkle from the sugar, and the satisfaction of pressing candy into the pillowy centers. Maybe you’re looking to fill treat bags for a classroom party, or maybe you just want to nibble something sweet with your afternoon coffee. Either way, these are the moments when Easter cookies steal the scene: gentle, unhurried, with just enough festive color to make spring feel official.
What You’ll Need to Bring These Cookies to Life
- butter – the main reason these cookies melt in your mouth, lending richness and that unmistakably soft, crumbly texture.
- Sugar – creates sweetness but also gives a little crispness around the edges, especially once it meets heat.
- Egg yolks – make the dough supple and give the finished cookies their characteristic tenderness; if you’re out, try substituting a splash of cream for slightly more delicate texture.
- Vanilla extract – rounds out the flavors, pulling everything together in the background.
- All-purpose flour – provides structure; sift it if you want an extra refined bite (though it’s perfectly fine to mix straight from the bag).
- Sanding sugar – not just for decoration; it gives a festive sparkle and satisfying crunch.
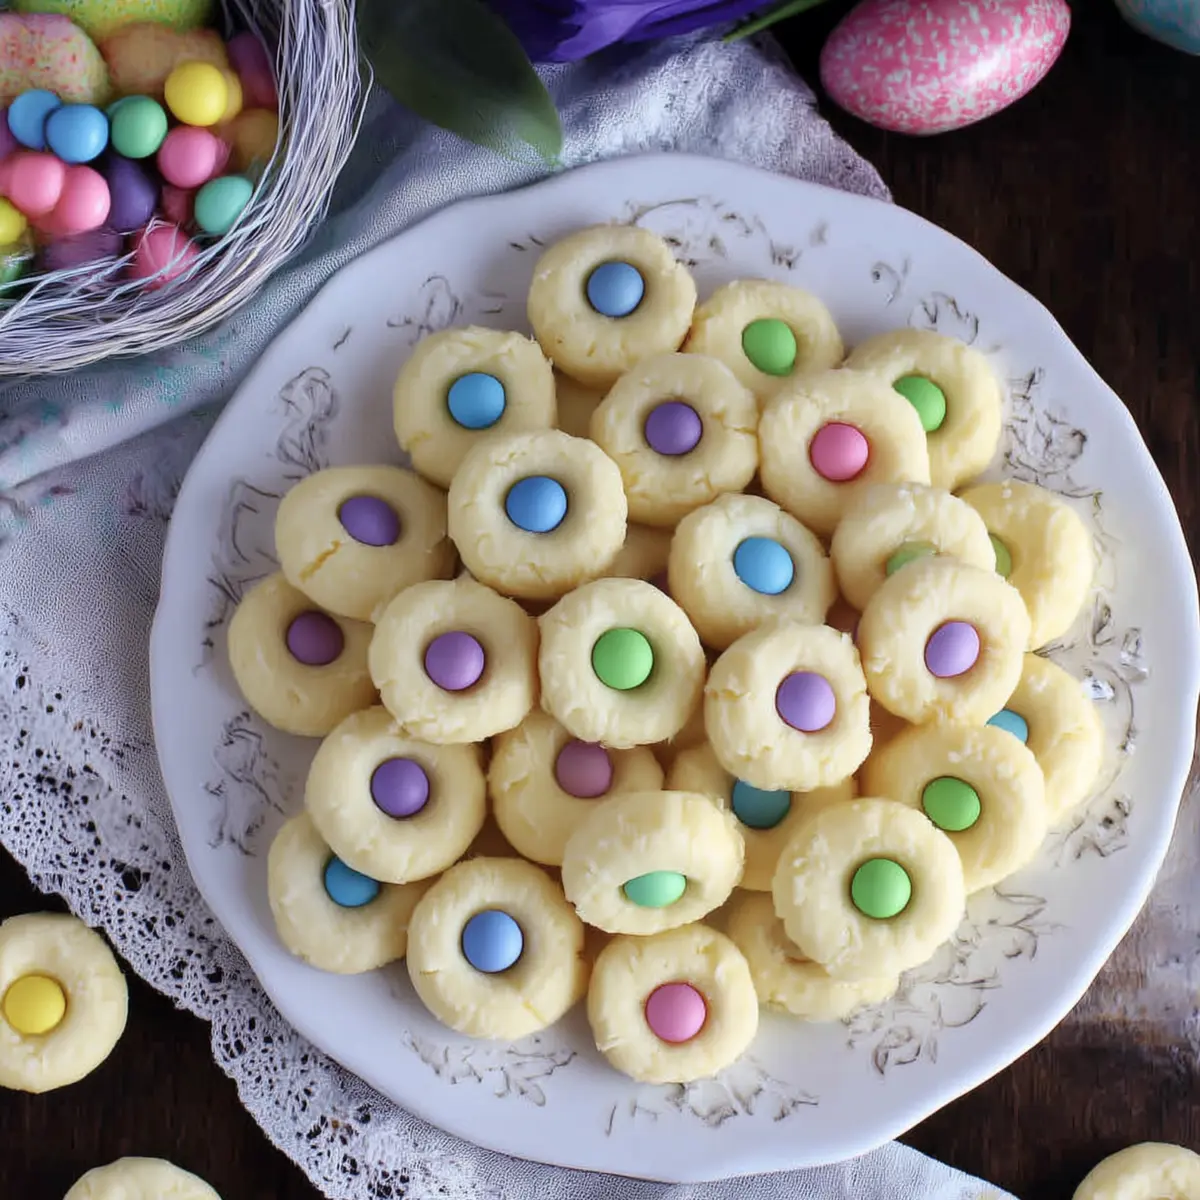
- Chocolate M&M candies – those pastel colors do double duty, bringing a playful pop to the top and a gentle chocolate finish to every mouthful.
See the recipe card below for the full list of ingredients and measurements.
Building Cookie Dough Memories
For me, the process of making Easter Bunny Button Cookies is as much about the experience as the outcome. Start out by letting your butter come all the way to room temperature; you want it soft but not melting, so it creams smoothly with the sugar. Whip them together until the whole mixture looks lighter in color and is fluffy—almost mousse-like if you peek into the bowl.
Once you add the egg yolks and a little vanilla, the dough deepens in color and scent—there’s something faintly custardy that’ll remind you of classic shortbread or those bakery cookies from your childhood. Sift or scoop in the flour, and mix just until you’ve swapped out every last dry patch for a unified dough. Go gentle! Over-mixing here is the enemy; you want a soft, cohesive dough that still feels like it could melt between your fingers.
You’ll notice the dough is sturdy, not sticky—a good sign. The next part is the most fun: dividing and rolling those tiny balls that will become your cookies. This is a perfect hands-on step for little helpers, or just a way to get your own hands in the mix and take a break from kitchen gadgets for a moment.
From Dough Balls to Button Cookies
Preheat your oven, letting the anticipation build alongside the aroma of vanilla wafting through your kitchen. Grab a tray lined with parchment or a silicone mat so nothing sticks, and set out a shallow bowl of sanding sugar. This is where things start to really look festive.
Roll each piece of dough between your palms just until it forms a smooth, compact ball. Drop each one into the sugar and roll them around for full coverage—the more sparkle, the better. Arrange them on your tray, leaving just enough space so the heat can work its magic evenly.
Now, the best part: pressing an M&M gently into the center of each ball. You want to nestle it down, just enough that it sits level with the dough (not buried). This tiny act is somehow soothing and a little addictive, and it turns a good cookie into a stunner.
Into the oven they go. You’re looking for just barely golden bottoms; the tops will stay light and delicate. Don’t wait for deep color! Once they’re set but still a little soft, take them out and let them cool in the open air. The shell of sugar crackles when you pick up the first one, but the inside stays plush and shortbread-like.
The Character of Every Crumble and Crunch
What makes Easter Bunny Button Cookies irresistible isn’t just their shape or color—though the pastel centers do look cheerful enough to cheer up even the most determined adult. It’s the balance of textures: sugar crystals crumbling between your teeth, the buttery base melting almost before you’re ready, and that smart, crisp snap from the chocolate. There’s just enough sweetness, which keeps you coming back for another (and another…).
Bite into one, and you get sent straight to that gentle place between shortbread and sugar cookie. The vanilla hums softly in the background. The sanding sugar offers a candied crunch that feels celebratory without being over-the-top. And if you’re lucky enough to snag a warm cookie straight from the rack, there’s the faintest memory of childhood Easter hunts—joy in cookie form.
Tiny Details to Make Bunny Buttons Impossible to Resist
Making these cookies isn’t tricky, but a few tweaks can make all the difference. Letting the dough rest for just a few minutes makes it easier to roll, especially if your kitchen is on the warmer side. If the dough feels a bit too crumbly to come together, don’t panic—knead it gently by hand or add a small splash of cream until it softens. Baking just until the edges are pale golden (not brown) will keep the centers tender, and letting them cool completely before storage prevents the sugar from getting sticky.
Want to mix things up? Swap the M&M candies for pastel chocolate eggs or even white chocolate drops. If you don’t have sanding sugar, regular granulated sugar works fine—just sprinkle a little extra for good measure. I sometimes add a pinch of lemon zest for something bright, almost floral.
For storage, stack in an airtight tin with parchment between layers. They keep beautifully for a few days, but honestly, they tend to vanish long before staleness threatens. And yes, these freeze well: a stash in the back of the freezer is perfect for surprise guests or late-night cravings.
Sharing Easter Bunny Button Cookies at Any Gathering
There’s hardly an event these cookies don’t fit. They dress up cupcake stands for brunch, shine in Easter baskets, and even make sweet little gifts tucked into cellophane bags. Try arranging them by color on a platter for a dappled, “speckled egg” effect. They’re right at home paired with a mug of milky tea or added to a dessert board beside fruit and pastel marshmallows.
Honestly, they’re a conversation starter—guaranteed to get adults reminiscing about their own button cookies or spark giggles with the little ones as they select their favorite candy hue. Even in the midst of a big feast, these tiny cookies still get noticed.
FAQs about Easter Bunny Button Cookies
Can I make Easter Bunny Button Cookies ahead of time?
Definitely; these cookies keep their texture and flavor for several days stored in an airtight container. For best results, store them with a layer of parchment between each row to prevent sticking. You can even freeze them for a couple of weeks if you want to get ahead for a party or holiday gathering.
What should I do if my dough feels too dry or crumbly?
If the dough isn’t coming together easily, try kneading it with your hands for a minute or two—your body heat helps soften things. If needed, add a small splash of cream or a bit of the reserved egg white until it just comes together. Avoid over-mixing once the dough softens.
Are there any recommended substitutions for the candy centers in these Easter Bunny Button Cookies?
You can swap the pastel M&Ms for similar-sized chocolate eggs, white chocolate buttons, or even colorful jelly beans if you want to avoid chocolate. Just press the candy gently into the dough the same way as you’d do with M&Ms.
How do I keep Easter Bunny Button Cookies fresh after baking?
Allow the cookies to cool completely, then store in a tin or sealed container at room temperature. Separate layers with parchment to help maintain their sweet crunch. If you live where it’s humid, add a small packet of dry rice in the bottom of the tin (in a cheesecloth or paper packet) to prevent them from turning sticky.
There’s something satisfyingly nostalgic about biting into a tray of Easter Bunny Button Cookies—the way they crumble, the cheerful pastel buttons on top, and the subtle vanilla aroma that hangs in the kitchen long after you’ve finished baking. Whether you’re lining a lunchbox, sharing them over hot drinks with friends, or simply treating yourself, these cookies deliver the kind of gentle joy you want at the heart of every spring gathering. Let their buttery richness and pops of color transform an ordinary afternoon into a moment worth slowing down for. After all, a cookie this bright and welcoming is really just an invitation to linger at the kitchen counter a little longer.
More Delicious Recipes
- Easter Egg Fruit Pizza: This vibrant dessert is perfect for celebrating spring with a festive flair, just like the Easter Bunny Button Cookies.
- Chocolate Shamrock Pies: These delightful pies feature a sweet chocolate filling, making them a fun and festive treat for the season.
- Vanilla Bean St Patrick’s Day Cookies: With their buttery texture and festive appeal, these cookies are a great addition to your spring gatherings.
Easter Bunny Button Cookies
Ingredients
Equipment
Method
- Preheat oven to 350 degrees. Line a baking sheet with parchment paper or a silicone baking mat. Set aside.
- In a mixing bowl, use a hand-held mixer to beat together the butter and sugar until light and fluffy.
- Add in the egg yolks and vanilla extract. Beat to combine.
- Add the flour and mix into the butter mixture until just combined. Don't over mix.
- Portion into one teaspoon and roll into balls. Roll each ball into the sanding sugar and place on the prepared baking sheet.
- Push a M&M candy into the center of the cookie.
- Bake for 10 minutes. Remove from oven and allow cookie to cool on the baking sheet for 3-5 minutes. Transfer the cookies to a wire cooling rack to finish cooling.