If you’ve got little ones bouncing off the walls before Easter brunch, these Easter Cathedral Cookies are a lifesaver. They always bring color and a burst of fun to the table, but the real treat is just how easy they are. You’re literally tossing a handful of ingredients together and winding up with something that always gets oohs and ahhs. I love making a batch the night before—my kitchen smells faintly of sweet coconut and vanilla, and the slices look like stained glass tucked into the cookie tray.
Why These Easter Cathedral Cookies Belong on Your Spring Table
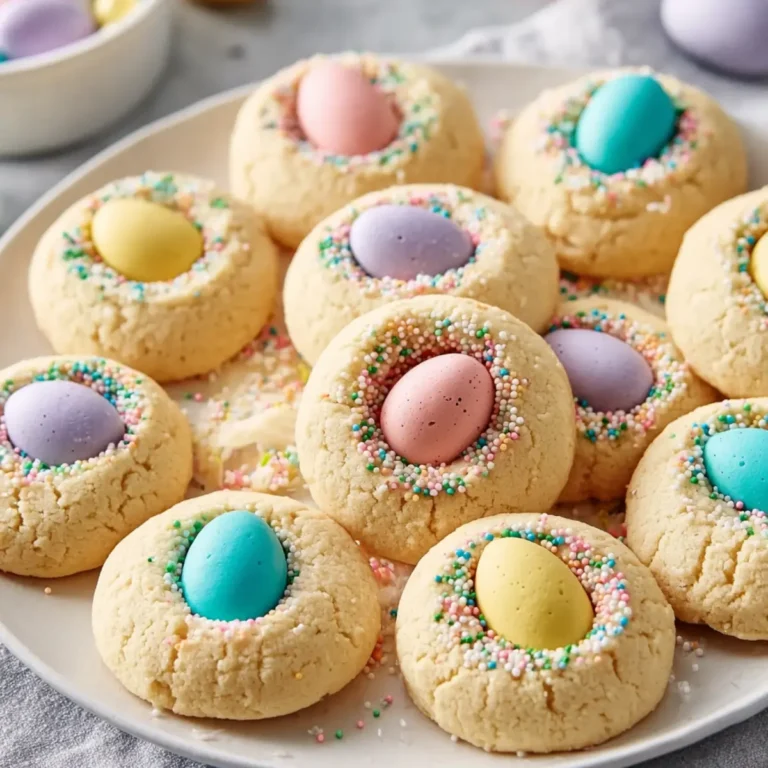
There’s nothing that captures the whimsy of Easter quite like these cookies. Easter Cathedral Cookies are soft, colorful, and a little bit nostalgic—if your family ever brought old-fashioned church potluck desserts, you’ll know just what I mean. They’re almost too pretty to eat, with those jewel-toned marshmallow pieces peeking out through the vanilla candy. Whether you make them for brunch, gift boxes, or just as a bright snack for a rainy afternoon, they always look gorgeous piled up on a platter. Plus, zero baking required—just a few simple steps and you’re done.
One thing I genuinely love? Kids can be hands-on at every step. From swirling coconut to rolling up the sweet, sticky dough, this is the kind of recipe that’s as much fun to make as it is to eat.
What Goes Into Easter Cathedral Cookies
Here’s what gives Easter Cathedral Cookies all their texture, color, and chewy charm:
- Vanilla flavored CandiQuik – This forms the creamy, gently sweet coating that binds the cookies and lets the marshmallow colors shine. Almond bark or white melting wafers work just as well if that’s what’s in your pantry.
- Sweetened coconut flakes – The coconut is what gives the outside its fluffy look and a little chewy bite. It also stops things from sticking and brings a lovely tropical aroma.
- Colored marshmallows – These are the “windows” in your cathedrals—little pockets of color and bounce. Pastel mini marshmallows are especially perfect for Easter, but you can use any mix of colors you love.
See the recipe card below for the full list of ingredients and measurements.
How to Make Easter Cathedral Cookies Step by Step
Ready to get your hands a little sticky? The process is basically impossible to mess up, and it’s forgiving enough for a little chaos in the kitchen. Here’s how I do it:
- Spread out a rectangle of plastic wrap and scatter coconut evenly over the surface. You want a good thick layer for rolling, so don’t be shy here; it keeps the log from sticking later and gives your cookies their signature texture.
- Drop your colorful marshmallows into a medium mixing bowl. The more varied the colors, the more stunning the finished cookies will look.
- Melt the vanilla candy coating until it’s silky smooth—microwave or stovetop both work, whichever you prefer. Pour it right over the marshmallows and give everything a gentle stir. You want each piece to get glossy, without crushing them to bits.
- Spoon the sticky mixture into the center of your coconut-covered wrap. Don’t fuss about evenness; a little extra here or there just adds charm.
- Working from one long side, use the plastic wrap to help roll the mixture into a plump log, tucking the coconut around the outer edges as you go. Your goal is a snug, coconut-crusted tube, but it doesn’t need to be perfect.
- Wrap the whole log tightly in the plastic and pop it in the fridge. Once the coating sets, you’ll be able to slice gorgeous stained-glass cookies that hold together perfectly.
- Slice thick coins when ready to serve and watch the colors peek through each piece. Store them in an airtight container to keep them fresh and chewy, if you have any left to store!
Secrets for the Best Easter Cathedral Cookies
Over the years, I’ve figured out a few little tweaks that make these cookies shine. First, always use enough coconut on the outside. If you skimp, the mixture will stick and get messy. If it’s your first time, don’t overwork the marshmallows or they’ll lose their shape—gentle folding is key.
Keep the candy coating just warm enough to coat but not so hot it starts to melt the marshmallows themselves. If your kitchen is on the warmer side, don’t hesitate to chill the mixture just a bit longer before slicing. For the neatest look, use a really sharp, thin-bladed knife when you cut them. Wipe the blade between every cut to keep the colors crisp. And if you find your log is crumbly or not quite holding shape, let it rest at room temperature for a couple minutes—the candy softens and everything slices cleanly.
Chilled airtight, Easter Cathedral Cookies stay fresh for days and are perfect for making ahead. They even travel well for packed lunches or holiday gifting.
Fun Variations and Serving Ideas for Easter Cathedral Cookies
There’s so much room to play with these cookies. Swap pastel marshmallows for bold brights for a birthday party, or stick to just pinks and yellows for a baby shower treat. If coconut’s not your thing, try rolling the log in finely chopped nuts or even colorful sprinkles for extra crunch and festivity.
You can dip the slices in melted chocolate for a more indulgent treat, or sandwich them between crisp wafer cookies for a fun twist. Serve them as part of a bigger dessert platter, tuck them into lunch boxes, or wrap them up for Easter baskets—kids love unwrapping the jewels inside.
Feeling edgy? Mix in a tiny pinch of your favorite spice, like cinnamon or cardamom, to the coconut for something unexpected. For an even easier prep, make individual “cathedral bites” by dropping spoonfuls of the coated marshmallow mix into mini cupcake papers and rolling in coconut—no log rolling required.
FAQs about Easter Cathedral Cookies
Can I make Easter Cathedral Cookies without coconut?
Yes, you can skip the coconut and use something else on the outside for that signature non-stick texture. Finely chopped nuts, crushed cookies, or colored sprinkles all work as fun alternatives, though you’ll miss out on that gentle chewy bite coconut brings.
How far in advance can I prepare Easter Cathedral Cookies?
You can easily make Easter Cathedral Cookies a day or two in advance. They actually slice best after a good chill. Just keep them tightly wrapped or in an airtight container in the fridge.
Can Easter Cathedral Cookies be frozen for later?
Absolutely! Wrap the unsliced log tightly in plastic, then foil, and freeze. Thaw in the fridge overnight before cutting into slices. Freshly sliced, they look and taste just like new.
Are there substitutions for the candy coating in Easter Cathedral Cookies?
If you don’t have CandiQuik or almond bark, any plain white chocolate melting wafers will get the job done. Just avoid regular chocolate chips—they can seize and won’t coat the marshmallows the same way.
There’s just something irresistible about a plate of Easter Cathedral Cookies—light catching on all those marshmallow colors and the creamy crunch of coconut on your tongue. These are the kind of treats that look fancy but don’t require any baking wizardry, and every batch is as fun to make as the last. Whether you serve them at brunch, sneak a slice with your afternoon coffee, or bring a platter to share, they’re always a welcome (and eye-catching) addition to the celebration.
More Tasty Ideas
- Easter Egg Fruit Pizza: This vibrant fruit pizza brings a festive touch to your Easter table, complementing the colorful theme of the Cathedral Cookies.
- Cinnamon Sugar French Toast Muffins: These sweet muffins make a delightful brunch addition, perfect for a spring celebration alongside your cookies.
- Vanilla Chai Muffins: The warm flavors of these muffins make for a cozy pairing with the festive Easter treats, bringing a wonderful balance to your brunch spread.

Easter Cathedral Cookies
Ingredients
Equipment
Method
- Spread out a large piece plastic wrap and cover it with coconut. You want about 14 inches by 9 inches.
- Place the marshmallows in a medium size bowl.
- Melt the candy coating and pour it over the marshmallows. Stir to coat the marshmallows.
- Spread the marshmallow mixture down the center of the coconut.
- Grab one long side of the plastic wrap and pull up to the top. The idea is to form it into a log shape with the coconut all around the outside.
- Roll it up gently and wrap up tightly.
- Refrigerate for 30 minutes before slicing and serving.
- Store in an airtight container.