Halloween is a season filled with anticipation, fun, and creativity. Costumes, decorations, and candy are at the heart of the celebration, but what often steals the spotlight at gatherings is the dessert table. Among the many treats you could prepare, there’s one that combines convenience, festive flair, and irresistible taste—the Halloween Icebox Cake. This dessert is more than just a sweet treat; it’s an easy, no-bake way to impress your guests without spending hours in the kitchen. By the time you’ve finished this guide, you’ll not only know how to make a Halloween Icebox Cake but also how to personalize it, troubleshoot common issues, and wow your family or party guests with something spooky yet delicious.
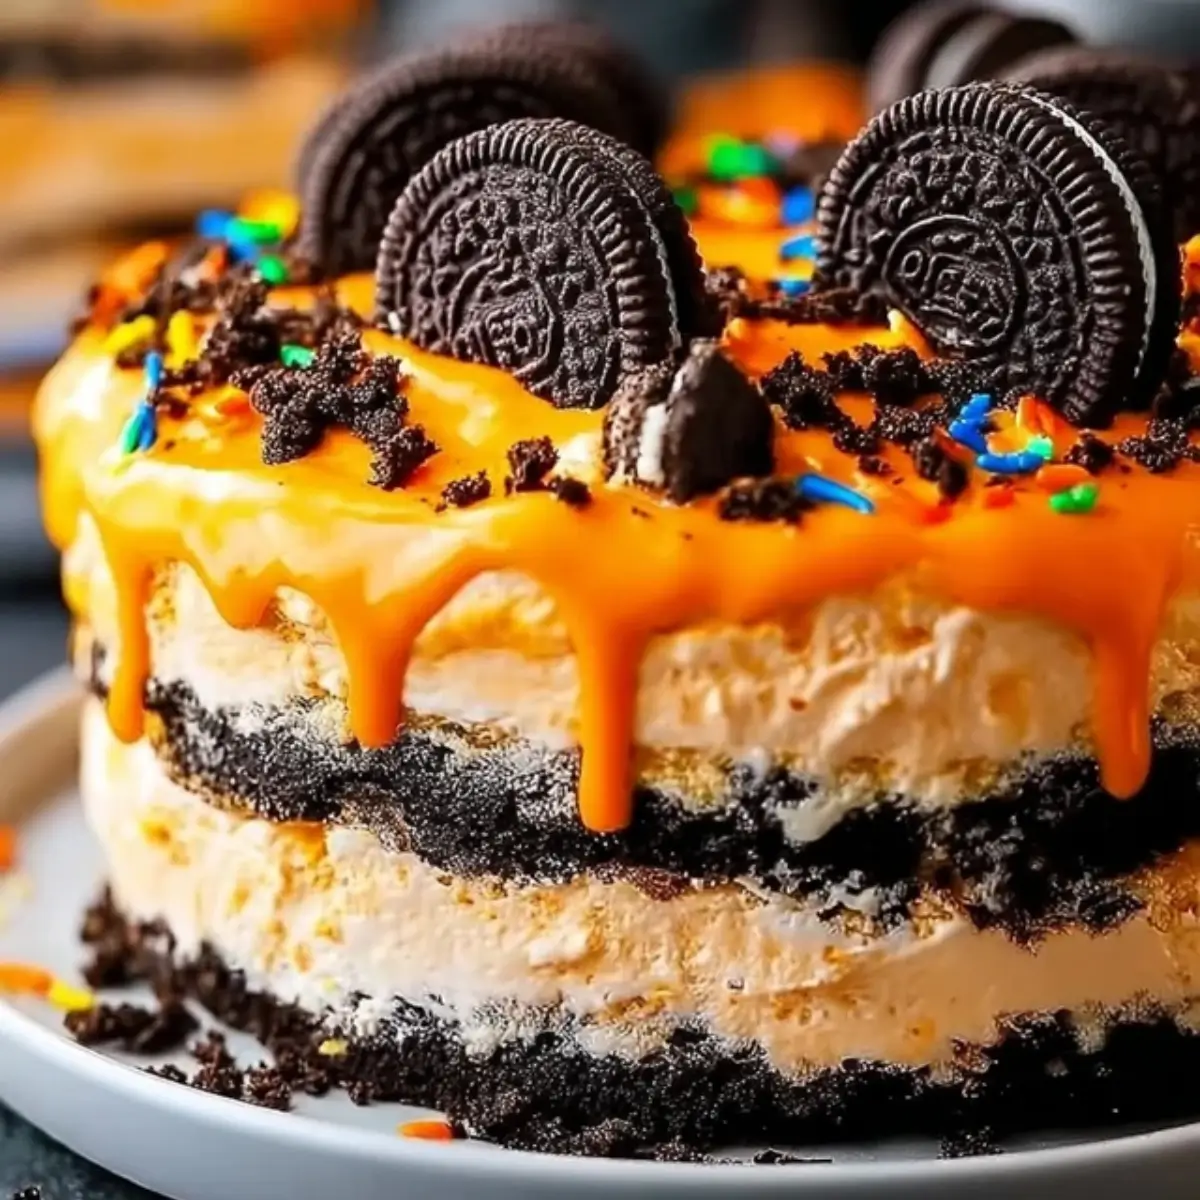
Table of Contents
What Is a Halloween Icebox Cake?
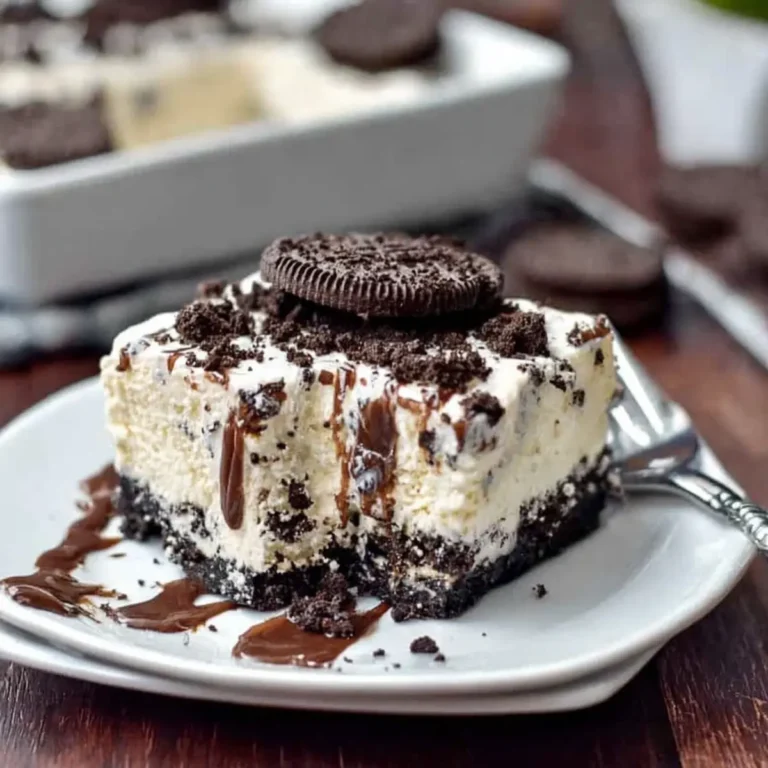
If you’ve never made an icebox cake before, you’re in for a surprise. At its core, an icebox cake is a dessert that layers cookies with a creamy filling—usually whipped cream or pudding—and then rests in the refrigerator until the cookies soften. Instead of baking, the chilling process transforms the cookies into tender, cake-like layers. This method became popular in the early 20th century when refrigerators, known as iceboxes, first appeared in homes.
The Halloween version takes the basic recipe and adds a seasonal twist. By coloring whipped cream in vibrant shades of orange, black, or purple and decorating with playful candies like gummy worms and candy eyes, you get a dessert that not only tastes wonderful but also sets the spooky mood. The best part is how little effort it requires, making it a perfect choice whether you’re hosting a large Halloween party or preparing something fun for your family at home.
Ingredients for Halloween Icebox Cake
Basic Ingredients
To prepare this festive cake, you’ll need:
- 4 cups heavy whipping cream
- 1 teaspoon vanilla extract
- 1 cup powdered sugar
- Orange food coloring (gel works best for vibrant shades)
- 2 (14.5-ounce) packages Oreo cookies (around 42 cookies)
- Orange icing for decoration
- Halloween sprinkles
Optional Add-Ins
- Cream cheese mixed into the whipped cream for added richness
- Food coloring in black or purple for layered effects
- Gummy worms, candy eyes, or edible glitter for decoration
Cookies are the backbone of your icebox cake. Oreos work wonderfully, but chocolate wafers and graham crackers are excellent alternatives. The key is to choose a firm cookie that will soften just enough when chilled but still hold its shape.
Step-by-Step Preparation Instructions
Whip the Cream
Start by whipping the heavy cream with powdered sugar and vanilla extract until stiff peaks form. This should take about five minutes with an electric mixer. Divide the cream into three bowls and add food coloring to create different shades of orange. Folding the color gently ensures you maintain the cream’s fluffy texture.
Layer the Cake
- Line a 9-inch springform pan with parchment or plastic wrap.
- Place a layer of cookies at the bottom. Break cookies if necessary to fill gaps.
- Spread one-third of the whipped cream (starting with the darkest shade of orange) over the cookies.
- Repeat with another layer of cookies and the medium orange cream.
- Finish with a final cookie layer and the lightest orange cream.
Chill the Cake
Cover the cake with plastic wrap and refrigerate it for at least six hours. Overnight chilling is even better since it allows the cookies to fully absorb the cream, creating soft, cake-like layers.
Decorate Before Serving
Once chilled, remove the cake from the refrigerator and decorate it. Drizzle orange icing across the top, add sprinkles, and place gummy worms or candy eyes for a spooky finish. Decorating right before serving ensures your toppings look fresh.
Decorating Ideas for a Spooky Effect
This cake is versatile, and the decorations can take it in several fun directions.
- Gummy worms crawling out of the layers make it look like something from a haunted garden.
- Candy eyes scattered on top give a playful monster-like appearance.
- Crush Oreos to resemble dirt and add candy gravestones for a haunted graveyard theme.
- Create a pumpkin patch effect with orange-tinted cream topped with candy pumpkins.
If you prefer simplicity, stick with two colors—black and orange—for a striking yet clean design.
Customizations and Variations
Flavor Variations
- Chocolate: Incorporate chocolate pudding or chocolate-flavored whipped cream for a richer taste.
- Pumpkin Spice: Add pumpkin spice to the cream for a fall-inspired flavor.
- Fruit Layers: Place thin slices of strawberries, raspberries, or bananas between the cream and cookies for a fruity surprise.
- Vegan Version: Use coconut whipped cream and dairy-free cookies for a plant-based alternative.
Holiday-Themed Variations
The adaptability of this cake means you don’t have to limit it to Halloween. For Christmas, switch the food coloring to red and green and add crushed candy canes. At Easter, pastel-colored cream and mini chocolate eggs create a festive look. For the Fourth of July, alternating red, white, and blue layers with fresh berries makes for a patriotic version.
Tips and Troubleshooting
Getting your Halloween Icebox Cake just right comes down to a few important details:
- Don’t overwhip the cream. Stop when stiff peaks form to avoid a grainy texture.
- Stick with firm cookies; softer ones will turn mushy too quickly.
- Spread your cream evenly over each cookie layer to maintain structure.
- Always chill for at least six hours; overnight gives the best results.
- Decorate lightly—too many toppings can weigh the cake down and make slicing difficult.
Avoid common mistakes such as rushing the chilling process or skipping the step of lining your pan, which makes removing the cake much easier.
Frequently Asked Questions
Can I make Halloween Icebox Cake in advance?
Yes, and you should. Preparing it a day before serving allows the flavors to meld and the cookies to soften into a cake-like texture. Just add decorations shortly before serving to keep them fresh.
What cookies work best for Halloween Icebox Cake?
Classic chocolate wafers or Oreos are the most reliable. Graham crackers also work if you prefer a milder flavor. The important thing is choosing cookies that are crisp enough to soften gradually without falling apart.
Can I freeze Halloween Icebox Cake instead of refrigerating it?
Freezing changes the texture of the cream and makes it icy rather than smooth. If you must freeze it, allow the cake to thaw in the refrigerator before serving. However, refrigeration is always the preferred method.
Conclusion
The Halloween Icebox Cake is proof that you don’t need complicated recipes to make a dessert that delights both the eyes and the taste buds. By layering cookies with whipped cream, chilling, and decorating with playful Halloween elements, you create a dessert that’s festive, simple, and memorable. It’s a perfect option whether you’re a busy host needing something quick or a parent looking to involve kids in a fun kitchen project.
This year, let your Halloween dessert table stand out with a cake that requires little effort but delivers maximum impact. Try this recipe once, and you may find it becoming a yearly tradition. Now it’s your turn to grab some cookies, whip up the cream, and make a Halloween Icebox Cake that will leave your guests talking long after the party is over.
More Relevant Recipes
- Halloween Sugar Cookie Bars: A festive dessert featuring soft, chewy cookie bars topped with colorful frosting and sprinkles, perfect for a Halloween celebration. These bars are easy to prepare and make a fun, sweet addition to your holiday spread.
- Halloween Cakesicles: These cake pops in popsicle form are dipped in chocolate and decorated with spooky designs. They make an eye-catching and playful treat for parties or trick-or-treaters.
- Strawberry Cheesecake Dump Cake: A quick and easy no-fuss dessert that layers strawberries, cream cheese, and cake mix into a decadent, oven-baked dish. It’s rich, creamy, and just as simple as an icebox cake.
Halloween Icebox Cake

This Halloween Icebox Cake is a no-bake dessert made with layers of Oreos, orange-tinted whipped cream, and festive decorations. It chills in the refrigerator until the cookies soften, creating a cake-like texture perfect for Halloween parties.
- Prep Time: 20 minutes
- Cook Time: 0 minutes
- Total Time: 20 minutes
- Yield: 12 servings
- Category: Dessert
- Method: No-Bake
- Cuisine: American
- Diet: Vegetarian
Ingredients
- 4 cups heavy whipping cream
- 1 teaspoon vanilla extract
- 1 cup powdered sugar
- Orange food coloring (gel recommended)
- 2 (14.5-ounce) packages Oreo cookies (approximately 42 cookies)
- Orange icing, for decoration
- Halloween sprinkles, for decoration
Instructions
- Line a 9-inch springform pan with plastic wrap or parchment paper, leaving it to stick about an inch above the sides of the pan.
- In a large mixing bowl, whisk the heavy cream, vanilla extract, and powdered sugar on high speed until stiff peaks form (about 5 minutes).
- Divide the whipped cream equally into 3 bowls. Add varying amounts of orange food coloring to each bowl to create different shades of orange, folding the color gently until fully combined.
- Place a single layer of Oreo cookies into the bottom of the pan. Use broken pieces to fill in any gaps.
- Spread one-third of the whipped cream mixture (using the darkest shade of orange) over the cookie layer, spreading evenly with a spatula.
- Add a second layer of cookies over the whipped cream, followed by another layer of whipped cream using the second bowl of cream.
- Repeat the process with the final layer of cookies and the last bowl of whipped cream, spreading evenly.
- Cover with plastic wrap and refrigerate for at least 6 hours or overnight to allow the cookies to soften.
- Remove the cake from the refrigerator and decorate with orange icing and Halloween sprinkles before serving.
Notes
- For a richer filling, mix cream cheese into the whipped cream.
- Divide whipped cream into multiple bowls and use different food coloring (orange, black, purple) for layered effects.
- Firmer cookies such as chocolate wafers or graham crackers work well if Oreos are unavailable.
- Decorate just before serving to keep toppings fresh.
- Chilling overnight yields the best texture.