There’s something deeply comforting about food that takes its time — dishes that fill your home with warmth, aroma, and a sense of anticipation. Birria tacos are exactly that kind of food. The kind you start early in the day, letting the beef slowly surrender to the deep flavors of dried chiles, garlic, and spices. When you finally bite into that crispy, cheesy taco, dripping with rich consommé, you understand why people can’t stop talking about them. These are not just tacos — they’re a full experience, one that invites you to slow down and savor each step.

Table of Contents
Why You’ll Love My Fave Birria Tacos
You’ll fall for Birria tacos the moment you hear the sizzle of tortillas hitting the skillet. The outside crisps up while the inside stays juicy with slow-cooked beef. The consommé — that fragrant broth — doubles as a dipping sauce, pulling every bite together into one perfect mix of textures and flavors.
What makes My Fave Birria Tacos special isn’t just their authenticity, but how approachable they are. You don’t need to be a chef to make them at home. With the right ingredients and a bit of patience, you’ll create something that tastes like it came from a small taqueria in Jalisco. Whether you’re making them for your family or treating yourself on a weekend, these tacos will always deliver comfort and satisfaction.
Key Ingredients for the Perfect Birria Tacos
Getting the flavor right starts with your ingredients. Each one adds its own note to the melody — from the earthy heat of the chiles to the fatty richness of the beef.
For the Birria Stew
- 3 lbs beef chuck roast or short ribs
- 4 dried guajillo chiles
- 2 dried ancho chiles
- 2 chipotle peppers in adobo
- 5 garlic cloves
- 1 medium onion
- 2 teaspoons cumin
- 1 teaspoon oregano
- 1 cinnamon stick
- 2 bay leaves
- 6 cups beef broth
- Salt and pepper to taste
Each of these elements plays a role in building the stew’s depth. Guajillo and ancho chiles add color and warmth, while chipotle gives a smoky edge. Using fatty cuts like chuck roast ensures the meat stays tender and flavorful.
For the Tacos
- Corn tortillas
- Shredded Oaxaca or mozzarella cheese
- Chopped onions and fresh cilantro
When you dip the tortillas into the rich broth and fry them to a golden crisp, that’s when magic happens. The slight char, the melting cheese, the juicy beef — everything blends into one irresistible bite.
Ingredient Substitutions and Variations
You can make My Fave Birria Tacos your own without losing their essence.
- Meat: Swap beef for lamb or goat if you prefer a traditional touch.
- Chiles: No guajillos? Use New Mexico chiles for a similar sweetness.
- Cheese: Monterey Jack works beautifully if Oaxaca is hard to find.
- Vegetarian Version: Use mushrooms, lentils, and vegetable broth for a surprisingly satisfying plant-based version.
- Extra Heat: Add more chipotle or even a dash of cayenne if you like your tacos fiery.
The best part is that Birria tacos are forgiving. As long as you maintain the slow-cooked richness of the broth, the final result will always be delicious.
How to Make My Fave Birria Tacos – Step by Step
Step 1 – Prepare the Birria Base
Start by toasting your dried chiles in a dry pan for a few seconds. This helps release their oils and deepen their flavor. Soak them in hot water for about 15 minutes until they soften. Blend them with onion, garlic, cumin, oregano, salt, and a bit of the soaking water until you have a smooth paste.
Meanwhile, sear your beef chunks in a large pot until browned on all sides. This step builds the foundation of your flavor — those browned bits are pure gold.
Step 2 – Simmer the Stew
Once your meat is seared, pour in the chile paste. Add the bay leaves, cinnamon stick, and beef broth. Stir well, making sure everything is combined. Cover and simmer gently for about three hours, or until the meat shreds easily with a fork. Taste as it cooks, adjusting the salt or spice as needed.
When it’s ready, the beef should be tender, juicy, and surrounded by a rich, reddish broth — your consommé.
Step 3 – Shred the Meat
Remove the meat from the pot and shred it using two forks. Keep it moist by ladling a bit of consommé over it. This step ensures every taco is juicy and flavorful.
Step 4 – Assemble the Tacos
Here’s where the magic happens. Dip each tortilla into the consommé to coat both sides. Place it on a hot skillet or griddle. Sprinkle a bit of cheese, then add the shredded beef. Fold the tortilla in half and fry until crisp on both sides, pressing gently to seal.
The edges should turn golden and crispy, while the cheese melts and mingles with the beef inside. The sizzling sound alone will make your mouth water.
Step 5 – Serve and Enjoy
Serve your tacos hot, alongside a small bowl of consommé for dipping. Top with chopped onions, fresh cilantro, and a squeeze of lime. The moment you dip that taco and take your first bite, you’ll understand why this dish has taken over social media and restaurant menus everywhere.

Expert Tips for Birria Taco Success
- Be patient: Low and slow cooking is the secret to tender meat and rich broth.
- Use fatty cuts: They add flavor and keep the meat from drying out.
- Skim the fat: Save the top layer of consommé fat — it’s perfect for frying the tortillas.
- Let the flavors develop: Birria tastes even better the next day as the spices deepen.
- Reheat properly: Warm tacos on a skillet, not in the microwave, to keep them crisp.
Serving Suggestions and Pairings
Tacos this flavorful don’t need much, but a few touches can elevate the experience even more.
Toppings
- Fresh lime wedges
- Chopped onion and cilantro
- Crumbled queso fresco
- Jalapeño slices for a kick
Pairings
Enjoy your tacos with Mexican rice, refried beans, or grilled corn. If you’re serving drinks, go for horchata, agua de jamaica, or a cold beer to balance the richness.
Got leftovers? Turn them into Birria Quesadillas or even Birria Ramen by adding noodles to the leftover consommé.
Nutritional Information (Per 2 Tacos)
Serving Size: 2 tacos
Calories: 480 kcal
Sugar: 3 g
Sodium: 820 mg
Fat: 26 g
Saturated Fat: 11 g
Unsaturated Fat: 13 g
Trans Fat: 0 g
Carbohydrates: 25 g
Fiber: 3 g
Protein: 34 g
Cholesterol: 115 mg
These tacos strike the perfect balance between indulgence and nourishment. You’re getting protein-packed, flavorful comfort food that satisfies every craving.
FAQs – My Fave Birria Tacos
Can I make Birria tacos ahead of time?
Absolutely. You can cook the birria stew in advance and store it in the refrigerator for up to four days. When you’re ready to eat, reheat the meat and consommé, then fry the tacos fresh. This actually intensifies the flavors.
What’s the best meat for Birria tacos?
Beef chuck roast is your best bet — it’s marbled, tender, and absorbs the stew’s flavors beautifully. You can also mix in short ribs for extra richness. Traditional recipes often use goat or lamb, which brings a more earthy flavor.
Can I make Birria tacos without a blender?
Yes. If you don’t have a blender, finely chop the softened chiles and garlic before mixing them into your broth. It won’t be as smooth, but the flavor will still be delicious. You can also use a store-bought birria paste in a pinch.
Conclusion
When you make My Fave Birria Tacos, you’re not just cooking — you’re creating an experience. Every step, from toasting the chiles to dipping the tortilla into that glossy consommé, connects you to a long tradition of flavor and care. These tacos bring together everything you love about comfort food: warmth, spice, texture, and a little bit of indulgence.
You’ve got the ingredients, the method, and all the know-how. Now it’s your turn to fill your kitchen with that rich, smoky aroma and watch as each taco disappears off the plate. So roll up your sleeves, heat that skillet, and discover for yourself why My Fave Birria Tacos are bound to become your new favorite meal.
More Tasty Ideas
- Pumpkin Pie Cookies: These delightful cookies capture all the cozy, spiced flavors of a traditional pumpkin pie but in a handheld treat. Perfectly soft with a hint of cinnamon and nutmeg, they’re ideal for autumn gatherings or quick dessert cravings.
- Maple Glazed Pumpkin Bread: This moist, aromatic pumpkin bread combines earthy pumpkin puree with warm spices and a sweet maple glaze. It’s a comforting baked good that pairs beautifully with coffee or tea during the cooler months.
- Pumpkin Chocolate Chip Muffins: These soft, bakery-style muffins feature the best of both worlds — the sweetness of chocolate chips and the subtle spice of pumpkin. Great for breakfast, brunch, or a cozy afternoon snack.
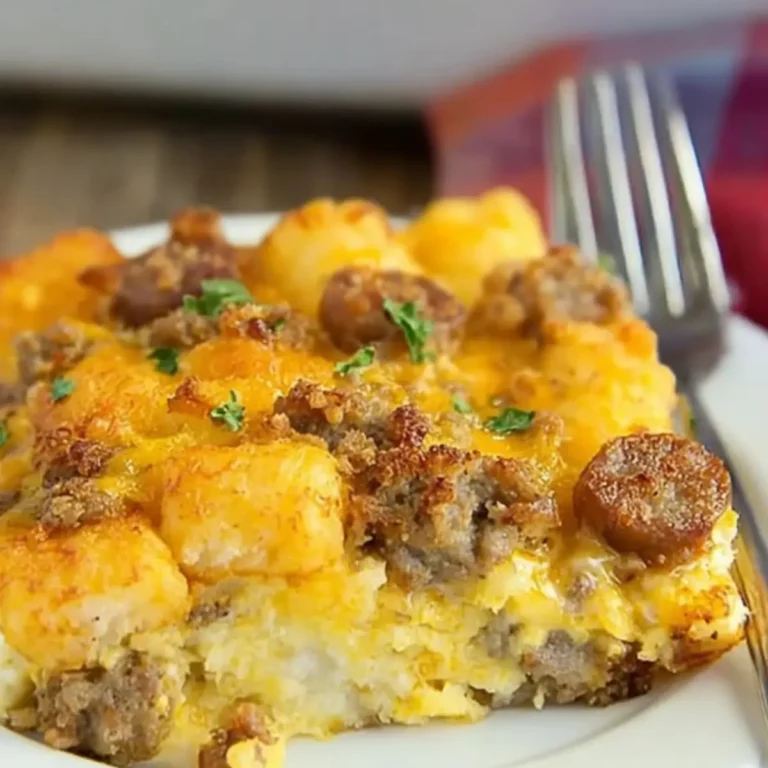
My Fave Birria Tacos

This Homemade Pumpkin Pie features a silky, spiced pumpkin custard baked in a buttery, flaky crust. It’s a classic fall dessert made from scratch, offering comforting flavors of cinnamon, ginger, and nutmeg perfect for holidays or cozy evenings.
- Prep Time: 35 minutes
- Cook Time: 1 hour 10 minutes
- Total Time: 1 hour 45 minutes
- Yield: 1 pie (8 servings)
- Category: Dessert
- Method: Baking
- Cuisine: American
- Diet: Vegetarian
Ingredients
- 1 1/4 cups all-purpose flour
- 1 tablespoon sugar
- 1/2 teaspoon salt
- 1/2 cup cold butter, diced
- 3 to 8 tablespoons ice water
- 3 large eggs, room temperature
- 1/2 cup brown sugar
- 1/4 cup granulated sugar
- 15 ounces pumpkin puree
- 12 ounces evaporated milk
- 3/4 teaspoon ground cinnamon
- 3/4 teaspoon ground ginger
- 1/4 teaspoon nutmeg
- 1/8 teaspoon cloves
- 1/8 teaspoon allspice
- Pinch of salt
Instructions
- In a large bowl, whisk together flour, sugar, and salt for the crust.
- Cut in the cold butter with a pastry cutter until the mixture resembles pea-sized crumbs.
- Gradually add ice water, 1 tablespoon at a time, until the dough comes together.
- Form the dough into a ball, wrap in plastic wrap, and chill for at least 1 hour.
- Preheat oven to 400°F (200°C) and grease a 9-inch pie pan with butter.
- Roll out the chilled dough into a 12-inch circle and fit it into the pie pan, trimming and crimping the edges.
- Chill the crust in the pan for 20 minutes. Line with parchment paper and fill with pie weights or dry rice.
- Blind bake for 15 minutes, then remove weights and paper.
- In a bowl, whisk together brown sugar, granulated sugar, cinnamon, ginger, nutmeg, cloves, allspice, and a pinch of salt.
- Add the eggs and whisk until smooth, then stir in pumpkin puree.
- Gradually add evaporated milk, mixing until the filling is smooth.
- Pour the filling into the pre-baked crust and bake at 400°F for 15 minutes.
- Reduce oven temperature to 350°F and continue baking for about 40 minutes, or until the center slightly jiggles and edges are set.
- Cool the pie completely on a wire rack before slicing and serving.
Notes
- You can substitute canned pumpkin with fresh roasted pumpkin puree for a more natural flavor.
- Use coconut milk instead of evaporated milk for a dairy-free version.
- Let the pie cool gradually to prevent cracks in the filling.
- The crust and filling can be prepared a day in advance.