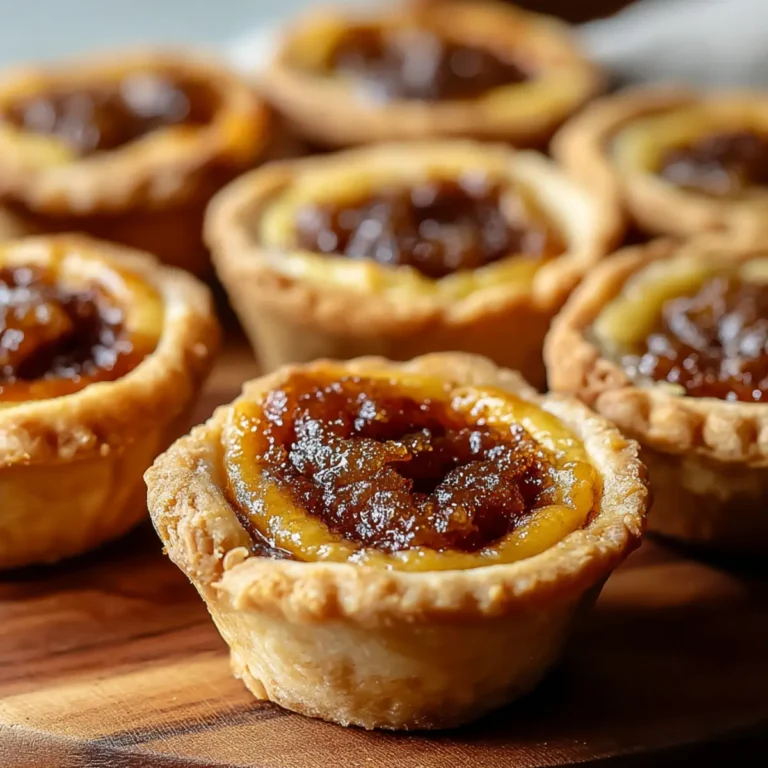
Late Sunday mornings were made for recipes like Golden Raisins Butter Tarts. Picture a kitchen filled with the sweet scent of bubbling maple syrup, the gentle clatter of a rolling pin on dough, and sunlight spilling across a messy countertop. You slip one of these tarts out of the muffin tin, and it’s still warm—crisp on the outside, oozing golden syrup inside, with plump raisins hiding within each bite.
If you’ve ever craved a nostalgic, deeply Canadian treat that’s gooey, flaky, and a bit old-fashioned in the best way, this is it. The combination of a homemade pastry shell with a caramel-like, buttery filling (and those golden raisins!) is pure comfort for your sweet tooth. No fussy steps, no special equipment—just a little patience and the satisfaction of making something truly special from scratch.
Nostalgic Canadian Comfort: Why These Butter Tarts Stand Out
There’s just something about biting into a crisp, flaky shell that gives way to a gooey, buttery center packed with golden raisins. Golden Raisins Butter Tarts aren’t your average dessert—each one feels like a little moment suspended in sugary bliss.
If you’ve ever wished for a dessert that balances decadence and simplicity, here’s your answer. These tarts bring you right back to cozy family kitchens, potlucks, and holidays growing up—there’s a reason they’ve stood the test of time. What makes these truly unique is the golden raisins, which plump up in the syrupy filling and give every bite just the right hint of fruitiness and chew.
Best part? You get everything homemade: a crust with that perfect tender snap, a filling that doesn’t run everywhere, and golden raisins that soak up every drop of sweet, buttery magic. Friends and neighbors will sneak back for seconds, guaranteed.
Inside Golden Raisins Butter Tarts: Everything You Need
Let’s break down what you’ll need for the ideal butter tart—from pantry classics to a surprise or two:
- Flour: forms the backbone of a tender, flaky crust.
- Salt: sharpens every flavor and balances the sweetness.
- Brown sugar: adds a subtle caramel note to the pastry base.
- Cold shortening: delivers extra flake and subtle richness.
- Unsalted butter (cold for crust, melted for filling): amps up the flavor and guarantees a melt-in-your-mouth shell and a luscious, rich filling.
- Cold water: helps the dough come together without overworking it.
- Corn syrup: the classic ingredient for that shiny, gooey texture.
- Maple syrup: brings real depth and fragrant sweetness.
- Vanilla extract: boosts the butter tart’s aroma and makes them irresistibly inviting.
- Large eggs: the secret for the filling’s satisfying structure and indulgence.
- Golden California raisins: the star—plump, sweet, and bright, giving these tarts their personality.
See the recipe card below for the full list of ingredients and measurements.
Swaps and Twists: Your Golden Butter Tart Toolkit
Don’t stress if your pantry looks a little different. For the pastry, you can swap out half the shortening for all butter if you love a rich, golden shell. No golden raisins? Regular raisins or even dried cranberries add their own character—just expect a slightly tangier bite.
Prefer a nutty crunch? A small handful of chopped pecans or walnuts stirred into the filling before baking works well. Maple syrup truly sets these butter tarts apart, but if that’s tricky to find, honey or golden syrup will still make a dreamy, sticky filling. Dairy-free bakers can use plant-based butters or margarine in both the dough and the filling for similar results.
Making Golden Raisins Butter Tarts: A Simple Method with Big Rewards
Rolling up your sleeves for a homemade treat has never been more rewarding. Here’s how to bring that old-school magic to life:
- Start by stirring together your dry pastry ingredients, just until the salt and sugar blend in.
- Add cold cubes of shortening and butter. Use a pastry cutter or your fingers, working quickly so everything stays cold. Stop when the mix looks like coarse crumbs—think small pebbles, not sand.
- Drizzle in cold water little by little. You want the dough to just come together—if it’s shaggy but holds when pressed, you’re on the right track.
- Shape the dough into two logs, wrap tight, and chill. Don’t skip the rest—chilling makes for the flakiest pastry later.
- When you’re ready, melt butter gently. Combine this with corn syrup, maple syrup, rich vanilla, and eggs. Whisk until the mixture’s smooth and golden, like a caramel sunset.
- Take out a dough log, slice into even pieces, and quickly roll each out to a rough circle. No need for perfection—rustic edges mean extra crispness!
- Press each dough circle into a muffin tin, forming little tart shells. Then, tuck a generous spoonful of golden raisins into the bottom of each.
- Carefully pour the syrupy filling over the raisins, filling each shell about three-quarters full. This keeps them from overflowing as they bake up and bubble.
- Repeat with the second dough log, filling up your whole muffin tin.
- Bake until the crust turns golden and the filling is vigorously bubbling. You’ll notice the irresistible aroma wafting from the oven—caramel, vanilla, and toasted dough all at once.
- Let the tarts cool in the pan before removing. The filling sets as it cools, making the finished tarts easier to lift without cracking that flaky shell.
Bake Like a Pro: Secrets, Tips, and Handling Tricks
For the perfect Golden Raisins Butter Tarts, keep everything as cold as possible until baking—the dough, the fats, and even the mixing bowl if you want to go all out. This gives that signature puff and crispness.
When making the filling, don’t beat the eggs too aggressively—just enough to combine. A gentle hand keeps the filling plush and delicate, never rubbery. If your kitchen’s warm, keep the dough you aren’t rolling in the fridge between batches.
Don’t overfill those tart shells! The filling bubbles up & settles as it cools, so leaving a finger-width at the top is your best bet for no-mess tarts. Worried about sticking? Lightly grease your muffin tin or use a parchment strip under each shell for easier removal. Leave the tarts in the pan to fully cool so the filling sets—this patience pays off.
Store leftovers in an airtight tin at room temperature for a day or two if you like your butter tarts chewy, or refrigerate them for a firmer bite. They’re even better the next day, if any survive that long.
Matching Flavors and Tart Variations
These butter tarts are endlessly riffable. If you want a little crunch or a flavor boost, sprinkle in toasted nuts, shredded coconut, or even a few chocolate chips alongside the raisins.
On the side, try serving golden raisin tarts with a dollop of whipped cream or a scoop of vanilla ice cream. Coffee, black tea, or a glass of cold milk make for perfect flavor pairings—each sip balances that caramelized sweetness.
Prefer a softer filling? Slightly underbake and let them cool completely. For a firmer, more set treat, bake just a bit longer. You can go mini for bite-sized gatherings or jumbo for a bold brunch statement. Butter tarts also freeze beautifully; just wrap tightly, pop in the freezer, and thaw at room temperature.
FAQs about Golden Raisins Butter Tarts
Can I use regular raisins instead of golden raisins in butter tarts?
Yes, regular raisins work perfectly fine in butter tarts. You’ll get a slightly deeper flavor from the darker raisins, while golden raisins keep things light and fruity.
How do I keep the tart filling from running everywhere?
Use a careful baking time and don’t overfill the shells to keep your filling gooey but contained. Allowing the tarts to cool fully in the muffin tin helps set the filling.
Can I make Golden Raisins Butter Tarts ahead of time?
Absolutely, these are great for making ahead. Store them at room temperature for a day or two, or freeze and thaw as needed—they hold up really well.
What’s the trick to a flaky butter tart pastry?
The secret is cold ingredients and a gentle touch—don’t overwork the dough, and handle everything as little as possible. Chilling the dough before rolling gives the best results.
A Delicious Way to Enjoy Golden Raisins Butter Tarts
Golden Raisins Butter Tarts are the kind of homemade treat that brings people together. Sweet, gooey, and surrounded by the crunch of real pastry, they’re a bite of both nostalgia and pure indulgence.
Maybe you make them for holidays, maybe for a weekend with friends, or simply to savor on your own—these tarts will always deliver comfort, a dash of Canadian heritage, and that moment of kitchen-made joy each time you bake them.
More Delicious Recipes
- Easy Breakfast Quiche: A wonderful comfort food option that’s perfect for brunch, just like your sweet butter tarts.
- Honey Sesame Chicken: This dish brings a delightful sweetness, similar to the gooey filling in butter tarts.
- Chickpea Feta Avocado Salad: A fresh and satisfying dish that pairs well with sweet treats for a balanced meal.

Golden Raisins Butter Tarts
Ingredients
Equipment
Method
- In a large mixing bowl, stir together the flour, salt, and brown sugar.
- Add the cold shortening and butter. Mix with a pastry cutter or your fingers until the mixture looks crumbly.
- Gradually add cold water and blend just until a dough forms.
- Divide the dough in half, shape each into a log, wrap in plastic, and chill in the refrigerator for at least 1 hour.
- In a microwave-safe measuring cup with a spout, melt the butter.
- Whisk in the corn syrup, maple syrup, vanilla, and eggs until the mixture is smooth.
- Preheat the oven to 425°F (220°C).
- Remove one dough log from the fridge. Cut it into 12 even pieces and roll each piece into a circle about 1 cm thick.
- Press each dough circle into a muffin tin to form the tart shells.
- Divide the golden raisins evenly among the tart shells, placing them at the bottom.
- Pour the filling over the raisins in each tart, filling each about three-quarters full.
- Repeat with the second dough log to make 12 more tarts.
- Bake for 15 minutes or until the crusts are lightly golden and the filling is bubbling.
- Let the tarts cool in the tin before removing carefully.