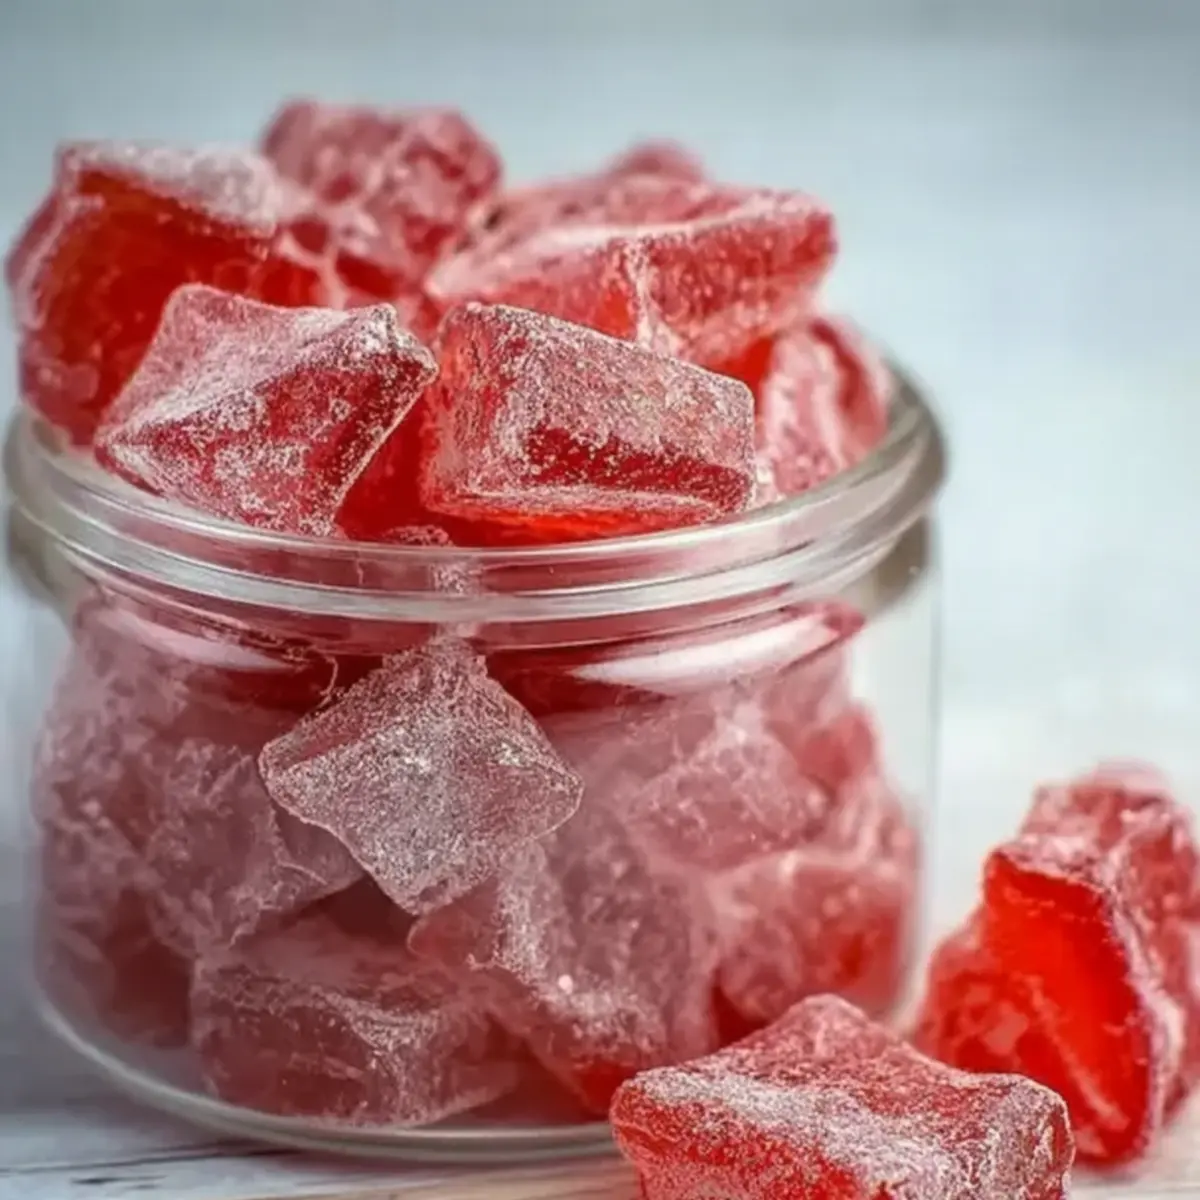
There’s something undeniably magical about making Old Fashioned Rock Candy at home. Maybe it’s the memory of spotting those jewel-like sweets in vintage candy jars or the thrill of cracking sugary shards with your own hands. Whatever the reason, this recipe brings both a wave of nostalgia and a burst of vibrant color to your kitchen.
The beauty of old-fashioned rock candy is how surprisingly simple it is: a handful of pantry ingredients, a bit of patience, and soon you’ll be surrounded by sparkling crystals that taste just as delightful as they look. Whether you’re revisiting childhood treats or sharing a new kitchen adventure with friends and family, this recipe is pure fun from start to finish.
Choosing pans and tools for perfect candy shards
To craft Old Fashioned Rock Candy at home, you only need a few key items from your kitchen drawer. Candy making might sound elaborate, but you’ll be surprised at how simple the setup really is. Here’s what you’ll want ready:
- Large heavy saucepan – A sturdy pot helps the sugar mixture cook evenly and prevents burning.
- Candy thermometer – Essential for hitting the precise temperature where magical crystals can form.
- Two shallow pans (around 38x25x2,5 cm each) – Greased, these are where you’ll pour and cool your candy to get that perfect breakable sheet.
That’s it! This recipe relies on basic, reliable kitchen tools, making it suitable for beginners and a fun project with older kids (just watch those hot sugar bubbles!).
Ingredients that make Old Fashioned Rock Candy unique
Each ingredient in this rock candy recipe has a special role to play—some bring structure, others add flavor or color. Here’s what you’ll need:
- Sugar – The heart and soul of classic rock candy, giving it structure and a satisfyingly crisp snap.
- Light corn syrup – Keeps the candy mixture smooth and prevents unwanted crystallization for glossy, clean-tasting shards.
- Water – Helps dissolve the sugar and starts the magic.
- Food colouring (red or your own favorite color) – Adds festive color to brighten up every bite and create those signature candy hues.
- Watermelon flavoring (or any extract you love) – Lends a nostalgic, fruity punch that can be customized to fit your taste or any party theme.
- Confectioners’ sugar – Dusts over the cooled candy pieces to prevent them from sticking and adds a soft, snowy finish.
See the recipe card below for the full list of ingredients and measurements.
The cooking process for easy rock candy at home
Making Old Fashioned Rock Candy is all about bringing patience, attention to detail, and a little sense of wonder to your kitchen. Here’s the step-by-step:
- Grease two shallow pans (about 38x25x2,5 cm each) and set them aside. The slick surface keeps your candy from sticking and makes breaking shards a breeze.
- Combine the sugar, water, corn syrup, and food coloring in a large heavy saucepan. Cook over medium heat, stirring gently, until the sugar granules dissolve and the mixture starts to look clear and uniform.
- Once you see the mixture boiling, stop stirring and let it cook untouched. Keep a close eye on the candy thermometer—you’re aiming for 150°C. The bubbles will look thicker, and you might notice the sweet aroma rising in the steam.
- When the thermometer hits 150°C, quickly remove the pot from the heat. Stir in your chosen flavoring. This is your moment to personalize the batch—fruity, spicy, or classic.
- Pour the hot candy into your waiting pans. Work swiftly but carefully—the mixture hardens fast. Let the slabs cool completely until they’re firm to the touch and opaque.
- Once cool, dust the top generously with confectioners’ sugar and break into chunky, sparkling pieces with your hands or the back of a spoon. Each shard will sound satisfyingly crisp as it snaps apart.
- Store your rock candy in airtight containers at room temperature to keep moisture away and maintain that perfect crunch.
Tips, troubleshooting, and common mistakes with rock candy
Rock candy may look simple, but homemade candy comes with quirks. Here’s how to navigate them:
- Crystal clarity: If your candy turns cloudy, it might be from stirring too much after it starts to boil. Stir only until the sugar dissolves, then hands off as it cooks.
- Temperature accuracy: If the candy isn’t firm, it likely didn’t reach 150°C. Always trust your candy thermometer—guessing is risky when it comes to boil stages.
- Sticky candy: Insufficient or uneven greasing of your pans can make removal tough. Be generous when greasing, especially in the corners.
- Flavor too faint or strong: Use high-quality extracts and be precise. A little goes a long way, especially with strong flavors like cinnamon or peppermint.
- Candy sticks together: Make sure to dust with enough confectioners’ sugar after breaking the pieces and store them in a dry, airtight container.
If you ever notice sugar crystals forming on the side of your saucepan, you can brush them down gently with a wet pastry brush before the mixture boils. Patience pays off with candy—there’s nothing quite like the scent of bubbling syrup to make a kitchen feel alive.
Pairing ideas and favorite variations for rock candy
Rock candy is more than just a solo treat—it’s an invitation to get creative. Here are a few pairing and variation ideas:
- Party favors: Pile colorful rock candy in jars tied with ribbon for party or wedding favors.
- Tea and cocktails: Use vibrant shards to sweeten drinks and add sparkle to a glass of iced tea or lemonade—or stir them into festive cocktails for a grown-up twist.
- Kid-friendly parties: Go wild with colors and flavors: grape, citrus, berry, or even clear with pure vanilla.
- Seasonal spins: Match colors and flavors to holidays—think green mint at Christmas, orange cinnamon for autumn, or multi-colored batches for birthdays.
- Tropical vibe: Swap watermelon for pineapple or coconut extract for a summery spin.
Rock candy is endlessly adaptable, so don’t be afraid to experiment with combinations that feel personal or tied to special memories.
FAQs about Old Fashioned Rock Candy
How do I store Old Fashioned Rock Candy to keep it fresh?
Store your rock candy pieces in airtight containers at room temperature, away from heat and moisture. This helps prevent them from becoming sticky or soft, ensuring that crisp, glassy texture lasts for weeks.
Can I swap out the flavoring in Old Fashioned Rock Candy?
Absolutely! Any extract or flavor oil will work. Try peppermint for winter, lemon for summer, or your own favorite blend. Just remember that a little goes a long way, so start sparingly and adjust to taste.
Is it safe to freeze homemade rock candy?
Freezing is not recommended because moisture can cause the candy to become sticky once thawed. It’s best kept dry and cool in an airtight container. If you need to make it ahead, simply break and store as directed—rock candy keeps beautifully at room temperature.
Bringing rock candy magic into your home
There’s a special kind of satisfaction in watching Old Fashioned Rock Candy cool and crystallize right on your kitchen counter. The glossy slabs, the satisfying snap as they break, the burst of color and flavor—they all come together for a treat that’s both playful and deeply nostalgic. Once you’ve tasted a piece, still dusted with whispery confectioners’ sugar, you’ll see why homemade truly beats store-bought every time. So gather your ingredients and bring a little sweetness—and a lot of sparkle—into your day.
More Delicious Recipes
- Christmas Coffee Blend Recipe: This festive drink pairs well with sweet treats like rock candy during the holidays.
- Peppermint Hot Chocolate: Enjoy a warm, chocolatey drink that matches the colorful fun of your homemade candy.
- Sunrise Mocktail: A vibrant drink that complements the cheerful colors and flavors of rock candy for a perfect party treat.
Old Fashioned Rock Candy Recipe
Ingredients
Equipment
Method
- Greased 2 (15x10x1-in) pans. Palace aside.
- Combine the sugar, water, corn syrup and food colouring In a large heavy saucepan. Cook over medium heat until sugar is dissolved.
- When it boils. Keep cooking it without stirring until a candy thermometer shows 300°.
- Take the mixture off the heat and add the flavouring. Quickly pour it into the pans you prepared earlier and let it cool.
- Sprinkle some confectioners' sugar on top and then break it into pieces. Keep the candy in airtight containers for storage.