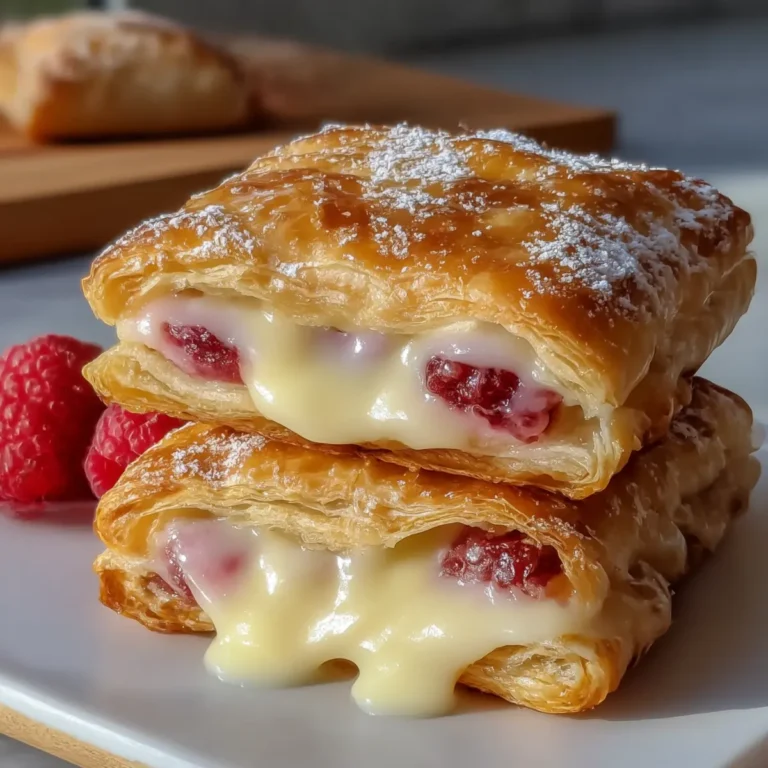
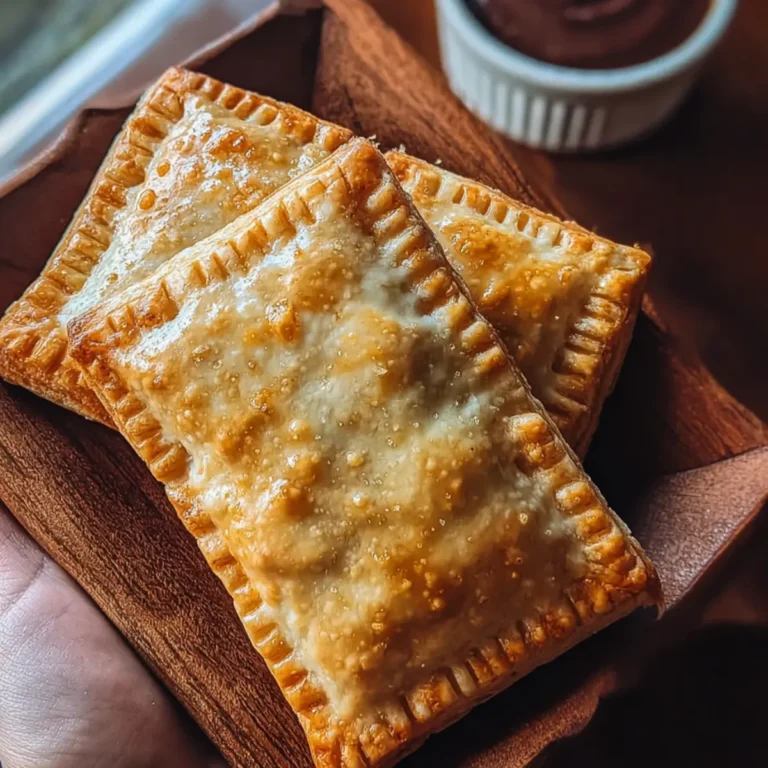
There’s something about homemade Pop Tarts that brings out that perfect mix of childhood nostalgia and grown-up appreciation for buttery pastry. Whenever I catch the scent of these baking—flaky dough turning golden, fruity jam just threatening to bubble through the seams—it’s impossible not to peek through the oven door every few minutes. These aren’t the grab-and-go treats from a cardboard box; they’re crisp at the edges, tender throughout, filled to the brim with sweet jam, and finished with a gleaming glaze. Sharing a fresh batch right off the wire rack with a strong cup of coffee or glass of cold milk—that’s my idea of dessert bliss (and honestly, breakfast joy).
Biting into a scratch-made Pop Tart has a kind of magic: a pastry shell that shatters ever so slightly, spilling warm fruitiness, and then the creamy sweep of vanilla icing to finish. If you’re craving a kitchen project that’s equal parts playful and impressive, these are the ones to make.
When Pop Tarts Bring Back the Magic
It’s funny how certain foods can be a portal through time. The minute you pull fresh Pop Tarts from your own oven, the kitchen fills with a scent so enchanting, it’s like waking up on a Saturday morning as a kid again. But here’s the real charm—these Pop Tarts aren’t just about nostalgia. They’re golden, glossy, unapologetically homemade, and the type of treat people didn’t actually believe you could make from scratch (until you hand them one, still warm, and watch their eyes go wide).
I like making these as an impromptu baking project on those rainy afternoons when you need a little edible distraction—rolling out the dough, spooning in jam with barely a pause to resist licking the spoon, and finally, drizzling on that glossy, vanilla-scented glaze. They’re a guaranteed hit, whether you wrap them up for a brunch table, tuck them into a kid’s lunchbox, or stack them on your countertop for late-night “just one more bite” missions.
What You’ll Need to Craft Homemade Pop Tarts
- Flour – this is your structure, giving the pastry its backbone and tender, flaky bite.
- Unsalted butter – cold and diced, it’s the secret to a pie crust that shatters at the teeth and tastes rich but not heavy.
- Granulated sugar – a pinch of sweetness in the dough to keep things balanced.
- Kosher salt – absolutely necessary so the tart doesn’t veer into blandness.
- Eggs – one for tender structure in the dough, and another for brushing and sealing.
- Whole milk – helps the dough hold together, with added richness.
- Fruit jam or preserves – pick a good quality or homemade one; strawberry, raspberry, or apricot all work beautifully. It’s the surprise center that bursts with sweet-tart flavor.
- Powdered sugar – what transforms a little cream into that shimmering classic glaze.
- Heavy cream – gives the icing a lush finish, velvety and smooth.
- Vanilla extract – real vanilla for a fragrant, almost floral finishing touch to the icing.
See the recipe card below for the full list of ingredients and measurements.
Bringing Everything Together for Handmade Pop Tarts
Making Pop Tarts from scratch involves a few steps, but every moment is worth it when you smell pastry and fruit mingling in the air. Here’s how I do it:
- Start by combining your dry ingredients in a large bowl—once the flour, sugar, and salt are mixed, you’ll want to work in the cold, diced butter using your fingers or a pastry cutter. The texture should look a bit like coarse sand, with some pebble-sized pieces still visible (those bits create all the flake later).
- Whisk one egg with whole milk and pour it into the bowl. Gently stir, just long enough for the dough to come together—don’t overmix or you’ll lose that tender crumb we’re aiming for.
- Split the dough into two rough discs, wrap in plastic, and pop them in the fridge. This little nap chills the butter and relaxes the gluten, which makes your pastry easier to roll and bakes to crisp perfection.
- When you’re ready, roll out the first disc on a lightly floured surface. You’re aiming for a rectangle that’s not paper thin, but nicely even. Trim the edges (snack on the scraps, if you’re like me) and slice the dough into neat rectangles for the tart bases.
- Repeat with the second disc, so you’ve got matching tops for every base—think of them like sweet pastry sandwiches just waiting to happen.
- Arrange the bottoms on a parchment-lined baking sheet and spoon a generous dollop of jam in the center of each, leaving space at the borders so the filling doesn’t escape. (A little restraint is good here, hard as it is.)
- Lightly beat your second egg and brush it along the edges of each bottom. Set the tops onto each tart and press the seams closed—then crimp the edges all around with a fork so they look charmingly rustic and lock in the jam.
- Don’t forget to poke a few little holes in the top of each pastry, so steam can escape. Slip the whole sheet into the fridge for another chill session. This keeps everything crisp and neat when it hits the oven.
- Preheat your oven—make sure it’s truly ready, not halfway there! Bake until the tarts are deeply golden, the edges just shy of toasty, and the bottoms sound faintly hollow if you tap them on the tray.
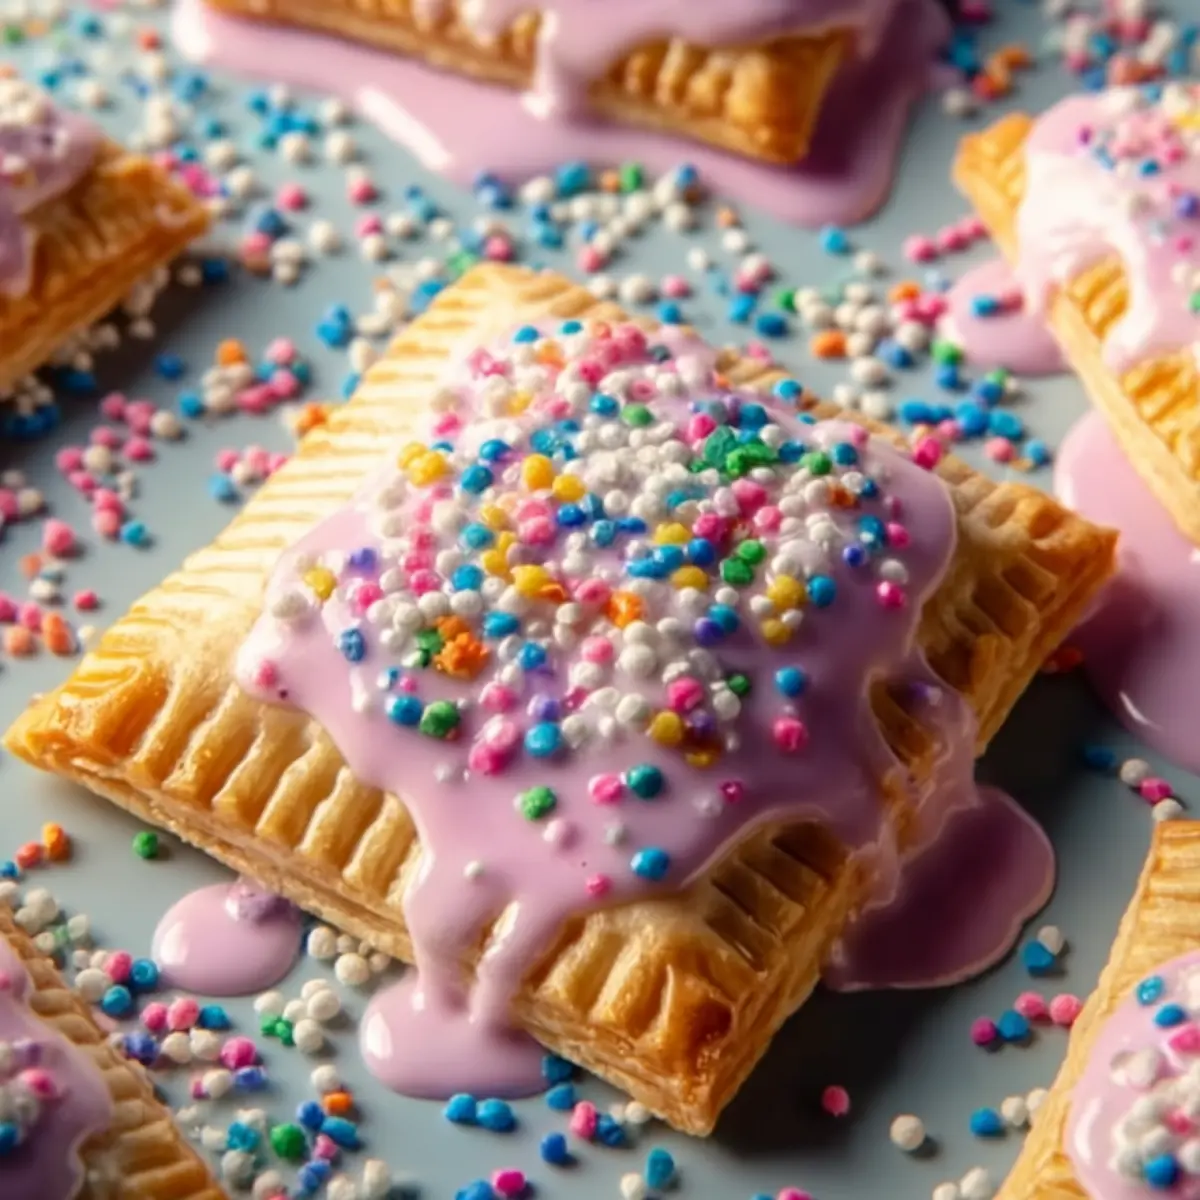
- Let your Pop Tarts cool right on a wire rack. When they’re at room temperature, whip up the glaze by stirring powdered sugar, heavy cream, and vanilla until it’s silky and spreadable. Drizzle or spread each tart and marvel at the shine. If you can resist biting in immediately, let the glaze set (or just accept sticky fingers—it’s part of the fun).
Texture, Flavor, and That First Bite
There’s a moment when you pick up a freshly baked Pop Tart—its edges buttery and crisp, glaze just set, a faint jammy smell escaping the cracks—where you can’t help but anticipate the first bite. The outer pastry snaps with a gentle crunch, but inside, it’s all delicate flakes and soft layers.
The filling does its part, too: sweet but sharp, never cloying, with a gentle ooze that stays put (no running off the sides). The glaze on top adds a hint of creamy richness, not too thick, with a kiss of vanilla that lingers on your tongue. Every chew has that classic Pop Tart contradiction—a store-bought memory, but miles better in taste, texture, and satisfaction.
It’s not just a pastry. It’s a three-in-one experience—crisp shell, lush fruit center, shiny glaze—for breakfast, dessert, or just a moment when you want to indulge in something real.
Little Details That Transform Pop Tarts
Getting homemade Pop Tarts just right is all about the details. Here’s what I’ve learned along the way:
- Use cold butter straight from the fridge—if it starts to melt into the dough, pause and chill everything. The colder the pastry, the flakier the results.
- For the filling, try any thick jam you love. Strawberry is a classic, but blueberry, cherry, or even fig preserves are incredible. If your jam is extra runny, reduce it down on the stove until spoonable and thick, or try adding a little cornstarch slurry.
- No whole milk? You can substitute with another high-fat milk, or even light cream (as long as you stick to the dough ratios).
- Don’t skip the chilling time before baking—this causes the butter to puff up the pastry and prevents spreading, so the Pop Tarts hold their shape.
- If your glaze is too thin, add more powdered sugar; if it’s too thick, loosen with a drip more cream or a touch of milk.
- Pop Tarts can be made ahead. Keep unglazed, baked tarts sealed at room temperature for a day or two; for longer storage, refrigerate or freeze. Glaze after reheating for best texture.
And if you crave a little extra, try dusting the wet glaze with colorful sprinkles or a pinch of freeze-dried berries.
Sharing and Serving Pop Tarts with Style
Pop Tarts don’t need a fancy setup to win fans, but I love surprising people with them at brunch, stacked slightly askew and shining with flecks of glaze. Set them on a platter next to a bowl of seasonal fruit and a pot of coffee, and you’ll watch them disappear.
They also tuck beautifully into lunchboxes—just wrap individually in waxed paper and stash in a tin. For a dessert twist, warm a tart ever so slightly and top with a gentle scoop of vanilla ice cream—a sort of nostalgic riff on pie à la mode.
I’ve even used them as a casual sweet on holiday mornings, set out with mugs of cocoa for maximum cozy vibes. However you serve them, they’re always the first to go.
FAQs about Pop Tarts
Can Pop Tarts be made ahead of time and stored?
Absolutely! You can bake the Pop Tarts in advance, let them cool completely, and store them in an airtight container for up to three days. For longer storage, you can refrigerate or even freeze them unglazed—just bring to room temperature or reheat before adding the icing.
What substitutions work for the Pop Tart filling?
Feel free to use nearly any thick, spoonable jam or preserve you like. If you want something less sweet, try apple or pear butter. Chocolate hazelnut spread or peanut butter with a touch of honey also make great fillings if you want to switch up the flavor.
Can I freeze homemade Pop Tarts for later?
Yes, Pop Tarts freeze beautifully. Bake and cool the tarts (leave off the glaze for best results), then wrap well and freeze. When you’re ready to enjoy, warm them in the oven or toaster and top with fresh glaze once thawed.
How do you reheat Pop Tarts without making them soggy?
The best way is to pop them in a hot oven for a few minutes until crisp and heated through. Avoid using the microwave, as it tends to soften the pastry. If you’ve glazed them, let them cool slightly before eating to avoid melting the icing everywhere.
There’s nothing quite like the comfort and downright fun of biting into a homemade Pop Tart. Whether you go classic with strawberry and glaze, or get experimental with your fillings, the flaky pastry and bright fruit center offer just the right hit of sweetness and texture. Fresh from the oven or stashed for later, these Pop Tarts make any moment a little more memorable, a little more delicious, and a lot more joyful. Go on—give them a try and see what all the homemade fuss is about.
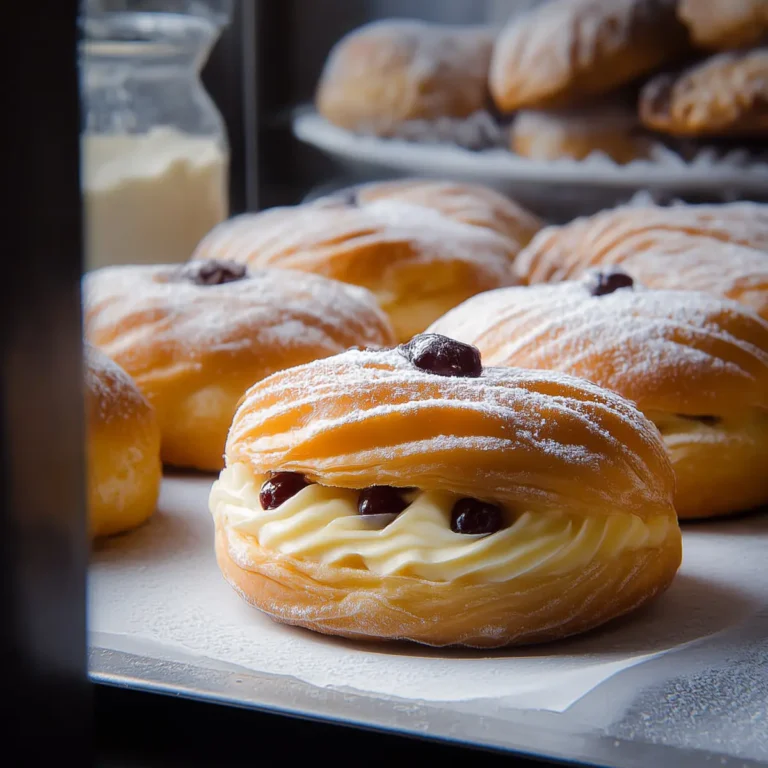
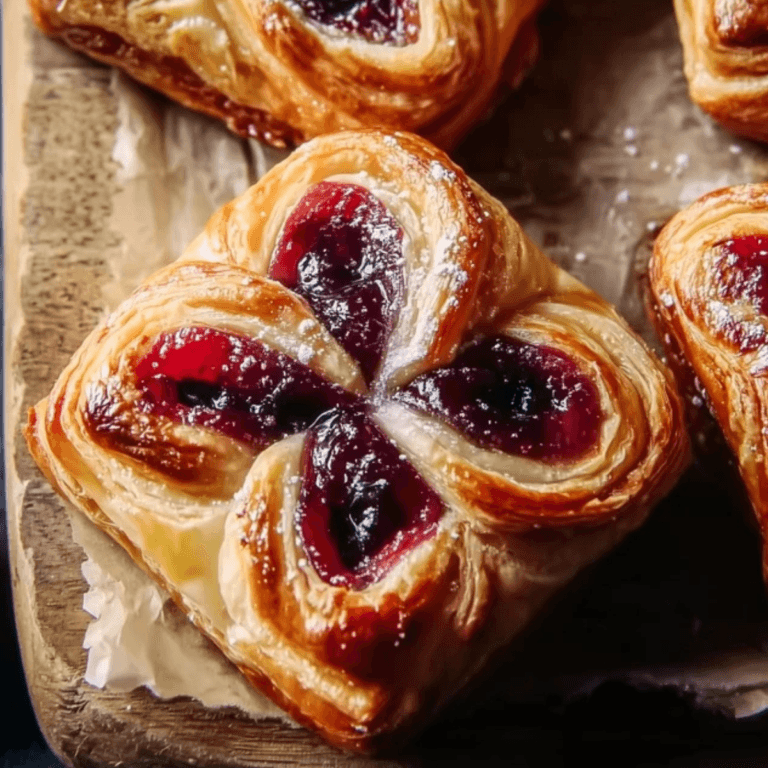
More Delicious Recipes
- Breakfast Danish Pastries: These flaky pastries provide a similar buttery texture and sweet fillings that you’ll enjoy just as much as Pop Tarts.
- Raspberry Almond Puff Pastry Danish: With a delightful jam filling, this pastry offers a gourmet twist on the flavors you love in homemade Pop Tarts.
- Cinnamon Roll Sugar Cookies: These sweet treats combine a comforting nostalgia and rich flavor, perfect for satisfying your sweet cravings like Pop Tarts do.
Pop Tarts
Ingredients
Equipment
Method
- In a large bowl, stir together the flour, sugar, and salt. Add in the cold butter and use a pastry cutter or your fingers to blend until the mixture forms coarse crumbs.
- Whisk one egg with the milk in a small bowl. Pour into the flour mixture and mix just until the dough holds together.
- Divide the dough in half, shape into discs, wrap each in plastic, and refrigerate for 30 minutes.
- Roll out one disc of dough on a lightly floured surface into a 1/8-inch thick rectangle. Trim edges and cut into 9 equal rectangles.
- Repeat with the second disc to create 9 matching tops.
- Place the bottom rectangles on a parchment-lined baking sheet. Spoon about 1 tablespoon of jam into the center of each, leaving a clean border around the edges.
- Beat the second egg and lightly brush the borders with it. Top each with a second rectangle of dough and press the edges to seal. Crimp with a fork.
- Poke holes in the tops to allow steam to escape. Refrigerate the assembled tarts for 30 minutes.
- Preheat the oven to 375°F (190°C). Bake the Pop Tarts until golden brown, about 30 minutes.
- Let cool completely on a wire rack. For the glaze, stir together the powdered sugar, heavy cream, and vanilla until smooth. Spread over cooled tarts and let set before serving.