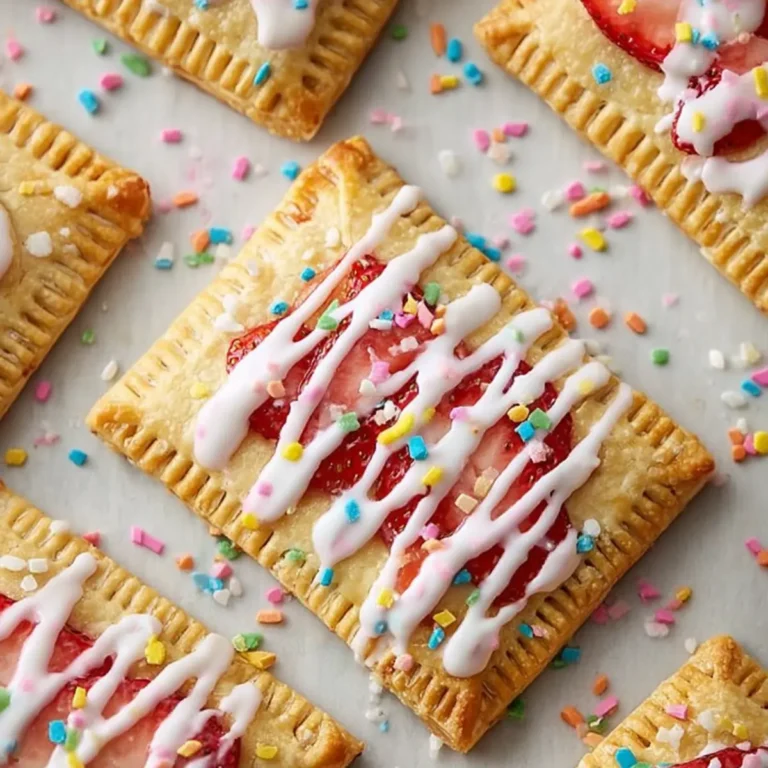
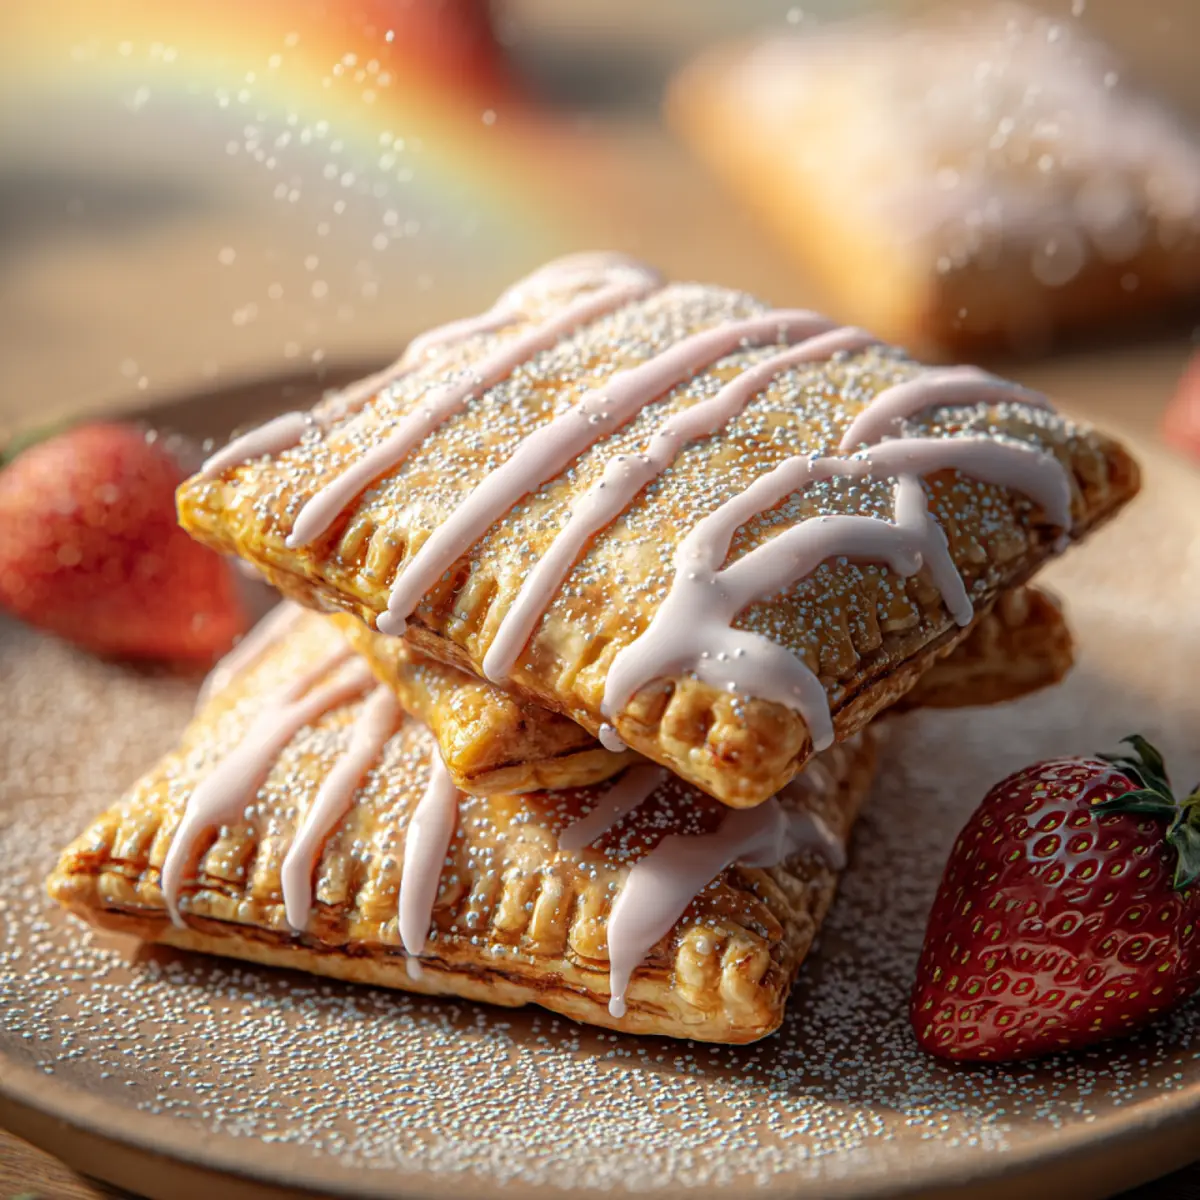
Ever get a craving for something a little nostalgic, buttery, and sweet—something that instantly takes you back to lazy mornings and quick after-school snacks? That’s exactly the feeling these homemade Pop-Tarts conjure up for me. Flaky pastry, a shimmering jammy center, and that crackly glaze with sprinkles on top—what more could you want when you need a treat that’s as fun to make as it is to eat?
Pop-Tarts have always been one of those “you know you shouldn’t, but you want to” groceries. Making them from scratch, though, honestly hits on a different level—crisp corners, soft centers, and an aroma that makes your entire kitchen feel cozy and a little mischievous. Whether you’re reliving a childhood breakfast or just craving a simple pastry with real flavor, these are the answer.
Why These Pop-Tarts Will Win You Over
What really sets these homemade Pop-Tarts apart is the combination of a flaky, buttery crust with a glossy, sweet jam filling. They aren’t just a copycat of the boxed version—they’re a grown-up (and way tastier) take that happens to be just as playful. You know that satisfying crunch when you bite into a well-baked pastry, followed by a soft, tangy burst of fruit? You get all of that here, plus the kind of aroma that practically drags everyone into the kitchen as soon as you open the oven door.
And honestly, there’s something pretty great about choosing your own jam, customizing sprinkles, or adding a hefty swipe of vanilla glaze. These toaster pastries are a blank canvas, perfect for kids, nostalgic adults, or anyone who wants to make a breakfast treat or afternoon pick-me-up from scratch. Bonus: they’re way fresher than anything you’ll find in a box, and they bring just a bit of magic to your routine.
What You Need for These Homemade Pop-Tarts
The beauty of Pop-Tarts is that you don’t need any weird ingredients—just the classics (plus a little imagination for the filling). Here’s what goes into every irresistibly flaky bite:
- flour – the foundation for a sturdy, tender dough; use all-purpose for that perfect balance between crisp and soft.
- Unsalted butter – brings richness and those melt-in-your-mouth layers; cold is key for flakiness.
- Granulated sugar – adds subtle sweetness and helps with browning.
- Salt – sharpens flavors and keeps things from tasting flat.
- Egg – binds the dough and gives it structure; also used for brushing on top for a little shine.
- Milk or cold water – just enough to bring the dough together without making it tough.
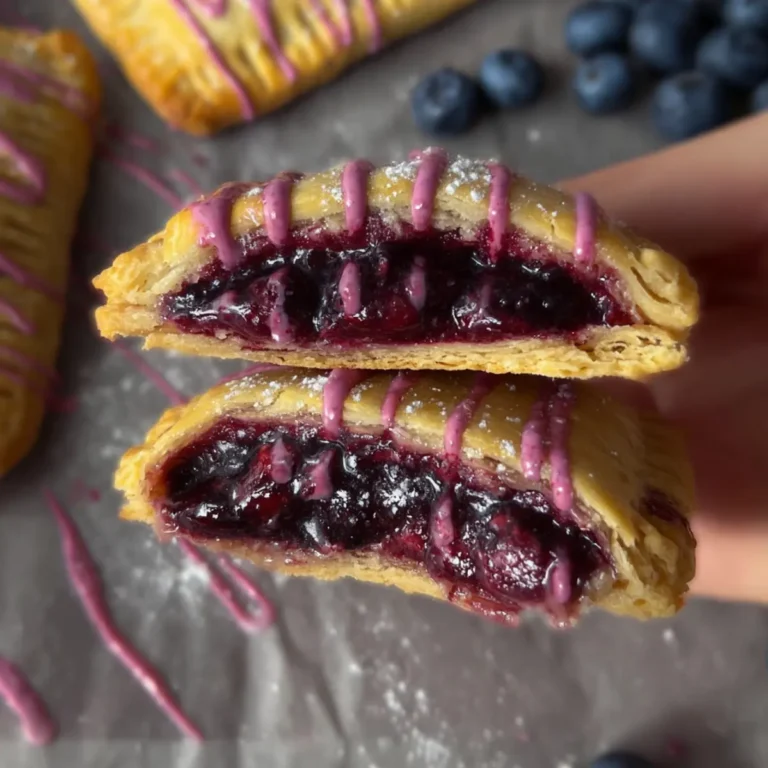
- Fruit jam or preserves – the fun part; choose your favorite flavor, or even mix a couple together for a twist.
- Powdered sugar – makes for the smooth, classic glaze everyone expects.
- Milk (for glaze) – thins the powdered sugar into a creamy, spreadable topping.
- Vanilla extract – adds warmth and depth to both glaze and dough.
- Sprinkles (optional) – totally for fun, colorful flair, but highly recommended if you want extra nostalgia.
See the recipe card below for the full list of ingredients and measurements.
How to Make Pop-Tarts from Scratch
Making Pop-Tarts totally from scratch is easier than you think—most of it’s just about keeping things cold and trusting your instincts. Here’s how I like to go about it:
- Start by preheating your oven and lining a baking tray with parchment paper. It saves you from any sticky situations (literally) later on.
- Mix together your [flour](https://en.wikipedia.org/wiki/Flour), sugar, and salt in a big bowl. Add your cubed, cold butter and work it in with a pastry cutter or your fingertips—stop when the mixture resembles chunky, damp sand, but don’t go overboard and let the butter melt.
- Crack in your egg and drizzle in just enough milk or cold water to bring it together. You’re looking for a shaggy dough that you can pat into two discs. Wrap them up and chill them, letting all that butter get nice and firm again.
- Once chilled, dust your counter with a bit more flour. Roll out one disc at a time until it’s about as thick as a coin—work quickly so your butter stays solid. Cut neat rectangles, and if you want the classic Pop-Tarts look, aim for uniform sizes (but honestly, rustic never hurt anyone).
- Spoon a generous dab of jam into the center of half your rectangles, leaving a buffer around the edge. Lay a second rectangle over each, then use a fork to gently crimp and seal all four sides. Don’t forget to prick the tops—just a couple of holes lets steam escape and keeps everything flat and crisp. Transfer them to your baking sheet.
- Brush the tops lightly with beaten egg for gloss and that beautiful golden color. Pop them in the oven until they look deeply golden and the edges are crisp, not pale. Your kitchen should smell like a bakery by now.
- Once cool, whisk together powdered sugar, milk, and vanilla extract to make your glaze. Smooth it lovingly over each tart, then go wild with sprinkles if you like. Let the glaze set, then enjoy warm or at room temp—the jam inside gets all gooey and comforting.
Secrets to Consistently Great Pop-Tarts
A few small tweaks can mean the difference between soggy or flat and “I can’t believe I made these!” Here are my tried-and-true tips for getting perfect Pop-Tarts every time:
Keep everything as cold as possible until baking—especially the butter and pastry dough. If your kitchen’s on the warm side, work quickly or even chill your baking sheet first.
Don’t be tempted to overfill with jam. A little restraint saves you from jam volcanoes and sticky messes in the oven. If some leaks out, just think of it as a baker’s treat for later.
Let the pastry chill again after shaping if you notice it’s gotten soft. This helps the butter work its flakiness magic and prevents spreading.
If your glaze feels too runny, just add a spoonful more powdered sugar and whisk again. Too thick? A drop or two more milk fixes it.
For leftovers (if you somehow have any), store them in an airtight container at room temperature for a day or two, or pop them in the fridge. Warm gently in the oven or toaster to bring back that just-baked flavor—the microwave works in a pinch, but you’ll lose any crispiness.
Creative Variations and Serving Ideas
One of the best things about homemade Pop-Tarts is how many ways there are to riff on them. You can swap out the jam for peanut butter and chocolate chips for a PB&J energy boost, or even mix up your preserves for a two-tone filling—strawberry and apricot together are especially nice.
If you’re feeling decadent, try a cinnamon-sugar mixture as a filling, or even a spoonful of Nutella. For a fall twist, go with spiced apple butter dusted with a little cinnamon in the glaze.
Pair these pastries with a big mug of coffee or tea for a retro breakfast, or serve them as a fun party dessert. Kids love customizing their own—line up bowls of jams, spreadable nut butters, and sprinkles for a DIY Pop-Tart bar.
You can freeze the unglazed, baked pastries for quick treats any day—just thaw, re-warm, and glaze right before serving. Leftovers are rare, but if you have them, try crumbling over ice cream for an over-the-top sundae.
FAQs about Pop-Tarts
Can I freeze homemade Pop-Tarts for later?
Absolutely! Bake and cool the Pop-Tarts, but skip the glaze if you plan to freeze them. Stack between layers of parchment in an airtight container and freeze. When you’re ready to eat, thaw at room temperature or gently warm in the toaster or oven, then glaze and finish with sprinkles.
What’s the best way to store leftover Pop-Tarts?
Keep any leftovers in an airtight container at room temperature if you’ll eat them within a couple days. For longer storage, the fridge works too. For maximum crispness, avoid stacking, or separate layers with parchment.
Can I change the filling in my Pop-Tarts?
Definitely! Use any thick, spreadable filling you love—fruit jam, preserves, nut butters, or even chocolate-hazelnut spread all work well. Just avoid anything runny, so your Pop-Tarts hold together as they bake.
How do I reheat Pop-Tarts without drying them out?
For that fresh-baked texture, reheat Pop-Tarts in a low oven or a toaster oven. This will revive the flaky pastry and keep the filling gooey. The microwave heats them fast, but you’ll lose some crunch, so it’s best for a quick fix.
There’s just something undeniably cheerful about biting into a homemade Pop-Tart—jammy, flaky, sweet, and simple. Whether you load yours with sprinkles, switch up the fillings, or just love the whole nostalgic vibe, these toaster pastries invite you to slow down and savor. They beg to be shared, devoured over coffee, or tucked into lunchboxes. However you enjoy them, homemade Pop-Tarts are proof that a little time in the kitchen pays off with every buttery, fruit-filled bite.
More Delicious Recipes
- Breakfast Danish Pastries: These pastries offer a flaky texture and are perfect for breakfast, just like your homemade Pop-Tarts.
- Banana Oat Muffins: Moist and sweet, these muffins make for a great after-school snack, reminiscent of the nostalgia of Pop-Tarts.
- Soft Chewy Lemon Cookies: These cookies provide a delightful sweetness, similar to the glaze on your homemade Pop-Tarts.
Pop-Tarts
Ingredients
Equipment
Method
- Preheat oven to 375°F (190°C) and line a baking sheet with parchment paper.
- Mix flour, sugar, and salt. Cut in cold butter until crumbly. Add egg and milk to form dough. Divide, wrap, and chill for 30 minutes.
- Lightly flour your surface and prepare a baking sheet.
- Roll dough, cut into rectangles, fill with jam, top with another rectangle, seal edges with fork, and dock tops.
- Brush with egg wash and bake for 25–30 minutes until golden. Cool on wire rack.
- Mix powdered sugar, milk, and vanilla for glaze. Spread over cooled tarts. Add sprinkles.
- Let glaze set. Serve warm or at room temperature.