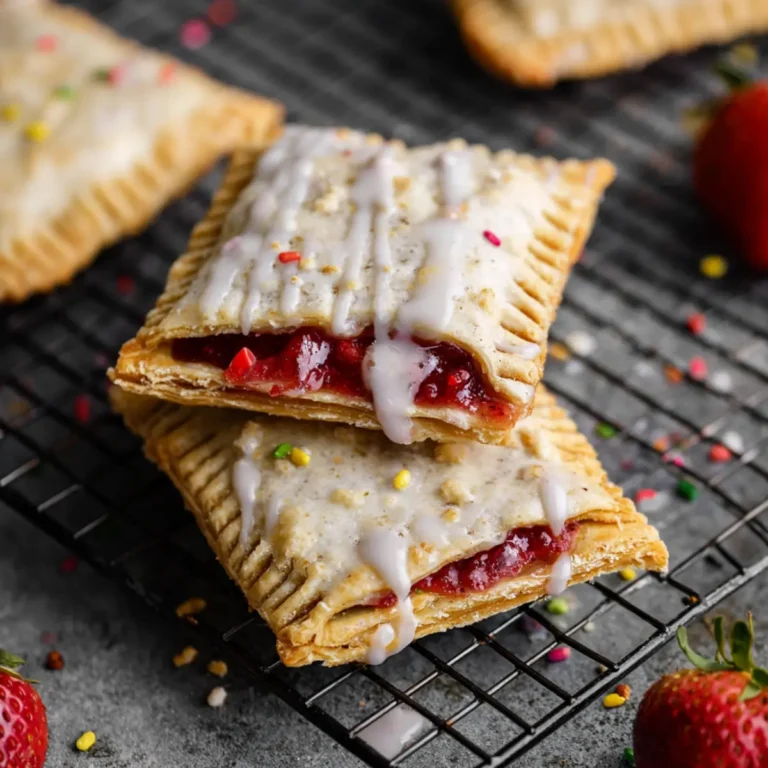
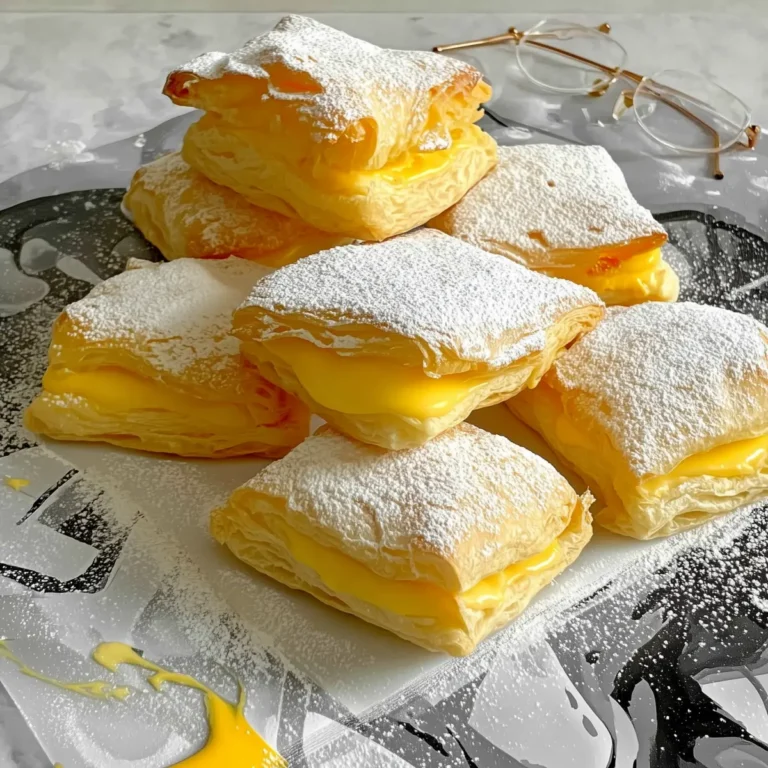
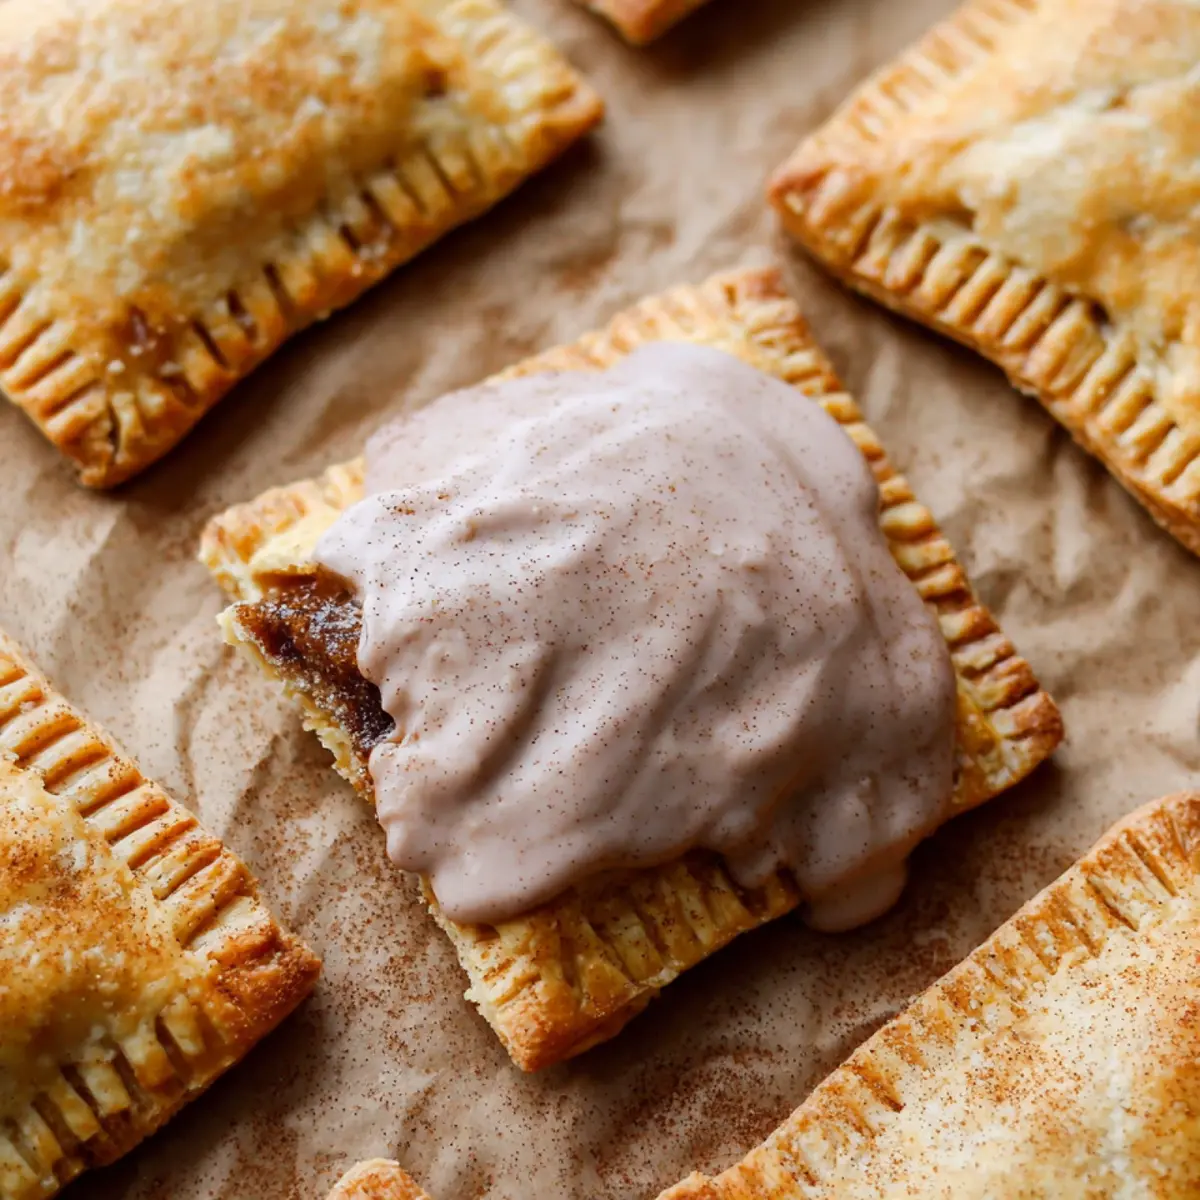
You know those weekend mornings when you wake up a little too late, the house is quiet, and your stomach’s rumbling for something nostalgic but so much better than the store-bought version? That’s when these Homemade Frosted Brown Sugar Cinnamon Pop Tarts totally deliver. Flaky pastry, warm cinnamon filling, and a sweet vanilla-kissed glaze—there’s nothing quite like biting into a golden, butter-layered pop tart that you made from scratch.
Maybe you grew up with those shiny packets in your lunchbox, but let’s be honest: fresh, real ingredients change everything. The crust is tender and shatters when you bite into it, the filling is cozy and aromatic, and that glaze is a hug on top. Even if you think making your own pop tarts sounds like overkill, one batch of these and you’ll never crave the boxed kind again.
Why Make Your Own Brown Sugar Cinnamon Pop Tarts?
If you’ve ever wished classic toaster pastries could taste as amazing as you remember, homemade frosted brown sugar cinnamon pop tarts are your answer. Making them from scratch means you control every layer—fresh buttery pastry, gooey cinnamon filling, and a sweet vanilla glaze that doesn’t taste artificial or cloying.
Best of all, they’re a total crowd-pleaser: adults go wild for the nostalgic flavor, and kids will think you have kitchen superpowers. You don’t need fancy gadgets or advanced baking skills to pull them off, just a bit of patience and some good butter. If you’re looking for a baking project that’s satisfying, hands-on, and way more delicious than anything in a foil pouch, these pop tarts check every box.
What’s Inside Homemade Frosted Brown Sugar Cinnamon Pop Tarts?
Wondering what makes these homemade treats so special? Here’s a breakdown of what goes into every dreamy bite:
- flour: forms the sturdy-but-tender base of the pastry, letting the buttery layers shine.
- Granulated sugar: adds a touch of essential sweetness to both the dough and the filling.
- Salt: balances everything and makes the buttery notes pop.
- Unsalted butter: makes the pastry flaky, rich, and oh-so irresistible.
- Ice water: helps bring the dough together without melting the butter, giving you those perfect layers.
- Brown sugar: delivers a deep, caramel-like sweetness in every mouthful of filling.
- Ground cinnamon: warms up the flavor, infusing the filling and icing with cozy spice.
- Extra flour (for filling): thickens the brown sugar and cinnamon so the mixture stays put inside the pop tart.
- Egg wash (egg + milk): seals the edges and gives a golden finish on top.
- Confectioners’ sugar: creates that classic, glossy pop tart glaze.
- Milk (for icing and egg wash): loosens up the icing so it’s smooth and spreadable.
- Pure vanilla extract: adds lovely depth to the glaze, bringing it all together.
See the recipe card below for the full list of ingredients and measurements.
Switch Things Up: Fun Substitutions
Maybe you’re out of something, or maybe you just feel like getting creative with your homemade brown sugar pop tarts. Here are some ideas:
- Swap out some or all of the unsalted butter for a dairy-free baking stick if you need a vegan pastry.
- Use light brown sugar for a milder, almost butterscotch filling, or dark brown sugar for more molasses kick.
- If cinnamon isn’t your jam, try a mix of warm spices: a little nutmeg or ginger works beautifully.
- No vanilla extract? Almond extract is a fun way to twist up the glaze flavor.
- Gluten-free? A 1:1 gluten-free flour blend can work, but the texture might be a bit more delicate.
- Want a tart surprise? Add a layer of thick fruit jam beneath the brown sugar filling—think apple, cherry, or even apricot.
Your Homemade Pop Tart Roadmap
Ready to dive in? Here’s how you’ll go from basic ingredients to a plateful of homemade frosted brown sugar cinnamon pop tarts:
- Make the Dough: Whisk together dry ingredients, then work in cold, cubed butter until you’ve got pea-sized bits throughout. Drizzle in just enough icy water to bring the dough together—don’t overwork it or you could lose the flakiness.
- Chill: Gather the dough into two discs and wrap them up nice and tight. Chill thoroughly so the butter firms back up; it’s key for flaky pastry.
- Roll & Shape: Roll out one disc at a time on a floured surface. Cut into even rectangles—don’t stress if they’re a bit wonky, rustic pop tarts are part of the fun.
- Mix Filling: Stir brown sugar, cinnamon, and a little flour together. This magical mix is what makes that middle so perfectly gooey. Spoon it into the center of each bottom pastry, staying away from the edges.
- Seal & Assemble: Brush the edges with egg wash. Lay another pastry rectangle on top, egg wash side down, and press the borders to seal. Use a fork to give those iconic crimped edges and poke holes on the top so steam doesn’t sneak out and burst your tarts.
- Chill Again: Pop them back in the fridge for a bit so the dough relaxes and your pop tarts bake up neat and tidy.
- Bake: Once everything is chilled, brush with more egg wash and slide the tray into a piping hot oven. You’re looking for golden, crisp tops and toasty bottoms.
- Make the Glaze: Whisk powdered sugar, a splash of milk, cinnamon, and vanilla into a luscious, pourable icing. If your glaze is too thick, add a bit more milk until it’s easy to spread.
- Glaze & Set: Spread icing over the cooled pop tarts—don’t worry if it dribbles down the side, that’s half the appeal. Let the glaze set so it becomes slightly crackly on top.
By the time you take your first bite, you’ll see that making pop tarts at home might take a little time, but every flaky, gooey, sweet-iced bite makes it worth the effort.
Essential Tips for Perfect Pop Tarts
A few tricks can make your homemade frosted brown sugar cinnamon pop tarts turn out bakery-worthy every time.
Always start with cold butter—this helps your pastry puff and stay tender. Don’t skip the dough chilling, both after mixing and after rolling out. Warm dough = sad, slouchy pop tarts. Use a light hand when rolling and sealing; you want to trap little layers of butter, not squash them flat.
When crimping the edges, press firmly with a fork so the filling doesn’t escape, but don’t tear the dough. And when glazing, wait until the pop tarts are completely cool or the icing will melt right off. For tidy rectangles, use a sharp knife or pizza wheel and a ruler—though nobody’s going to complain about uneven edges.
Leftovers? They keep well in an airtight container for several days, and a quick zap in a toaster oven brings the pastry back to life. If you want to prep ahead, freeze unglazed pop tarts, and glaze after reheating.
Pairing Ideas and Fun Variations
Homemade frosted brown sugar cinnamon pop tarts taste fantastic with a mug of strong coffee or hot cocoa, especially on chilly mornings. For a breezy brunch, pair them with fruit salad or a big bowl of tangy yogurt to balance out the sweetness.
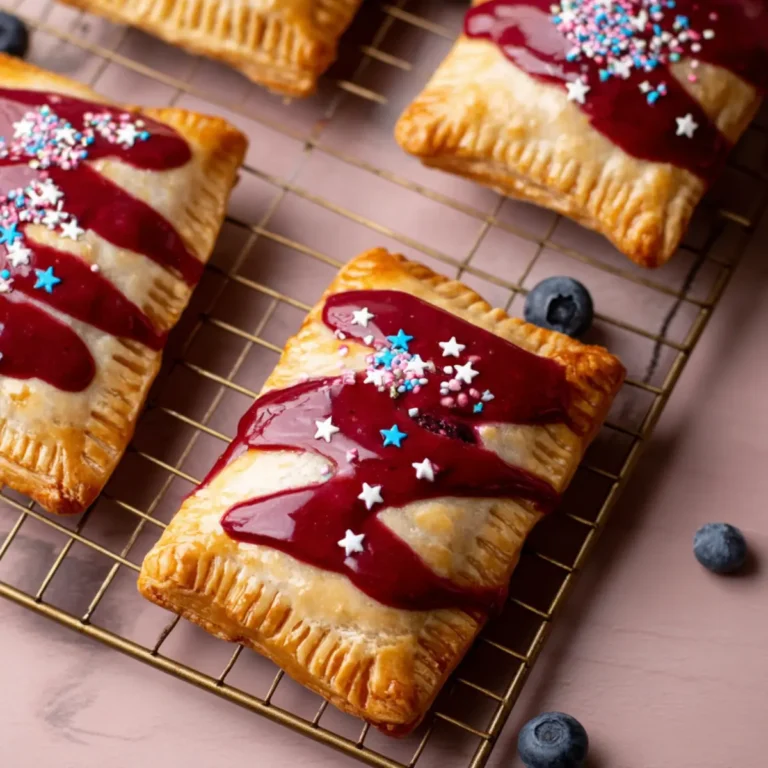
If you want to shake things up, try drizzling melted chocolate over the glaze or rolling the dough into rounds for pop tart “hand pies.” Feeling more savory? Skip the glaze, sprinkle on a little flaky salt, and serve them warm for a sweet-meets-salty twist.
Pop tarts stay fresh for days and can easily be made in advance. You can even fill them with jams or chocolate spread for different flavors—cherry-lime, apple pie, or even pumpkin spice for autumn vibes. If you’re feeling generous, wrap a few up to share; they make such a thoughtful (and delicious) gift.
FAQs about Homemade Frosted Brown Sugar Cinnamon Pop Tarts
Do homemade pop tarts have to be refrigerated?
You don’t need to refrigerate them if you’ll eat them within a couple days; store in a sealed container at room temperature. For longer stash life, refrigerate and reheat for a fresh-from-the-oven feel.
Can I freeze homemade frosted brown sugar cinnamon pop tarts?
Yes, freeze well-wrapped, unglazed pop tarts for best texture. When ready to eat, thaw and warm in the oven, then glaze once completely cool for a fresh-tasting finish.
How do I keep the filling from leaking out?
To keep filling in place, don’t overfill and be sure to seal edges thoroughly with egg wash and a fork. Chilling the assembled pop tarts before baking also helps prevent leaks.
Can I make these pop tarts gluten-free or vegan?
Absolutely! Use a gluten-free flour blend for a gluten-free crust and swap butter and egg for plant-based alternatives to make vegan pop tarts—just keep an eye on texture, as it can change slightly.
Final Thoughts on These Pop Tarts
Once you try homemade frosted brown sugar cinnamon pop tarts, it’s tough to settle for the grocery store version again. Layer after layer, the rich pastry, spiced sweet filling, and creamy glaze make for a breakfast treat that’s miles ahead of anything prepackaged.
Whether it’s a cozy weekend baking project or a special breakfast surprise, these pop tarts are sure to win over fans of all ages. They’re just the right blend of nostalgia, comfort, and hands-on fun—and always worth a spot in your recipe rotation.
More Delicious Recipes
- Coffee Rolls: These sweet rolls make a delightful pairing for your homemade pop tarts, adding a rich coffee flavor to breakfast.
- Breakfast Danish Pastries: With flaky pastry and sweet fillings, these danishes are reminiscent of pop tarts and perfect for a special morning treat.
- Banana Oat Muffins: Healthy and delicious, these muffins offer a great breakfast option that complements the sweetness of your pop tarts.
Homemade Frosted Brown Sugar Cinnamon Pop Tarts
Ingredients
Equipment
Method
- This is the same recipe as all butter pie crust. See step-by-step photos in the pie crust post if you need visuals for making the pastry. I usually make the pastry the night before. In a large bowl, whisk together the flour, sugar, and salt. Using a pastry cutter or two forks, cut the butter into the mixture until it resembles a coarse meal (pea-sized bits with a few larger bits of fat is okay). You can also use a food processor, and pulse the mixture together, but be careful not to overwork the ingredients. Drizzle the water over the flour mixture, 1 Tablespoon at a time, and stir with a spatula after every Tablespoon has been added until the dough begins to form large clumps. Do not add any more water than needed.
- Transfer the dough to a floured work surface. Using floured hands, gently bring the dough mixture together into a ball. Avoid overworking the dough. If it feels too dry or is too crumbly to form a ball, dip your fingers in cold water and then continue bringing dough together. If it feels too sticky, sprinkle more flour on the dough and then continue bringing it together. Using a sharp knife or bench scraper, cut the dough in half. Gently flatten each half into 1-inch-thick discs. Wrap each tightly in plastic wrap. Refrigerate for at least 2 hours and up to 5 days (or in the freezer for up to 3 months).
- Remove 1 chilled dough disc from the refrigerator and allow it to sit at room temperature for 5 minutes. Keep the other disc in the refrigerator. After 5 minutes, place disc onto a lightly floured work surface, and roll it into a 9×12-inch rectangle, about 1/8 inch thick. Trim the sides as needed. With a pizza cutter or sharp knife, cut the dough into thirds and each third into thirds again. You will end up with 9 rectangles, each measuring 3×4 inches. Use a ruler to help make this easier and more accurate. Place each of the 9 rectangles onto a baking sheet lined with parchment paper or a silicone baking mat. The pop tarts will not spread much in the oven, so you may place them near one another. Place the baking sheet in the refrigerator.
- Repeat step 3 with the 2nd disc of dough to make 9 more rectangles. Place each of the 9 rectangles onto a baking sheet lined with parchment paper or a silicone baking mat. Place the baking sheet in the refrigerator.
- Mix the brown sugar, cinnamon, and flour together in a small bowl.
- Remove 1 baking sheet of pastry rectangles from the refrigerator. These will be the bottoms of your pop tarts. Brush egg wash over the entire surface of each rectangle. Place a heaping Tablespoon of the filling into the center of each rectangle and spread it around with the back of a spoon, leaving a 1/4-inch border around the edges.
- Remove the 2nd baking sheet of pastry rectangles from the refrigerator. These will be the tops of your pop tarts. Brush egg wash over the entire surface of each top rectangle, then place each top rectangle, egg-wash-side-down, on the filling-topped bottoms. Use your fingertips to press firmly around the pocket of filling, sealing the dough well on all sides. Reserve remaining egg wash.
- Using a toothpick, poke 6 to 8 holes in the tops of each filled pastry to allow the steam to escape. You can, instead, use a knife to make a few small slits. Seal the edges tightly by crimping with a fork. Refrigerate the filled pop tarts, uncovered, for at least 20 minutes and up to 1 hour.
- Preheat the oven to 350°F (177°C). Once the unbaked pop tarts have chilled for 20 minutes, remove from the refrigerator and brush the tops with the remaining egg wash. Bake for 25–30 minutes or until golden brown, rotating the pan halfway through baking. Let the pop tarts cool on the pan for about 5 minutes, then transfer to a cooling rack to cool completely before icing.
- In a medium bowl, whisk together the confectioners’ sugar, milk, cinnamon, and vanilla. You want a thick glaze, but not too thick that it is hard to spread. If it’s too thick, add more milk, 1 teaspoon at a time, until it reaches a spreadable consistency. Spoon the icing on top of each cooled pop tart, and use the back of the spoon or an icing spatula to spread. The icing will set in about 1 hour.
- Store pop tarts in an airtight container at room temperature for up to 3 days or in the refrigerator for up to 5 days. To reheat, bake in a 350°F (177°C) oven for 10 minutes.