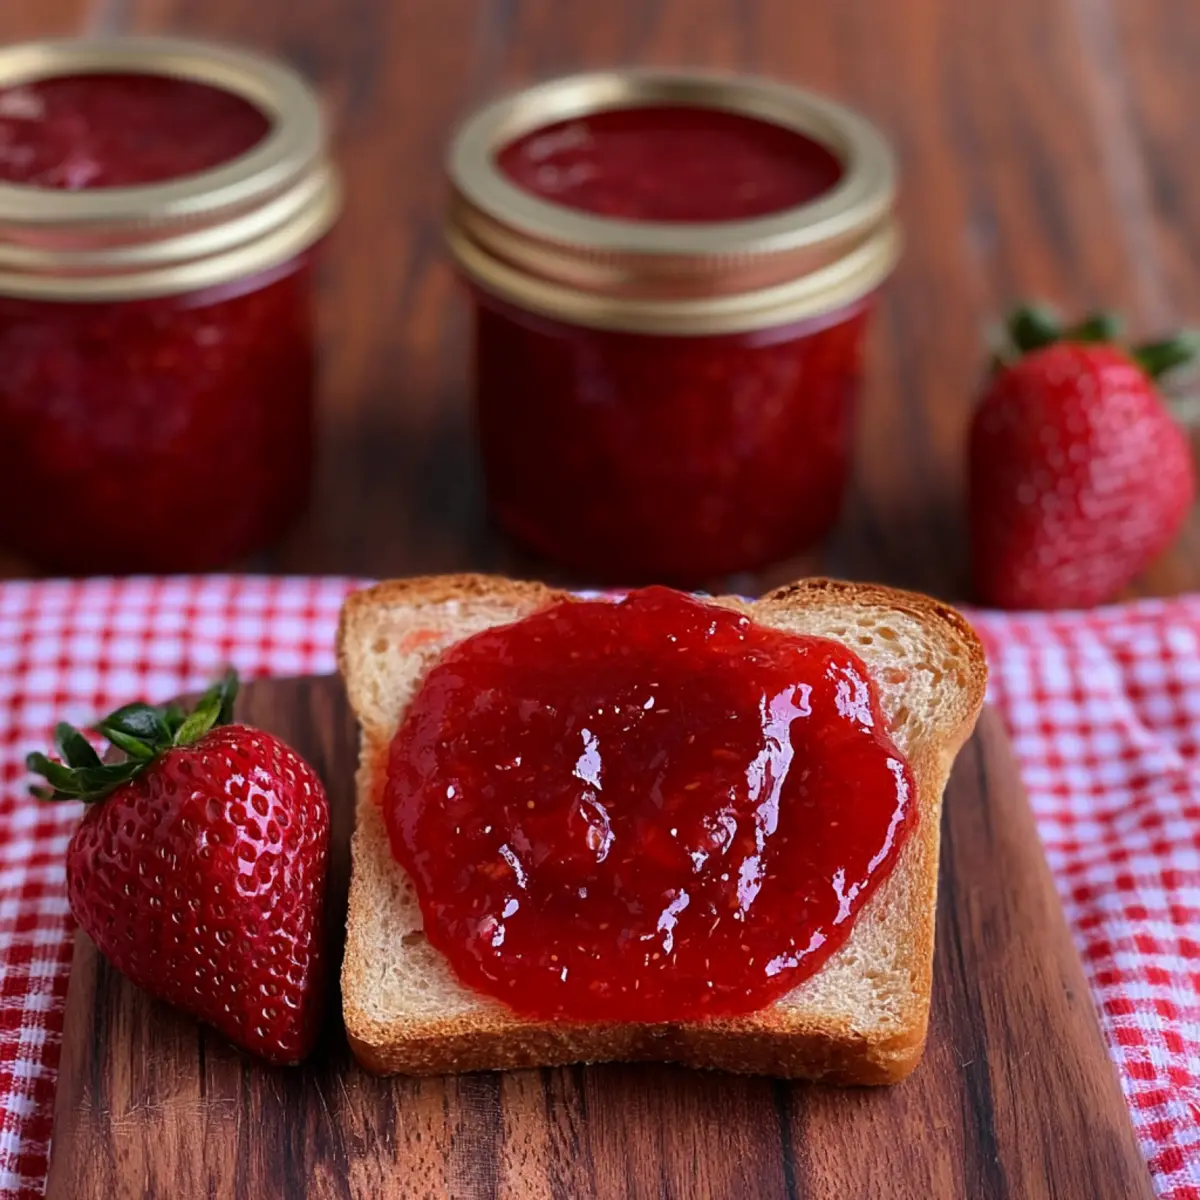
Sometimes, it all begins when you catch that unmistakable aroma of ripe, sun-warmed strawberries at the market—the kind that begs to be turned into something special. If you’ve ever craved the pure, nostalgic taste of Homemade Strawberry Jam spread thick on toast, you know store-bought just can’t compete. The process is simpler than you think, and the result is a jar of bright, glossy jam that packs all the flavor of summer in every spoonful.
Let’s get you in the kitchen, stirring fragrant berries and sugar until your house is filled with that sweet, irresistible scent. Nothing fancy—just the essential steps for a foolproof, classic jam you’ll reach for again and again.
The Simple Pleasures of Homemade Strawberry Jam
There’s something undeniably rewarding about transforming fresh fruit into jam with your own hands. Homemade Strawberry Jam isn’t just about flavor—it’s about bringing the essence of summer to your breakfast table, cheering up a simple scone, or making an ordinary PB&J shine. This recipe is free from pectin, relying on time and patience to coax out that thick, luscious texture.What makes this jam stand out is how the strawberries cook down, turning vibrant red and deeply fragrant. The aroma alone pulls everyone into the kitchen. That combination of juicy fruit and citrus creates a classic balance of sweet and tart, allowing the true flavor of ripe strawberries to take center stage. Whether you’re gifting a jar or savoring it yourself, you’ll know every bite is homemade with care.
Essential Ingredients for the Best Jam
Every jar of Homemade Strawberry Jam starts with just a few classic ingredients. Here’s how each one plays a role in building that rich, old-fashioned flavor:- Strawberries – The star of the jar, delivering sweetness and that signature berry aroma. Fresh, ripe berries are key for the deepest flavor.
- Granulated sugar – Not just for sweetness, sugar helps achieve a glossy finish and supports the jam’s texture.
- Lemon juice (fresh) – Adds brightness and a hint of tartness while helping the jam set.
See the recipe card below for the full list of ingredients and measurements.
Step-by-Step: How to Make Homemade Strawberry Jam
Ready to fill your kitchen with the scent of bubbling strawberries? Here’s how you turn humble berries into a batch of irresistible Homemade Strawberry Jam:- Sterilize your mason jar(s) by boiling them in water, then dry them completely. Set aside a jar large enough to hold the finished jam.
- Remove the tops from the strawberries and dice them. You can adjust the size based on whether you prefer chunky pieces or a smoother jam.
- Combine the strawberries, lemon juice, and sugar in a large, deep saucepan or pot.
- Stir to thoroughly coat the berries with sugar, ensuring even coverage.
- Let the mixture sit for a little while—just until you notice the strawberries start to release their juices and glisten with syrupy goodness.
- Turn the heat to medium-low and stir gently with a rubber spatula until the sugar dissolves completely. Scrape down the sides to prevent any crystals.
- Increase the heat to medium. As the mixture simmers, use a potato masher to break down the strawberries further, releasing their juice and softening any larger pieces.
- Bring the jam to a rolling boil. Continue to stir constantly, watching for the mixture to bubble vigorously and reach a glossy consistency. Aim for a temperature of 220°C for a perfect set.
- Remove from heat. If a foamy layer appears on top, skim it off for a clear, jewel-toned finish.
- Pour the hot jam into your prepared jar, leaving a small space at the top to allow for expansion.
- Seal the jar immediately with its lid and let it cool to room temperature on the counter.
- Once cool, refrigerate your jam until set. Enjoy it within the next couple of weeks for the brightest flavor.
Troubleshooting and Texture Tips
Cooking jam is all about following your senses and a few smart kitchen habits. Here’s how to ensure your Homemade Strawberry Jam comes out glossy, thick, and bursting with fruit flavor every time.- Always dissolve the sugar fully before bringing the mixture to a boil. Undissolved sugar can leave crystals in your finished jam.
- If your mixture looks too runny after cooling, don’t worry—jam continues to thicken as it chills in the fridge.
- Keep an eye on the bubbling stage. High, rolling boils are needed to set the jam, but don’t walk away—stir to prevent scorching.
- Use a potato masher for chunkier jam or blend your strawberries for a smoother spread before cooking for an even consistency.
- If foam forms during cooking, a quick skim removes it for a clear finish, but it’s totally optional and won’t affect taste.
Creative Variations and Serving Ideas
Once you have a classic jar of Homemade Strawberry Jam in your fridge, the ways to use it are nearly endless. Of course, there’s nothing better than a spoonful on warm toast or swirled through creamy yogurt—but you can absolutely get creative.Try adding a hint of zest from lemon or orange for extra brightness, or a pinch of cardamom for a subtle twist. A drop of almond extract brings out the berries’ sweetness in a special way, and blending with other summer berries can create your own signature jam.
Beyond breakfast, use your strawberry jam as a filling for thumbprint cookies, an easy layer in a trifle, or a decadent topping for vanilla ice cream. Packaged in a mason jar with a ribbon, it even makes a thoughtful edible gift.
How to Store, Reheat, or Freeze Strawberry Jam
Homemade Strawberry Jam is best enjoyed fresh, but smart storage means you can have that summery goodness on hand a bit longer. Once fully cool, keep your sealed jar in the fridge and use within two weeks for freshest flavor.If you’d like to extend its life, strawberry jam can be frozen in a clean, freezer-safe jar after cooling. Thaw overnight in the fridge before using—just know the texture may be a little looser than freshly made. Because this is a refrigerator jam and not shelf-stable, it’s best to avoid leaving it at room temperature for extended periods.
Reheating isn’t usually necessary, but if your jam gets a bit too firm, a short stint at room temperature will soften it back up. Always use a clean spoon to avoid introducing moisture and shortening its shelf life.
FAQs about Homemade Strawberry Jam
Can I use frozen strawberries for Homemade Strawberry Jam?
Yes, you can use frozen strawberries if fresh aren’t available. Just thaw them first and drain excess liquid before starting the recipe. The jam may be a touch softer due to the extra moisture.
How do I know if my jam has set properly?
The jam will look glossy and thick when it reaches its setting point. Allow it to cool—if it’s still too runny, remember it will continue to thicken in the fridge. For extra assurance, the jam should reach 220°C while boiling.
How long will Homemade Strawberry Jam last in the fridge?
This jam will generally stay fresh for up to two weeks when refrigerated in a sealed container. Because it’s not canned, it isn’t shelf-stable for long-term storage, so enjoy it soon for the best flavor.
Can I freeze homemade jam for longer storage?
Yes—cool your jam before transferring it to a freezer-safe jar, leaving some space for expansion. Thaw it in the refrigerator before serving. Expect a softer texture after freezing but the same sweet berry taste.
A Sweet Finish to Homemade Strawberry Jam
It’s hard to beat the satisfaction of making your own Homemade Strawberry Jam—spooning up that thick, ruby-red spread and knowing exactly what went into every bite. The pure strawberry aroma and soft, jewel-like texture make every slice of toast something special.With a single jar in your fridge, you’ll find endless ways to add a burst of bright flavor to breakfast, snacks, and even dessert. There’s always a reason to open up a pot of homemade jam and savor the simple joy it brings.
What To Try Next
Here are some tasty ideas to enjoy alongside your homemade strawberry jam or to try next in your kitchen.
- Rice Krispie Easter Nests — a fun way to use jam in a sweet treat with crunchy texture.
- Lemon Garlic Dijon Vinaigrette — bright and fresh, perfect for salads that pair well with berry flavors.
- Vegetarian Stuffed Bell Peppers With Rice — a hearty, wholesome meal balanced nicely by the sweet jam on the side.
Recommended Equipment


* As an Amazon Associate, I earn from qualifying purchases. There is no extra cost to you.

Homemade Strawberry Jam Recipe (No Pectin)
Ingredients
Equipment
Method
- Sterilize your mason jar(s) in boiling water and dry completely. Set aside. (You'll need a jar large enough to hold roughly two cups.)
- Remove the tops from the strawberries and dice the strawberries up. (See note about blending.)
- Place strawberries, lemon juice, and sugar in a large pot or deep saucepan.
- Stir to coat strawberries in sugar.
- Let strawberries sit for about 10-15 minutes until they begin to release their juices.
- Turn the heat to medium-low and stir with a rubber spatula until the sugar has melted completely. (Be sure to scrape any sugar off the sides of the pot and spatula. (All the sugar must be dissolved to prevent the finished jam from crystalizing.)
- Increase the heat to medium and allow to simmer for 10-15 minutes while stirring frequently and mashing the strawberries with a potato masher as they soften.
- Bring the mixture to a full rolling boil, and boil until the mixture reaches 220 F. (see note) Stir constantly to prevent the mixture from burning.
- Remove from heat. (Skim off any foam from the top of the jam if desired.)
- Pour into the prepared jar, leaving about 1/4 inch space at the top.
- Place the lid on immediately and allow to cool until room temperature.
- Refrigerate until firm and store in the fridge for up to two weeks.