If you’ve ever scrambled for a dessert that looks impressive but takes almost no fuss, you’re not alone. I’ve found myself in that “a little something sweet, but not a project” space many times, especially right before guests show up. That’s where mini cheesecake bites work their magic—decadently creamy, perfectly portioned, and endlessly customizable with whatever fruit or chocolate’s leftover in the fridge. They bring all the wow-factor of classic cheesecake, just scaled down into crowd-pleasing, poppable bites that vanish every time.
Why Mini Cheesecake Bites Are a Party Favorite
These mini cheesecake bites are bite-sized happiness on a tray, and let’s be honest: sometimes you just want a dessert that doesn’t demand forks or plates. They’re easy to make ahead of time, look adorable on a platter, and you’ll notice people circling back to steal another when they think no one’s watching. Whether it’s for birthdays, showers, holidays, or just a weekend treat, they hit the ideal balance—not too rich, not too fussy, and endlessly adaptable. I love how you can top each one differently, so every bite feels a little bit personalized. No awkward slicing, no melted mess; just creamy, tangy cheesecake with a buttery base that you can pick up and savor in a couple of happy bites.
What’s in These Mini Cheesecake Bites?
Here’s what goes into every batch of these poppable cheesecakes—simple staples, with plenty of room for riffs:
- graham cracker crumbs – the soul of that classic crumbly base; digestive biscuits also work if that’s what’s in your cupboard.
- Unsalted butter – adds lush richness and binds the crust together so it’s never crumbly.
- Granulated sugar – a little in the crust and more in the filling for mellow sweetness.
- Cream cheese – the star: smooth, tangy, and what gives cheesecake its trademark texture.
- Sour cream – bumps up the creaminess and adds the tiniest tang that keeps things lively.
- Vanilla extract – infuses the filling with cozy, fragrant warmth.
- Lemon juice – optional, but just a splash brightens all the flavors without making it taste obviously lemony.
- Eggs – gently hold everything together and deliver that classic, custardy bite.
- Strawberries – diced fresh and used to top for color, juiciness, and a burst of freshness.
- Blueberries – another fruity topper; use them alone or mix ‘em up.
- Cherry pie filling or fresh cherries – as old-school or as fresh as you like; great for a sweet-tart finish.
- Chocolate shavings or drizzle – lends a hint of indulgence and looks gorgeous sprinkled or swirled over the tops.
See the recipe card below for the full list of ingredients and measurements.
How to Create Perfect Mini Cheesecake Bites Step by Step
- Start by making the crust. Combine your crumb base (graham crackers or digestive biscuits work great), some sugar, and melted butter in a bowl until the mix looks like slightly damp, sandy pebbles. When you press a handful together, it should barely hold its shape—think sandcastle at the beach.
- Firmly press a spoonful of this mixture into the bottom of each muffin liner, mini tart pan, or silicone mold. You want a solid base with no gaps, so give it a good press using the back of a spoon or a tiny cup. Pop the pan in the fridge to firm up while you get the filling going.
- In a fresh bowl, beat the soft cream cheese with sugar until it’s noticeably creamy and lump-free. Add in sour cream, vanilla, and just enough lemon juice to make things bright, not overtly citrusy—trust me, it wakes everything up. Now, add the eggs one at a time, mixing only until you can’t see the yolk anymore. Overmixing can lead to cracks, so go easy.
- Spoon the cheesecake filling over the chilled crusts, almost to the top but not so full you risk a spill. Smooth out the tops with a spatula or the back of your spoon, then give the pan a gentle tap on the counter to pop any lurking air bubbles.
- If you’re baking: Warm the oven (not too hot—cheesecake likes gentle heat), and bake until the edges are set but the centers have just a slight jiggle. Don’t worry if they puff a bit or look soft in the middle—they’ll settle as they cool. Cool the pan at room temp, then transfer to the fridge for a proper chill.
- If you’re opting for a no-bake version: Skip the oven, slide the filled molds straight into the refrigerator, and let them firm up completely.
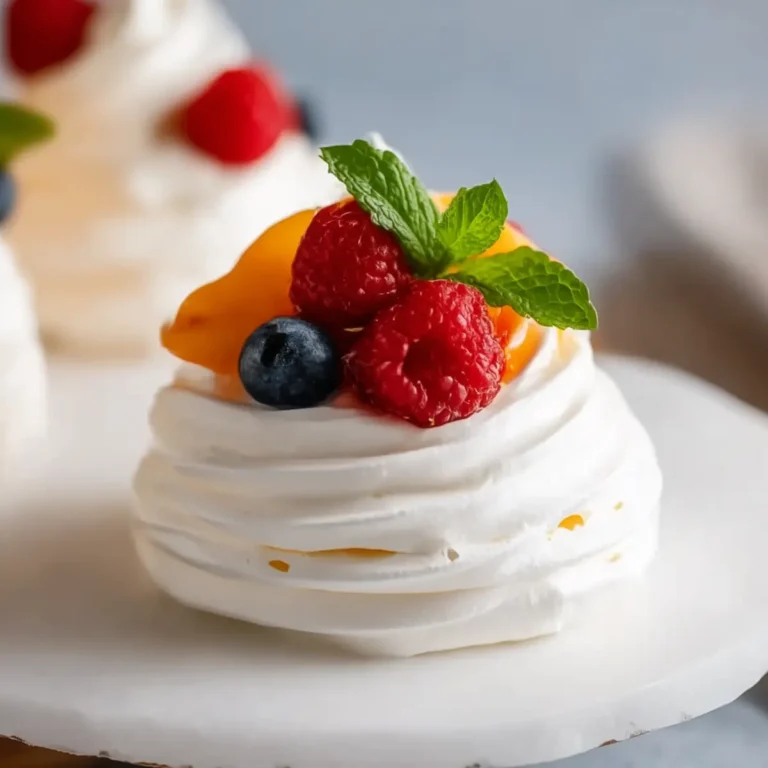
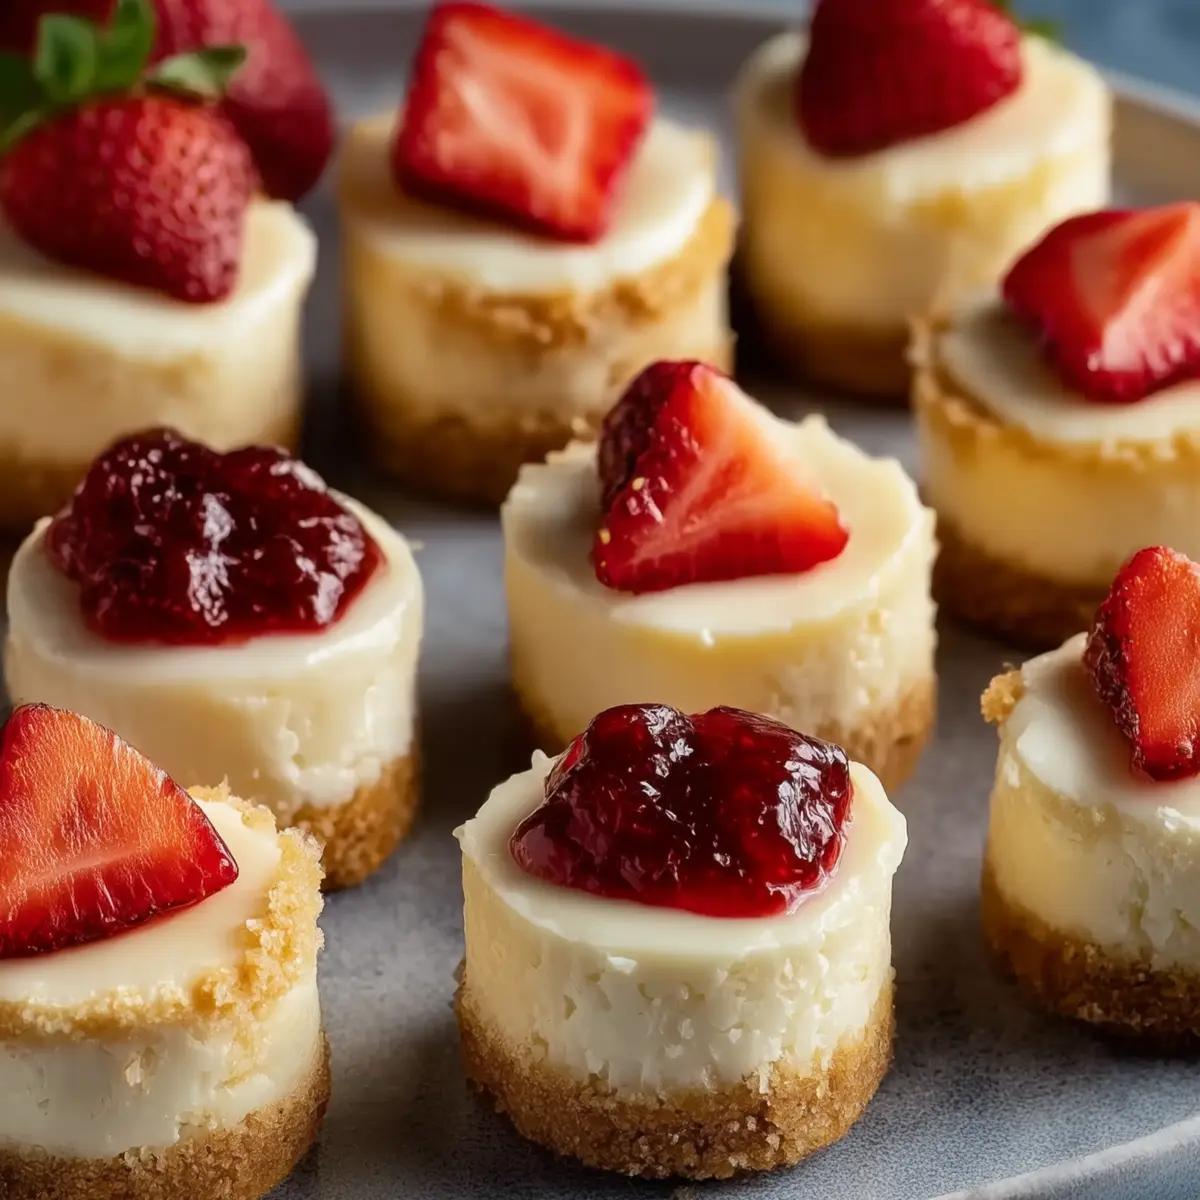
- Once chilled and set, carefully pop the bites out of their molds. Now the fun—decorate with diced strawberries, a few blueberries, a nudge of cherry pie filling, or a drizzle of chocolate. Play it classic or mix and match so each one’s a mini masterpiece.
- Serve your mini cheesecake bites cold for the silkiest texture, or let them warm ever-so-slightly for a softer mouthfeel. They’re just right as-is, but nobody’s ever said no to an extra berry or two.
Secrets for Mini Cheesecake Bites That Never Disappoint
If you want mini cheesecake bites that look bakery-perfect and taste even better, keep these little pointers in mind. First, don’t rush through prepping the crust—press it down well so it doesn’t fall apart when you go to eat. When mixing up the filling, stop as soon as everything looks smooth; too much mixing can sneak in air bubbles, which can translate to pesky cracks after baking. Gently tapping the filled molds before baking helps get rid of those bubbles, too.
When baking, keep an eye out for edges that look set and a center that’s still a little soft—it’ll firm as it cools. For the no-bake variation, patience is everything. If you try to unmold them before they’ve had time to chill properly, things can get a bit messy. Want extra smooth sides? Run a thin butter knife along the inside of each mold before removing.
Store any leftover mini cheesecake bites in a covered container in the fridge. They’ll actually taste creamier the next day, making them perfect for prepping ahead. And if you’re traveling with them, keep them chilled until right before serving. A warm car is not a friend to cheesecake!
Endless Toppings and Ways to Serve Mini Cheesecake Bites
What I love about mini cheesecake bites is how easily you can switch up their final act. Pile a variety onto a dessert platter, each with a different topping: juicy strawberries, ripe blueberries, a glistening spoon of cherry pie filling, or an artful swirl of chocolate. For special occasions, try a combo of berries and a sprinkle of edible flowers or mint leaves—seriously pretty and so fresh.
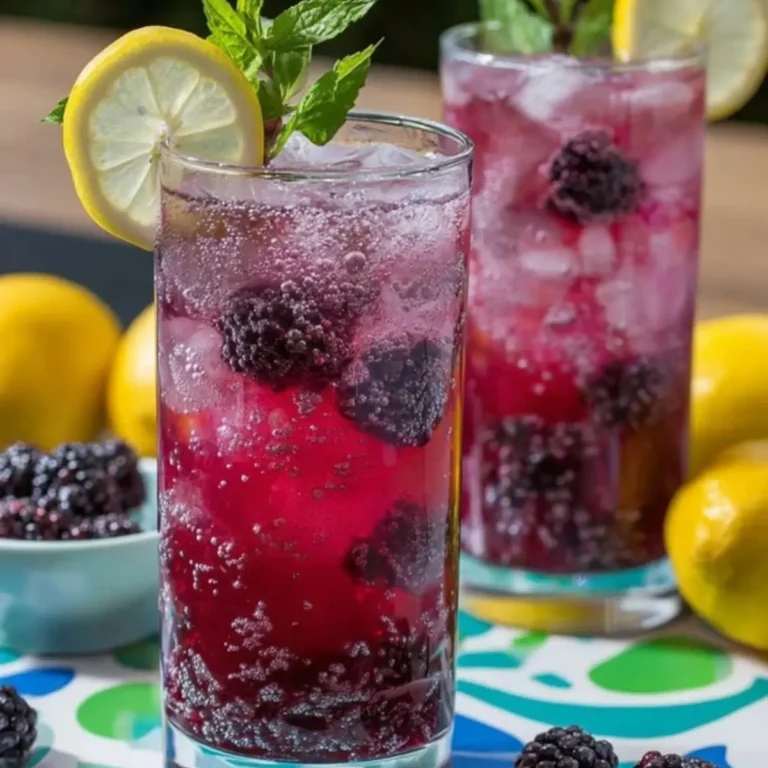
Pair these with a fruit salad or simple green grapes on the side. They’re also gorgeous beside a bubbly glass of prosecco, a homemade lemonade, or even coffee for a low-key afternoon treat. For chocolate lovers, swap half the filling with cocoa powder or fold in some mini chocolate chips.
If you’re hosting during the holidays, dress them up with pomegranate seeds and little shavings of dark chocolate. Or go citrusy for spring: top with thin-sliced candied lemon, orange zest, or fresh raspberries. And yes, you can freeze them—just wait to add any juicy toppings until after they thaw.
FAQs about Mini Cheesecake Bites
How long do mini cheesecake bites last in the fridge?
Mini cheesecake bites keep well in the fridge for several days when stored in an airtight container. They’re actually even creamier on day two, so don’t be afraid to make them ahead for parties or gatherings.
Can I freeze mini cheesecake bites after baking?
Absolutely. Let them cool and chill thoroughly first, then freeze on a baking sheet until firm. Transfer to a freezer-safe container. Add any fresh fruit or juicy toppings only after thawing to keep them looking sharp.
What can I use instead of graham cracker crumbs for the crust?
Digestive biscuits work well, or try finely crushed vanilla wafers, shortbread cookies, or even chocolate cookies for a twist. Just avoid anything too oily, as that can make the crust greasy instead of crisp.
Do mini cheesecake bites have to be baked, or can I make them no-bake?
You don’t have to bake them if you don’t want to. For a no-bake version, just chill the assembled bites in the fridge until firm. The texture is a little softer, but still delicious—great for summer or when you want a totally hands-off dessert.
These mini cheesecake bites really are a little party all on their own. Creamy, smooth, and kissed with fruit or chocolate, they come together with hardly any drama and somehow manage to feel special every single time. However you top them—classic cherry, bright berries, or the simplest swirl of chocolate—they’re sure to disappear fast. Set a tray out, grab one while you can, and savor that moment of sweet, tangy, buttery bliss.
More Delicious Recipes
- Andes Mint Mini Cheesecakes: These mini cheesecakes offer a delightful twist with their minty flavor, perfect for mint lovers.
- Andes Mint Chocolate Cupcakes: If you enjoy chocolatey desserts, these cupcakes with a minty touch will be a hit at any gathering.
- St Paddy’s Mint Cheesecake Cups: Celebrate the season with these minty cheesecake cups that bring festive flair to your dessert table.
Mini Cheesecake Bites Recipe: Perfect Party Treats in Every Bite
Ingredients
Equipment
Method
- In a medium mixing bowl, combine graham cracker crumbs, granulated sugar, and melted butter. Stir until all crumbs are evenly coated and have the texture of damp sand. Press the mixture firmly into the bottoms of muffin liners, silicone molds, or mini tart pans using the back of a spoon or a small measuring cup. Chill the crust in the refrigerator for 10–15 minutes to set while you prepare the filling. This ensures a firm base that won’t crumble when serving.
- In a large mixing bowl, beat the softened cream cheese and sugar on medium speed until smooth and creamy. Add the sour cream, vanilla extract, and lemon juice, mixing until fully combined. Gradually add the eggs, one at a time, mixing just until incorporated. Avoid overmixing, as this can trap air and cause cracks in baked mini cheesecakes. The goal is a silky, lump-free filling with a light yet rich texture.
- Spoon the cheesecake filling evenly over the chilled crusts, filling each mold nearly to the top. Smooth the surface using a small spatula or the back of a spoon. Gently tap the molds on the counter to release any trapped air bubbles, helping the cheesecake set evenly and maintain a smooth top.
- For baked mini cheesecake bites, preheat the oven to 325°F (160°C) and bake for 18–20 minutes. The edges should be set, but the centers remain slightly soft. Let the bites cool completely at room temperature, then refrigerate for at least two hours. For no-bake mini cheesecake bites, skip the oven and place the filled molds directly in the refrigerator for at least two hours until firm.
- Once the mini cheesecakes are chilled and set, top them with your choice of fresh fruit, cherry pie filling, chocolate drizzle, or other garnishes. Keep toppings light to maintain the elegance and bite-sized nature of each piece. Serve chilled for the creamiest texture, or slightly softened for a melt-in-your-mouth experience. Gentle handling ensures that every mini cheesecake bite is perfectly shaped, creamy, and visually appealing.