If you’ve ever scrambled last-minute to make something impressive for a party, you know just how clutch mini tart shells can be. There’s something about the buttery scent that fills your kitchen while these little shells bake—a hint of nostalgia, maybe, or just the pure promise of a delicious bite ahead. Whether you want to fill them with silky chocolate, lemon curd, or savory mousse, these mini tart shells make it feel like you’ve pulled off the perfect party trick.
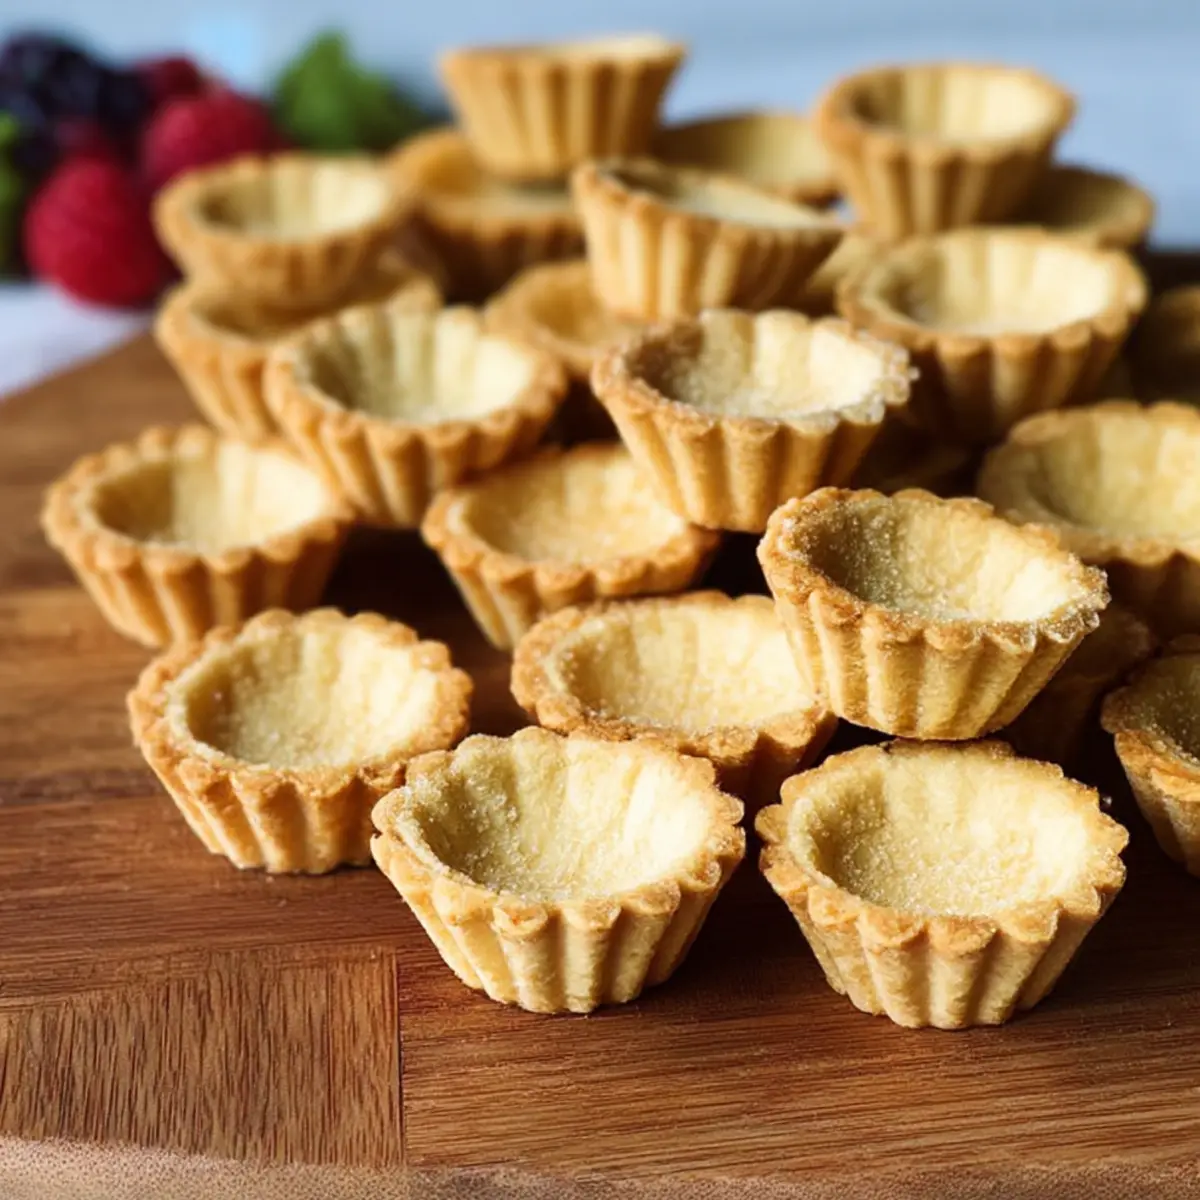
The dough comes together quickly, it handles beautifully, and the end result is a golden, crisp shell that’s ready to be filled with just about anything you crave. They give off that “tiny, elegant bakery creation” vibe but without the fuss or a parade of complicated steps. Ready to bake up a tray of mini tart shells that will impress every guest—or, let’s be real, that you’ll snack on straight from the oven?
Why These Mini Tart Shells Are Always a Hit
Mini tart shells have this universal magic—they can go sweet or savory, they look stunning on a platter, and everyone loves a bite-sized treat that feels just a little bit fancy. These tart shells are made with a buttery dough that bakes up crisp and delicate, with just the right touch of richness and snap.
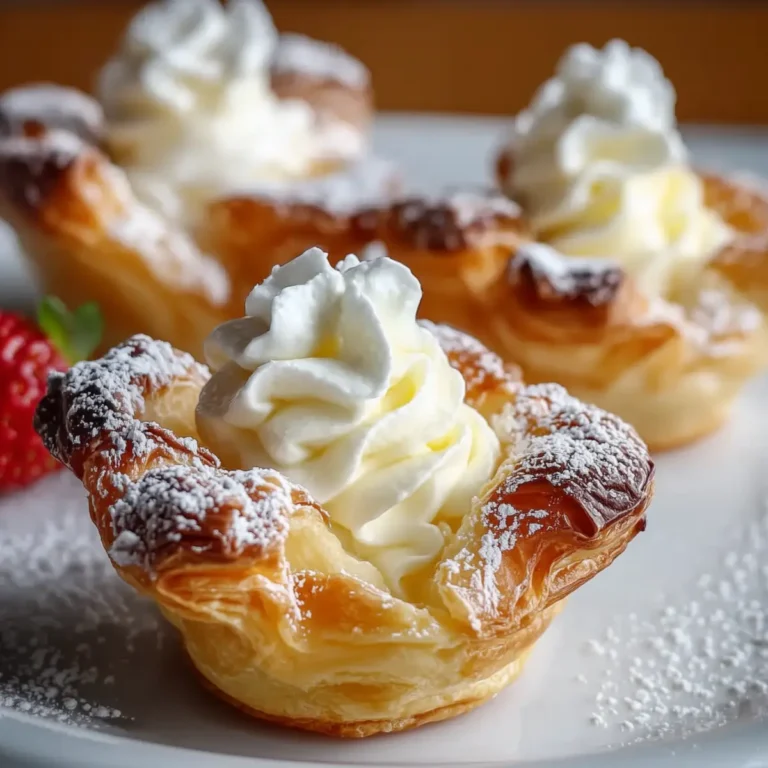
They’re perfect for entertaining because you can bake them ahead of time and fill them at the last minute, which is a lifesaver when you’re juggling other party prep. But really, it’s their sheer versatility that makes them so special: fill them with fresh berries and cream for a summer dessert, spoon in lemon curd or ganache for an elegant finish, or go the savory route with whipped goat cheese and roasted veggies for a small bite that packs huge flavor.
The best part? You control every detail—from the shell’s thickness to the creative fillings. These shells aren’t just impressive; they’re also a joy to make. There’s something so soothing about pressing the dough into the molds and knowing you’re just a few short steps away from something wonderful.
What You Need for These Mini Tart Shells
Let’s break down what goes into truly great mini tart shells—classic pantry staples that yield a dough you’ll want to make on repeat:
- Flour – The essential base, giving these shells their structure and signature tender bite.
- Sugar – Just a touch to enhance flavor; keeps things balanced without being overly sweet.
- Salt – Brightens the butteriness and sharpens every other flavor.
- Butter (softened) – Rich, creamy, and utterly key for that irresistible crumbly texture. Don’t skimp—it’s the heart of the shell.
- Egg yolks (or whole eggs) – For color, tenderness, and binding everything together. Using yolks alone gives extra richness, but whole eggs work in a pinch.
- Milk (room temperature) – A splash for moisture, bringing the dough together silky-smooth.
See the recipe card below for the full list of ingredients and measurements.
How to Make Mini Tart Shells Step by Step
Here’s how to go from pantry staples to golden mini tart shells, with all the sensory cues and baker’s secrets you need to pull it off perfectly:
- Whisk together the egg yolks and milk until smooth, and set aside. In the bowl of your stand mixer, combine the flour, sugar, and salt—just toss them together with a quick whisk to get things evenly blended.
- Add the softened butter right in. Mix until the butter is broken up and the mixture looks like loose, sandy crumbs. When you pinch some between your fingers, it should hold its shape for a second before crumbling—think of a slightly damp beach sand texture.
- Pour in the egg and milk mixture with the mixer running on low. Watch as the dough comes together almost magically—no endless mixing required. You’re looking for the dough to start pulling away from the sides of the bowl and forming big, soft clumps.
- Scoop the dough onto a lightly floured work surface. Knead briefly, just until the dough feels smooth under your hands (it shouldn’t stick). Divide into two sections, and cover one half to keep it moist.
- With the other half, roll the dough out between parchment or a nonstick baking mat to a thickness where you can press a gentle fingerprint—right around a quarter inch. Take a round cookie cutter that’s a bit larger than your tart molds and cut out as many circles as the dough offers up.
- Gently nestle each round into your tart molds, pressing with your thumbs so the dough settles evenly—don’t fuss if it looks a little rustic. Trim any overhang for a clean edge. Collect any scraps, reroll, and keep going until every mold is filled.
- Don’t skip this little trick: use a fork to prick the bottom of every shell (this stops the crust from puffing up strangely during baking). Cover all the molds with plastic wrap and chill—the dough needs time to relax, which keeps the shells tender and prevents shrinkage.
- While the shells are chilling, heat your oven to a moderate temperature. Once they’re cold and firm to the touch, slide the trays in. Bake until the tart shells are a lovely golden brown all over, especially around the edges.
- Let the shells cool briefly in their molds, then gently pop them out onto a rack. They’ll finish crisping as they cool, and you’ll be rewarded with that perfect, shattering bite.
Nifty Tips for Making Perfect Mini Tart Shells
There are a few tricks that make your mini tart shells go from “good” to “gorgeous.” First, don’t rush the chilling step—cold dough equals shells that hold their shape and don’t slump or shrink in the oven. If your kitchen runs warm, you can always pop the pressed tart shells into the freezer for a few extra minutes before baking.
If you’re after the most delicate texture, use only the egg yolks instead of whole eggs (but don’t fret if you need to sub in whole eggs—it’ll still turn out lovely). Whenever you collect scraps and reroll, do so gently; overworking can make the crust a bit tougher.
When it comes to unmolding, patience is your friend. Tart shells will slip out much more easily if you let them cool for just a minute or two in their molds before lifting them out. And if you’re making these ahead, store the cooled shells in an airtight container lined with a bit of parchment to keep them crisp for days. Mini tart shells are one of those things that reward just a bit of extra care with stunning results.
Serving Ideas and Creative Variations
Mini tart shells are a total blank canvas—about as versatile as it gets. For dessert, fill them with pastry cream and top with whatever’s in season: berries in the summer, spiced apples in autumn, or a swirl of chocolate ganache when you’re feeling decadent. For a sunny burst, spoon in lemon curd and finish with whipped cream.
If you lean savory, try a creamy goat cheese whip with roasted red peppers, or a zesty herbed ricotta with a curl of smoked salmon. These shells can be layered with everything from silky mushroom duxelles to classic quiche mixtures if you want to serve them warm.
They’re also excellent for make-ahead entertaining: bake the shells in advance and store them airtight, then fill just before serving for the freshest texture. For holidays, you can even toss a bit of lemon zest or a pinch of dried herbs into the dough to match the fillings. Mini tart shells are endlessly adaptable—swap fillings, add sweet or savory spices to the pastry, or even shape them with fluted cutters for extra flair. You’ll never run out of ways to shine with these on the table.
FAQs about Mini Tart Shells
Can I freeze mini tart shells after baking?
Absolutely! Once the shells have cooled completely, stack them gently in an airtight container with parchment between the layers, then freeze. They’ll keep their texture—just thaw at room temperature before filling so they stay crisp and don’t soften.
How should I store leftover mini tart shells?
Store cooled, unfilled mini tart shells in an airtight container at room temperature for several days. If you’ve already filled them, keep the filled tarts in the fridge. The shells are best fresh, but they’ll hold up nicely for at least two to three days.
What’s the best substitution if I’m out of egg yolks?
You can use whole eggs instead of just yolks; the shells will be slightly less rich, but still delicious. If you need an egg-free option, try a baking egg replacer, though the texture may change a bit and you might lose some of that signature golden color.
Do mini tart shells work better for savory or sweet fillings?
Mini tart shells are fantastic for both sweet and savory fillings. Their neutral, buttery flavor means they’re as happy holding lemon curd and berries as they are a savory custard or creamy cheese. Just be mindful to match the filling’s richness to the shell’s delicate crunch for the best bite.
Mini tart shells really are the secret weapon every home baker should have in their back pocket. This recipe gives you all the buttery snap and delicate crumb you want, ready for any filling you dream up—be it a velvety chocolate mousse or something tangy and savory. Plate up a batch for a party, tuck one into a lunchbox, or save a few for yourself; these shells make any occasion feel extra special. Serve them filled and see how quickly they disappear.
More Delicious Recipes
- Mint Chip Mousse Cups: These delightful cups offer a rich and creamy chocolate experience that complements your mini tart fillings perfectly.
- Andes Mint Mini Cheesecakes: Combining a smooth cheesecake texture with minty flavor, these treats are a great way to utilize your tart shells for a sweet twist.
- Lemon Truffles: These truffles add a citrusy touch that pairs beautifully with the buttery tart shells for a fresh, elegant dessert option.
Mini Tart Shells
Ingredients
Equipment
Method
- Start by mixing the egg yolks with milk and set it aside. In a stand mixer bowl combine the flour, sugar and salt and give it a quick whisk.
- Add the soften butter and mix again until it turns into crumbs. Add the mixture of egg yolks and milk while continuing to mix on the low speed of your mixer. The dough will come together very quickly.
- Transfer the dough onto your work surface, knead it for a minute and divide it into two pieces. Cover one-piece with plastic wrap and put it aside. Cover the second piece with parchment paper or Teflon mat and roll it out until it’s ¼ of an inch thick.To make the tart shells I use tart molds that are 2 and three quarters of an inch across at the widest opening and a round cookie cutter that is about 3 and a quarter of an inch. Using a cookie cutter, cut as many circles of dough as you can.
- Place the round dough into the tart mold and push down gently with your thumbs, so the dough is distributed evenly all around. Cut off the excess dough if necessary. You don’t need to grease the molds with oil spray, because the dough contains a lot of butter.Don’t forget to cover the dough and the ready tart shells with plastic wrap to prevent it from drying out. Collect all the remaining dough into a ball and roll it again. Repeat the process with the remaining dough.
- Don’t miss the next step! To prevent the crust from bubbling up during baking, use a fork to prick the bottom of each tart crust! Cover the tart shells with plastic wrap and let them chill for 15-20 minutes.In the meantime, preheat the oven to 350 F degrees and bake the mini tart shells for 15-20 minutes or until they have a golden-brown color. Let them cool for a couple of minutes and take them out of the mold.