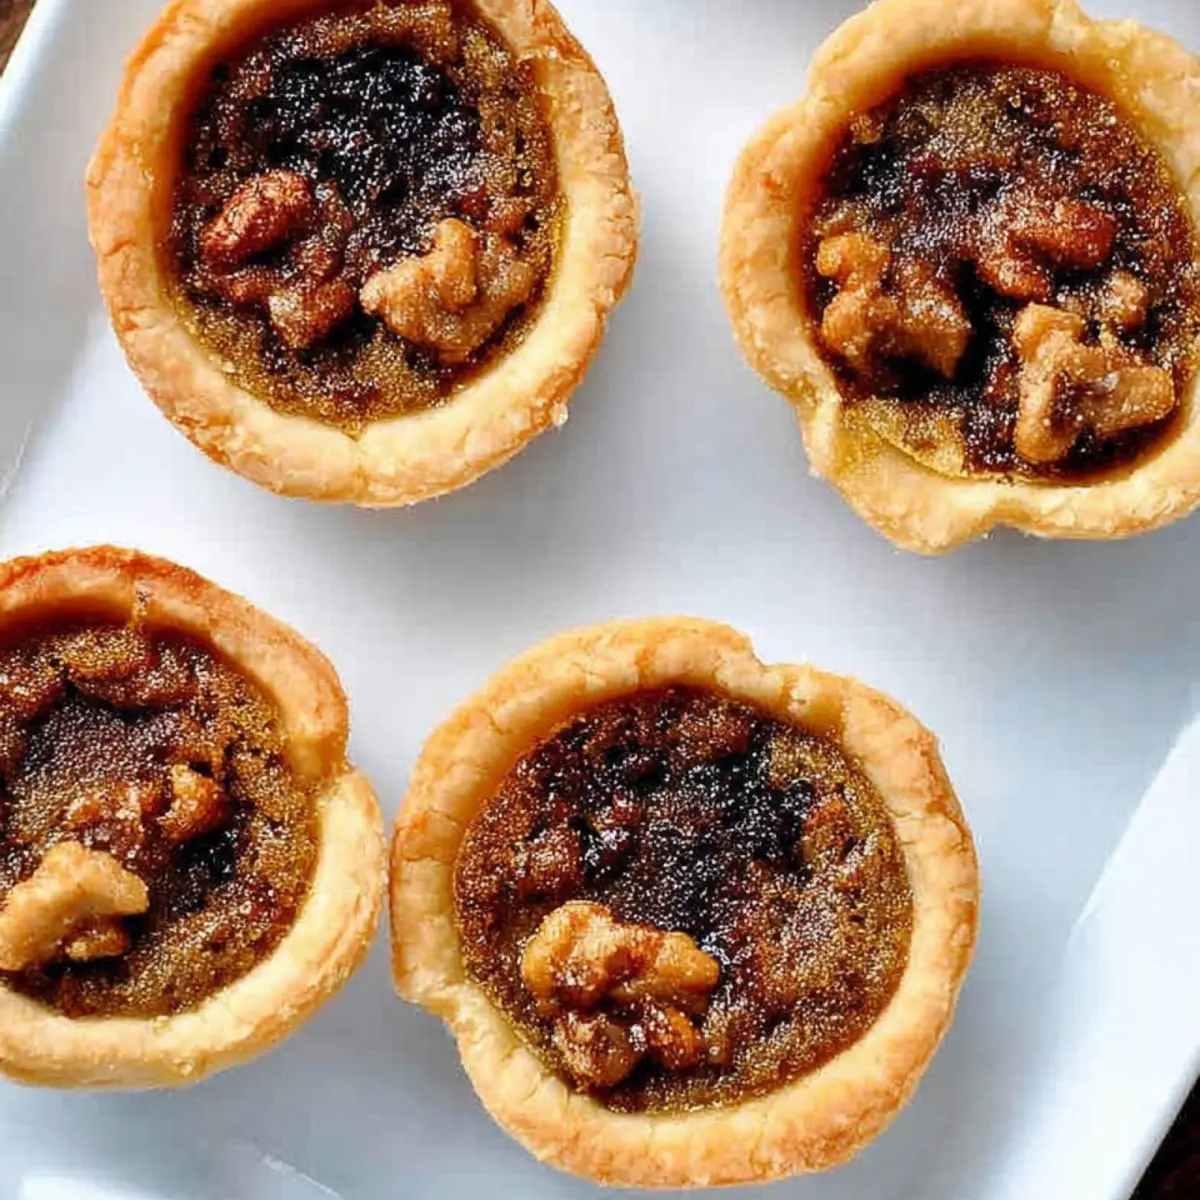
There’s something undeniably nostalgic and comforting about a batch of Nana’s Butter Tarts fresh from the oven. This classic Canadian treat combines crisp, flaky pastry with a sweet filling of raisins and brown sugar, all finished with the subtle richness of maple syrup. If you’ve ever wanted to capture that perfect blend of gooey and golden, this recipe promises all the memories (and the melt-in-your-mouth flavor) that have made Nana’s Butter Tarts a cherished family favorite for generations.
The beauty of this recipe is its simplicity and adaptability—you can keep it pure and runny, or toss in some chopped pecans for a satisfying crunch. I love how the aroma fills the kitchen as these little tarts bake—warm vanilla, butter, and caramel wafting through the air. It always brings me back to chilly mornings when we’d sneak the first tart while it was still warm.
Why these tarts feel like home in your kitchen
Biting into a homemade butter tart is a uniquely Canadian pleasure—flaky, golden pastry cradling a glossy, sweet filling dotted with juicy raisins. What really sets Nana’s Butter Tarts apart is the touch of maple syrup that melds with brown sugar, creating a deep, almost toffee-like richness. Including chopped pecans or walnuts isn’t traditional everywhere, but that nutty crunch brings welcome contrast to the soft, sticky centers.
These tarts are easy enough for a lazy Sunday and special enough for family holidays. From the satisfying snap when you break into the pastry to the syrupy, gooey center, every single bite feels like a throwback to simpler times. This recipe honors tradition while letting you add that personal twist, making it perfect whether you’re baking for a crowd, a teatime treat, or just for you.
The essential tools for perfect butter tarts
You won’t need fancy gadgets for these tarts, just a few reliable kitchen basics:
- Food processor – Makes pastry-making simple, but if you don’t have one, a pastry cutter or even your fingertips work for rubbing in the butter.
- Sharp knife – For cubing the chilled butter and chopping any nuts you want to use.
- Mixing bowls – One for pastry, one for the filling.
- Tart tins – Three-inch individual tart tins or a standard muffin tin gives you individual portions.
- Rolling pin – For rolling the dough to fit your tart tins.
- Fork – Pricking the pastry and mixing the filling.
- Wire rack – Cooling the tarts to set that sticky center and prevent sogginess.
- Plastic wrap or waxed paper – For resting and chilling the dough.
Nana’s Butter Tarts ingredients and sweet swap-ins
- flour – Gives the pastry structure and that signature flaky bite. Choose unbleached for best flavor.
- Salt – Balances the sweetness and brings out the buttery notes in the crust.
- Butter (chilled) – The cornerstone of a tender, melt-apart pastry. Make sure it’s cold.
- Vinegar – A secret touch for pastry: it helps ensure a tender crust every time.
- Milk – Binds the pastry without making it tough.
- Organic sultana raisins – Soft, plump, and sweet; soak for juiciest results.
- Brown sugar (or part brown sugar, part maple syrup) – Choose pure brown sugar, or swap in maple syrup for a subtle Canadian twist.
- Butter (softened, for filling) – Makes the filling smooth and helps everything meld together.
- Eggs – Give body and that classic set-but-still-gooey texture.
- Organic vanilla – Lifts all the other flavors with warmth and complexity.
- Pecans or walnuts (optional) – For crunch and a nutty depth; optional but delicious if you love a little contrast.
See the recipe card below for the full list of ingredients and measurements.
Step-by-step: how to craft the best butter tarts
- Prepare the pastry dough: Add flour and salt to your food processor and pulse to stir. Cube the chilled butter, then toss it in; pulse again until the mixture looks like coarse breadcrumbs with a few bigger pieces (the magic for crisp, flaky pastry).
- Bring it together: Stir vinegar into the milk, pour it all at once into the processor, and pulse until the dough just starts to come together—don’t overdo it or the pastry can toughen.
- Shape and chill: Tip the dough onto your work surface, divide into two balls, and gently flatten into discs. Wrap tightly in waxed paper or plastic and chill if not rolling right away—it helps the butter firm up and the pastry relax for easier rolling later.
- Roll and line the tins: Roll the pastry out evenly and cut circles to fit your tart or muffin pans. Press the dough gently into the tins, smoothing out any creases, and prick the bases a few times with a fork.
- Prepare the raisins: Rinse the raisins in hot water two or three times, then squeeze out any excess moisture with your hands. This step plumps them up and keeps the tart filling from being watery.
- Mix the filling: In a bowl, combine brown sugar, (and maple syrup, if using), softened butter, and the drained raisins. Stir everything together, then crack in the eggs and pour in the vanilla. Mix until silky and evenly blended. If you want a nutty variation, fold in the chopped pecans or walnuts now.
- Fill and bake: Spoon the filling into your pastry shells, filling each about two-thirds full. Don’t overfill or the bubbly, syrupy goodness will run and crisp along the tart edges (which some people secretly love!).
- Bake: Slide into a preheated oven at 175°C for 22–24 minutes. Watch for golden edges on the pastry and a softly set, but still jiggly center. When you move the pan, the filling should wobble slightly but not be soupy.
- Cool and enjoy: Let the tarts cool in their tins for a few minutes, then use a small knife to gently lift them out. Cool completely on a wire rack so the centers can set up gooey without becoming runny.
Tips, troubleshooting, and avoiding butter tart mishaps
Making Nana’s Butter Tarts isn’t complicated, but there are a few little tricks that help you avoid disappointment:
- Pastry too tough? Don’t overwork the dough. Gentle pulsing and minimal handling are your secret weapons for flaky results.
- Overflowing filling? Only fill the shells two-thirds full—trust me, that bubbling filling spreads as it bakes. Overfilling leads to stuck tarts and burnt sugar messes.
- Watery filling? Always squeeze excess water from the soaked raisins. A waterlogged filling won’t set properly.
- Undone or dry centers? Bake just until the centers jiggle slightly. Overbaking leads to a set, dry filling instead of that signature gooey ooze.
- Sticking in the pan? Let the tarts sit for a few minutes after baking. A thin butter knife releases the sides easily without damaging the delicate crust.
- Crumbly pastry? If your dough cracks while rolling, let it warm for 2–3 minutes to soften up—but don’t let the butter melt.
Pairing ideas and tasty variations for Nana’s classic tarts
Nana’s Butter Tarts are perfectly at home with a cup of strong tea or fresh coffee, but you can also dress them up for dessert by adding:
- A scoop of vanilla or maple ice cream—the cold against the warm tart is just divine.
- Fresh berries or a dollop of whipped cream for a lighter touch.
- Holiday twist: Add a pinch of cinnamon or orange zest to your filling for festive flair.
- Go nutty: Chopped pecans or walnuts in the filling bring crunch—delicious if you love texture.
- All raisin or none at all: If you’re in the “no fruit” camp, skip the raisins (they’re traditional, but hey, make them your own).
These tarts are a crowd-pleaser at parties, potlucks, or even stashed for solo moments with a mug of hot chocolate.
FAQs about Nana’s Butter Tarts
How do I store Nana’s Butter Tarts and keep them fresh?
Let your butter tarts cool completely, then store them in an airtight container at room temperature for up to 2 days. For longer storage, keep them in the fridge for up to 5 days. The crust stays flakiest at room temp, but refrigeration helps the filling stay gooey.
Can I freeze Nana’s Butter Tarts, and what’s the best way to do it?
Absolutely! Nana’s Butter Tarts freeze very well. Once cooled, arrange in a single layer separated by parchment and freeze in an airtight container for up to 2 months. Thaw at room temperature or gently warm them in a low oven to restore their gooeyness.
Can I substitute walnuts for pecans or skip the nuts entirely?
Yes, you can use either pecans or walnuts, or leave out the nuts if you prefer a classic, all-gooey filling. The nuts add crunch but aren’t essential to the soul of this recipe—make it your own!
The last word on Nana’s Butter Tarts bliss
There’s a reason Nana’s Butter Tarts remain a beloved treat—nothing compares to the crackle of flaky pastry giving way to a syrupy, caramel center generous with raisins and a hint of vanilla. Bake up a batch and you’ll see what’s kept this recipe alive across generations. Whether you love them oozing and runny or just set with a nutty surprise, each tart is a little taste of home comfort. Serve warm with a coffee or stash a few for midnight cravings—there’s always a good excuse to make (and savor) Nana’s Butter Tarts.
More Delicious Recipes
- Classic Canadian Butter Tarts with Raisins: A traditional version of butter tarts that celebrates the same nostalgic flavors and textures you love.
- Lemon Poppy Seed Scones: These delightful scones offer a different baked good experience, perfect for pairing with tea just like Nana’s tarts.
- Brownie Bottom Mini Cheesecakes: A sweet treat that combines rich flavors, bringing a unique twist to your dessert table alongside butter tarts.
Nana's Butter Tarts
Ingredients
Equipment
Method
- Put flour and salt in food processor and pulse.
- Cube butter, then add to flour in processor bowl and pulse until it resembles coarse meal.
- Add vinegar to milk. Add all at once to flour mixture. Pulse until it just forms a ball.
- Remove and divide into two balls. Place on waxed paper or plastic wrap, flatten gently into a disc, top with another layer of wrap, fold over and refrigerate if not using right away.
- Roll out and cut to fit your tart tins. Press gently into tins, smoothing out any creases. Prick several times with the tines of a fork.
- Rinse the raisins with hot water a couple of times. After draining the last time, squeeze them with your hands to remove excess water.
- Measure the brown sugar, maple syrup and butter into a medium bowl. Add the raisins and stir.
- Add the eggs and vanilla and stir thoroughly to combine. Stir in the chopped pecans or walnuts, if using.
- Carefully spoon into 24 three-inch pastry-lined tart shells, filling 2/3 full.
- Bake in 350°F. degree oven for 22 – 24 minutes or until pastry is golden brown. Remove and let cool on a wire rack.