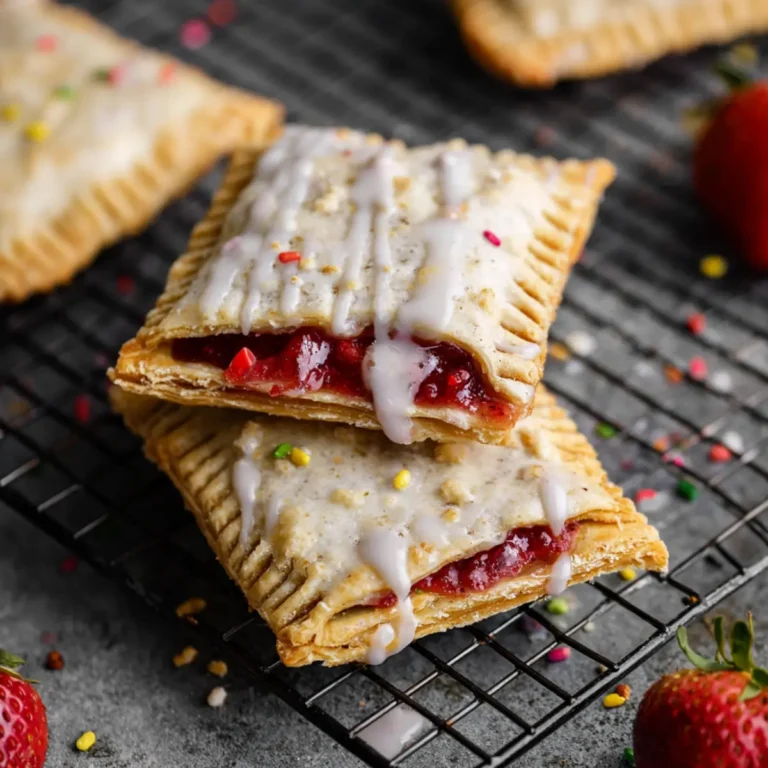
Some mornings just call for the comforting smell of sweet pastry dough mingling with rich, creamy cheese as it bakes until golden and puffy. There’s something irresistible about a homemade Cheese Danish, warm from the oven, with delicate layers that flake at the slightest touch and a filling that’s both tangy and decadent. For me, making a Cheese Danish isn’t just about breakfast—it’s about carving a little pocket of bakery magic right at home. Whether it’s a slow Sunday or a treat to share with friends, the first bite—crisp edges giving way to buttery softness and creamy filling—never loses its charm.
What Makes This Cheese Danish So Irresistible
A classic Cheese Danish is pure comfort with a touch of elegance—no wonder a fresh batch never lasts long in my kitchen. The magic, for me, is in those impossibly thin, buttery layers that have just enough crispness to shatter beautifully at the bite, wrapped around a cloud of sweetened cream cheese. There’s a wonderful balance of sweet and tangy here, brightened up if you add a little lemon zest, and finished off with a vanilla-scented glaze that sets into a delicate shell. Each bite delivers contrast: crisp outside, meltingly soft middle, creamy filling, and just a touch of lemon to wake up your taste buds. This Cheese Danish is weekend brunch and cozy cafe in one bite—and that’s what keeps me coming back.
The Ingredients That Set This Cheese Danish Apart
Every great Cheese Danish starts with simple, quality ingredients. Here’s a look at what makes each element tick and how you can tweak the flavors to make them truly your own:
- flour – forms the backbone of the dough, giving structure and just enough chew; use a standard white flour for a tender crumb.
- Granulated sugar – adds sweetness and helps the dough brown to golden perfection.
- Salt – brings all the flavors into balance so the finished Danish isn’t flat or one-note.
- Active dry yeast – helps the dough rise into those beautiful flaky layers you crave.
- Whole milk – keeps the dough rich and soft; make sure it’s warm but not hot to wake up the yeast.
- Egg – adds color, richness, and helps the dough bind.
- Cold unsalted butter – the key to lamination, creating all those crisp, flaky strata; only use unsalted so you can control the salt level.
- Cream cheese – gives the filling its classic tang and creamy texture; softer is better for mixing smoothly.
- Vanilla extract – infuses both the filling and glaze with fragrant sweetness.
- Lemon zest (optional) – a touch of zest in the filling adds fresh, bright flavor and keeps things from tipping too sweet.
- Powdered sugar – for the glaze; it melts easily and sets to that beautiful finish.
- Milk or lemon juice – thins the glaze; go for lemon if you like a little zing.
- Fruit preserves, berries, or sliced almonds (optional) – add color, flavor, or a bit of crunch on top for a bakery finish.
See the recipe card below for the full list of ingredients and measurements.
Bringing This Cheese Danish Together Step by Step
This Cheese Danish comes together in layers—literally! If you’ve never tried homemade laminated dough, don’t be intimidated. The process is surprisingly soothing, and the results are worth every fold.
- Mix and knead the dough. Start by stirring together the dry ingredients, including your flour, in a large bowl. Bloom your yeast in warm milk until it’s foamy, then mix it with a beaten egg. Combine everything and knead until the dough feels smooth and stretchy—this will take a bit of elbow grease but it’s an oddly satisfying task. Cover the dough and let it chill in the fridge, giving you a little break too.
- Shape your butter block. Place cold, unsalted butter between sheets of parchment and pound it (great stress relief) into a neat square. Chill again until the butter is firm but still pliable, not rock hard.
- Lamination time. Roll out your dough into a large square, then plop the butter block in the middle at a diagonal. Fold the dough’s corners over to seal up the butter like a package. Gently roll it all out into a long rectangle, then fold it into thirds, letter-style. Chill, then repeat this roll-and-fold dance two more times, resting the dough each time to keep those layers distinct. This is the step that turns a simple dough into a flaky showstopper.
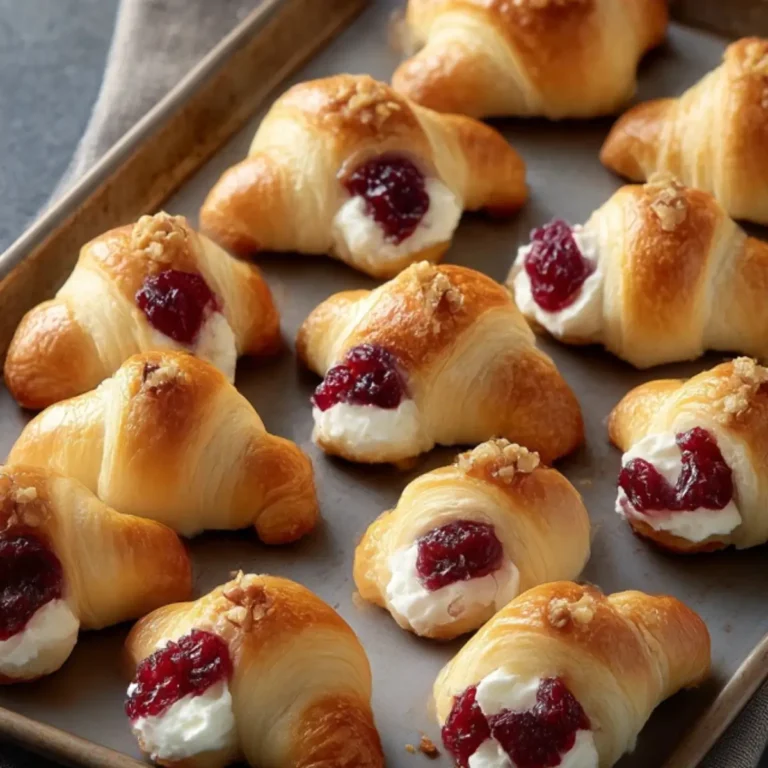
- Shape and fill. Roll out your chilled dough to about the thickness of a coin. Cut it into squares, then dollop a spoonful of sweetened cream cheese in the center of each. Fold or twist the corners as you like—classic pinwheels, envelopes, or go freeform. Press down gently so the filling stays put. Now’s the moment to add berries or jam if you want another layer of flavor.
- Proof and bake. Arrange the shaped pastries on lined baking trays. Leave them to rise at room temperature until they’re just puffed—a sign the yeast is ready. Preheat your oven to 200°C. Brush the pastries with milk (or a beaten egg for extra color), then bake until the Cheese Danish is puffed, golden, and your kitchen smells incredible—usually about 15 to 20 minutes.
- Glaze to finish. Let your Danishes cool completely (or as long as your patience allows). Mix up a glaze with powdered sugar, milk (or lemon juice), and a touch of vanilla, then drizzle generously. It’ll set into a delicate, sweet shell.
Getting That Signature Flaky and Creamy Balance
Nailing the texture of a Cheese Danish at home is all about subtlety. It’s tempting to rush the chilling steps, but that time in the fridge is what separates a fluffy, layered pastry from a flat, tough one. The butter should stay cold but never brittle—if it squishes or cracks wildly, let it rest. Also, don’t overload the filling or pile on too much jam; you want contrast, not sogginess. The oven’s heat puffs each Danish dramatically, and nothing beats the sound of that first crunch as you bite in and find the silky sweet cheese inside. If you like a little zing, the optional lemon zest in the filling is just the thing to brighten up those rich layers without overpowering them.
Tips, Variations, and Serving This Cheese Danish
If you’re new to working with yeast dough or lamination, keep the kitchen cool—warmer environments make the butter too soft, which can ruin the flakes. For a time-saver, the dough can be made the day before and left to chill overnight, making your morning easier. Play around with flavors: swirl in a dollop of fruit preserves or scatter fresh berries on top before baking for a bakery-café twist. Almond slivers add a nutty crunch that pairs beautifully with the creamy filling. Once baked and glazed, Cheese Danish are at their best the day they’re made, but they hold their own for a couple of days in an airtight box. Reheat gently to refresh their crisp edges and soften the filling—just avoid the microwave, which can make the dough rubbery. And if you ever find yourself with leftovers (rare!), freeze unglazed pastries and pop them in the oven straight from frozen when a craving hits.
FAQs about Cheese Danish
Can I make Cheese Danish dough ahead of time?
Yes, you can prepare the dough a day in advance and keep it chilled in the refrigerator. This actually helps deepen the flavor and makes your morning much easier. Just give it a few minutes at room temperature before rolling and laminating.
What’s the best way to store leftover Cheese Danish?
Store leftover Cheese Danish in an airtight container at room temperature for up to two days. For longer storage, refrigerate them, but keep in mind the pastry will lose some crispness.
Can I freeze Cheese Danish after baking?
Absolutely—just freeze the danishes before adding the glaze. Once cooled, wrap them tightly in plastic wrap and freeze. Reheat in a moderate oven until warmed through, then glaze before serving.
Is there a good substitute for cream cheese in the filling?
You can use mascarpone or ricotta cheese if you want a milder filling. Both will give a slightly different flavor and texture but are excellent alternatives, especially if you want a lighter taste.
How do I refresh Cheese Danish if they’ve gone stale?
To bring back their crispness, warm Cheese Danish in a preheated oven at 180°C for five to eight minutes. This will restore some flakiness to the pastry, and the filling will be soft and luscious again.
After all the folding, filling, baking, and drizzling, there’s nothing quite like sitting down with a warm Cheese Danish—layers shattering at your touch, creaminess melting into sweet glaze, and the kitchen still fragrant from the morning’s effort. Whether you take yours with coffee, tea, or just bare hands and a quiet moment, it’s a little luxury that always feels earned. Give it a try, and watch these pastries work their bakery magic in your own space.
More Delicious Recipes
- Breakfast Danish Pastries: These pastries offer a delightful variety of flavors and fillings for your morning indulgence.
- Raspberry Almond Puff Pastry Danish: This recipe combines sweet raspberries with almond flavors for a tasty twist on the classic Danish.
- Lemon Poppy Seed Scones: Perfect for brunch, these scones provide a fresh, citrusy taste that pairs well with coffee or tea.

Deliciously Flaky Cheese Danish Recipe for Perfect Mornings
Ingredients
Method
- Make the Dough: In a large bowl, mix flour, sugar, and salt. In another bowl, combine warm milk and yeast, let sit for 5–10 minutes until foamy. Add egg and yeast mixture to dry ingredients. Mix and knead until smooth (about 6–8 minutes). Cover and chill for 30 minutes.
- Prepare Butter Block: Place cold butter between parchment sheets. Pound and shape into an 8-inch square. Chill until firm yet pliable.
- Laminate the Dough: Roll dough into a 16-inch square. Place butter in center like a diamond. Fold corners over to seal. Roll into a long rectangle (8×24 inches). Fold into thirds like a letter. Chill 30 mins. Repeat rolling and folding 2 more times, chilling in between.
- Shape the Danish: Roll dough to 1/4-inch thickness. Cut into 4-inch squares. Add a tablespoon of cream cheese filling to the center. Fold corners or shape as desired. Add berries or jam if using.
- Proof and Bake: Place on parchment-lined baking sheets. Let rise at room temp for 1 hour. Preheat oven to 390°F (200°C). Brush with egg wash or milk. Bake 15–20 minutes until golden brown.
- Glaze and Serve: Cool completely. Mix powdered sugar, milk/lemon juice, and vanilla for glaze. Drizzle and serve!